A classic Thanksgiving dessert gets an upgrade with my low sugar pumpkin pie recipe! This easy recipe is perfect to include on your Thanksgiving table!
I’m going to go ahead and say it. My favorite Thanksgiving pie is pumpkin pie.
I love how it’s creamy and spicy at the same time. It just screams turkey day to me!
But in recent years I’ve found that I prefer my desserts with less sugar. They just taste better that way to me!
Thankfully you can easily make a low sugar pumpkin pie at home with my simple recipe. And it definitely doesn’t skimp in the flavor department!
Okay, let me show you how to make it:
Here’s a video tutorial in case you learn better that way. The written tutorial and recipe card are below!

Note: Some links are affiliate. All opinions are 100% my own. If you click a link and make a purchase, I will earn a small commission. This has zero impact on the price you pay, and it helps Buttered Side Up out! Thank you!
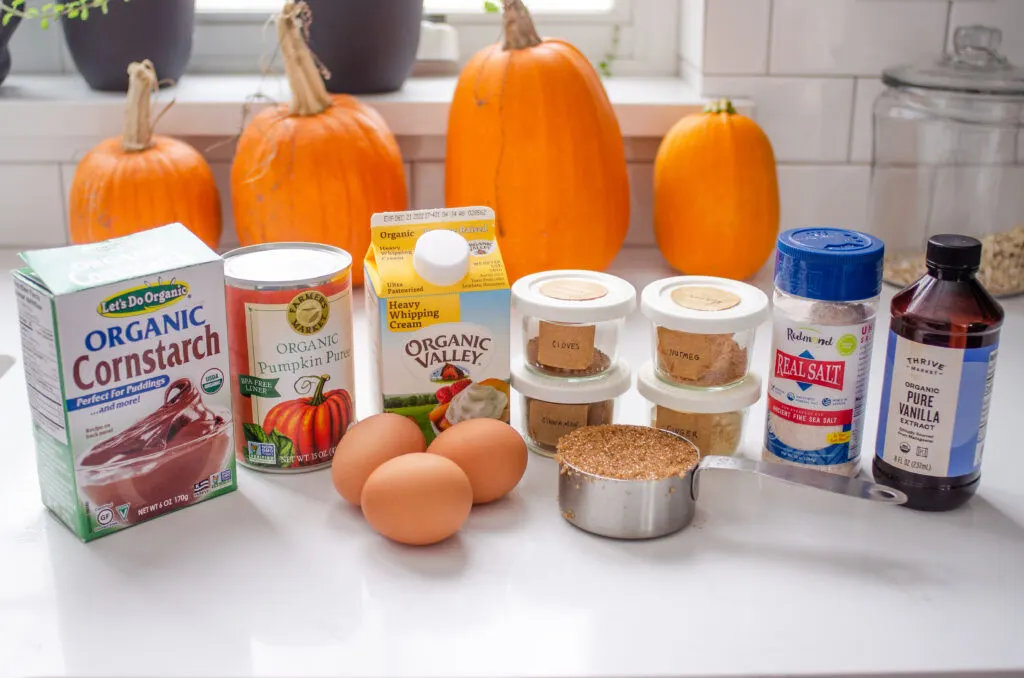
Ingredients:
- 1 15-oz. can pumpkin puree: Make sure to use pumpkin purée, NOT pumpkin pie filling! They’re not the same thing! I like the canned pumpkin purée from the brand Farmer’s Market, but you could also use homemade pumpkin puree if you prefer (it’s pretty easy to make if you own a food processor, and it makes for the best pumpkin pie IMO).
- 1 1/4 cups heavy cream: Many recipes call for evaporated milk, but I prefer to use heavy cream. Please do not substitute fat free milk here!
- 3 large eggs: I also tested this recipes with just 2 eggs, but I found that I preferred the pie with the added egg. You’ll be using the egg yolks as well as the egg whites.
- 1 tablespoon vanilla extract: Please use pure vanilla extract, NOT imitation vanilla flavor!
- 1 tablespoon cornstarch: For the best results, I like to add a tablespoon of cornstarch to the filling. This helps to thicken the final pie. Also, I find that the flavor is improved with the added cornstarch!
- 1/4 teaspoon ginger
- 1 teaspoon cinnamon
- 1/4 teaspoon cloves
- 1/4 teaspoon nutmeg
- 1/8 teaspoon salt: I like to add a bit of salt to bring out the other flavors in this pie.
- 1/2 cup sugar: I like to use brown sugar, but you could also use regular sugar, granulated cane sugar, coconut sugar, or sucanat. I DO NOT recommend using an artificial sweetener. I much prefer to just lower the natural sugar levels!
- 1 unbaked pie crust: You can use your personal favorite pie crust recipe here! Use a traditional homemade pie crust, or a graham cracker crust if you prefer. My sourdough pie crust would also be lovely here. Or you could opt for an almond flour or coconut flour crust to make this gluten free. These days you can even purchase decent pie crusts in grocery stores.
Note: You can substitute the individual spices for 1 3/4 teaspoons pumpkin spice (you can use homemade pumpkin pie spice or store bought), but the final flavor will be slightly different.


How to Make a Low Sugar Pumpkin Pie:
Preheat your oven to 425 degrees Fahrenheit (218 degrees Celsius).
Preparing the Crust:
First, roll out your pie crust and line your pie tin with it. You’ll want to roll the pie crust a couple inches bigger than your pie pan.
I like to roll my pie crust out on a floured sheet of parchment paper, then flip it over into the pie plate, and carefully pull the parchment paper off.
You can brush any excess flour off of the pie crust with a pastry brush.

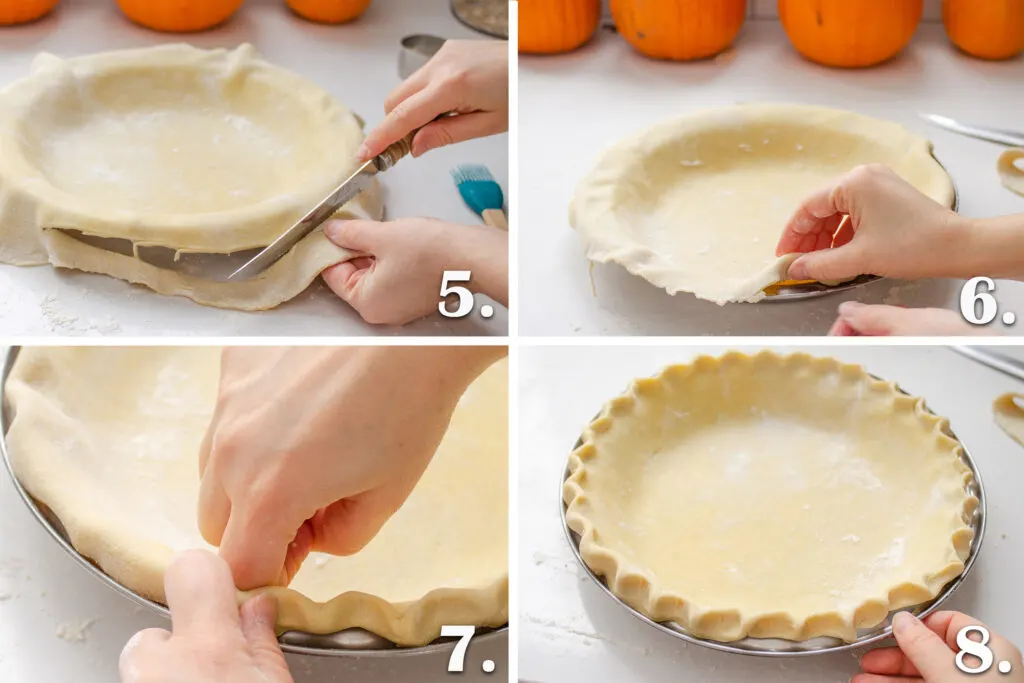
Next, trim the edges to about an inch larger than the pie pan all the way around.
Fold the edges of the pie crust under.
Finally, crimp the edges and place the pie dish in the fridge while you mix together the filling.
Now if you like a well done pie crust, you can blind bake or par-bake the crust first. It’s up to you! I usually skip this step since I’m okay with a softer bottom crust.

Mixing Together the Pumpkin Filling:
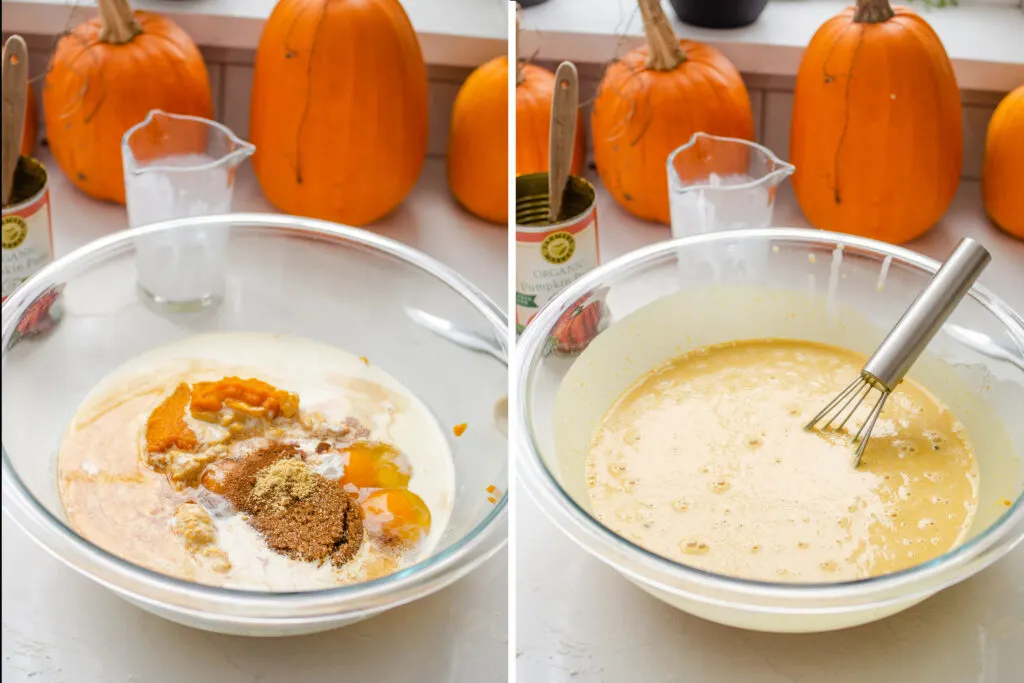
In a large bowl, whisk together all of the filling ingredients.
I mean it: you really want to give this a good whisk until everything is well incorporated.
You don’t need to get too crazy though and add too much air.
This could also be done with a hand mixer, but I don’t find it necessary.
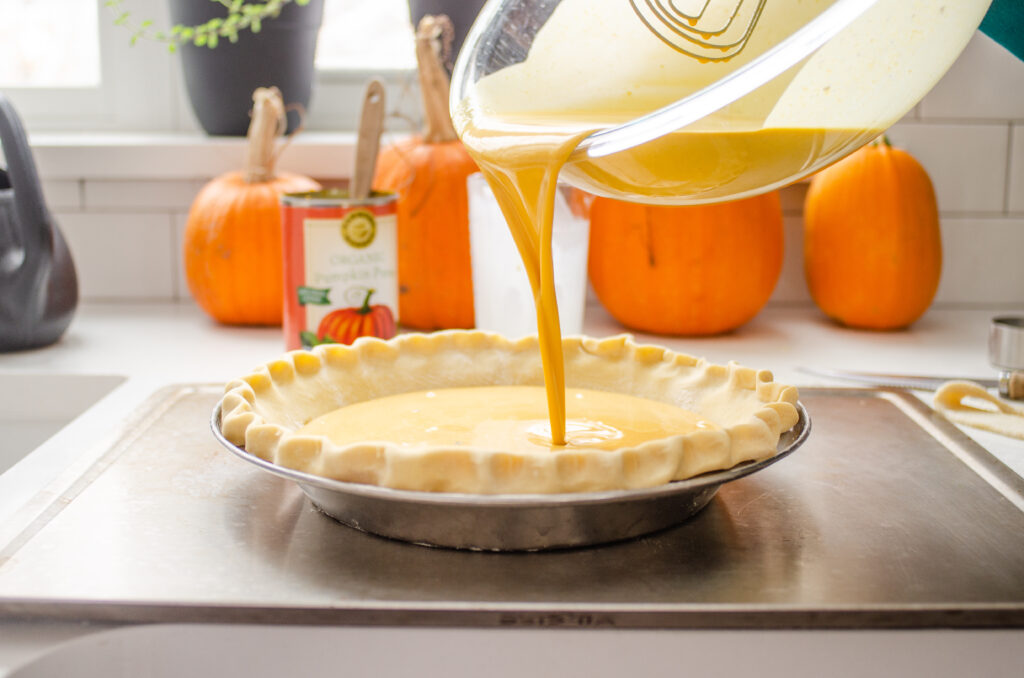

Place the chilled pie crust on a baking sheet. This just makes it easier to transfer the pie to the oven and prevent sloshing pie filling onto your oven floor.
Now pour the pumpkin mixture into the pie crust.
Baking Time:
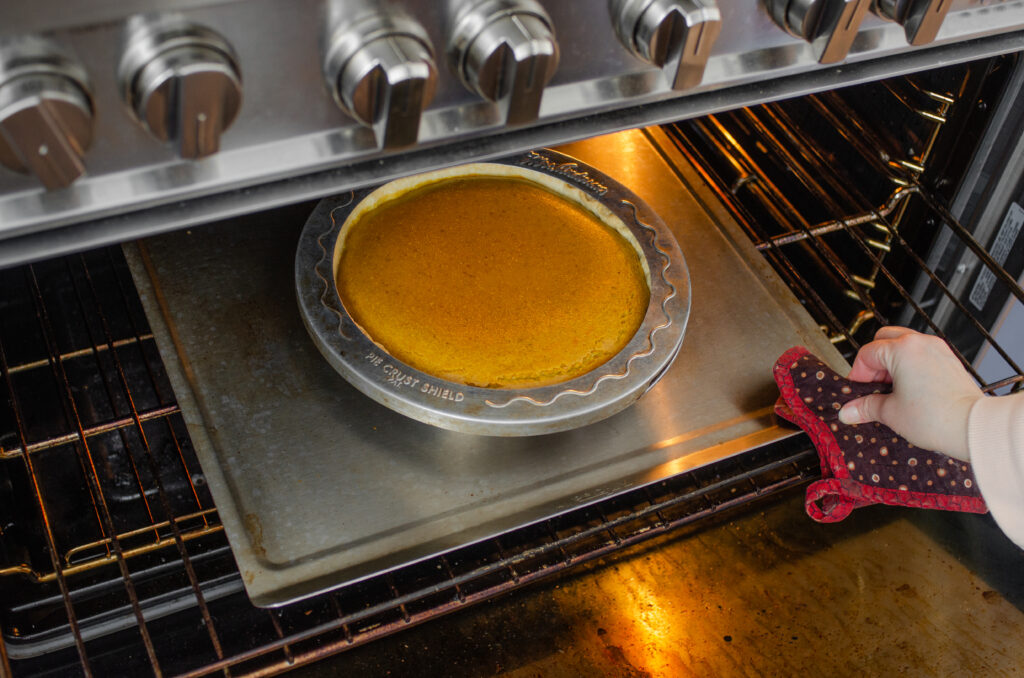
Transfer to the preheated oven and bake for 15 minutes.
Then lower the oven temperature to 375 degree Fahrenheit (190 C), and continue to bake for about 25-40 minutes longer.
Note that I tested this recipe using a stainless steel pie pan. If you use a glass or ceramic pan, the baking time will be a bit different.
By the way, you can place a pie crust shield around the outer crust if you find that it’s browning too much before the pie is finished baking.
You can purchase a special pie crust shield, or place strips of aluminum foil around the crust. I much prefer the pie crust shield!

How to tell if a pumpkin pie is done:
The Wiggle Test:
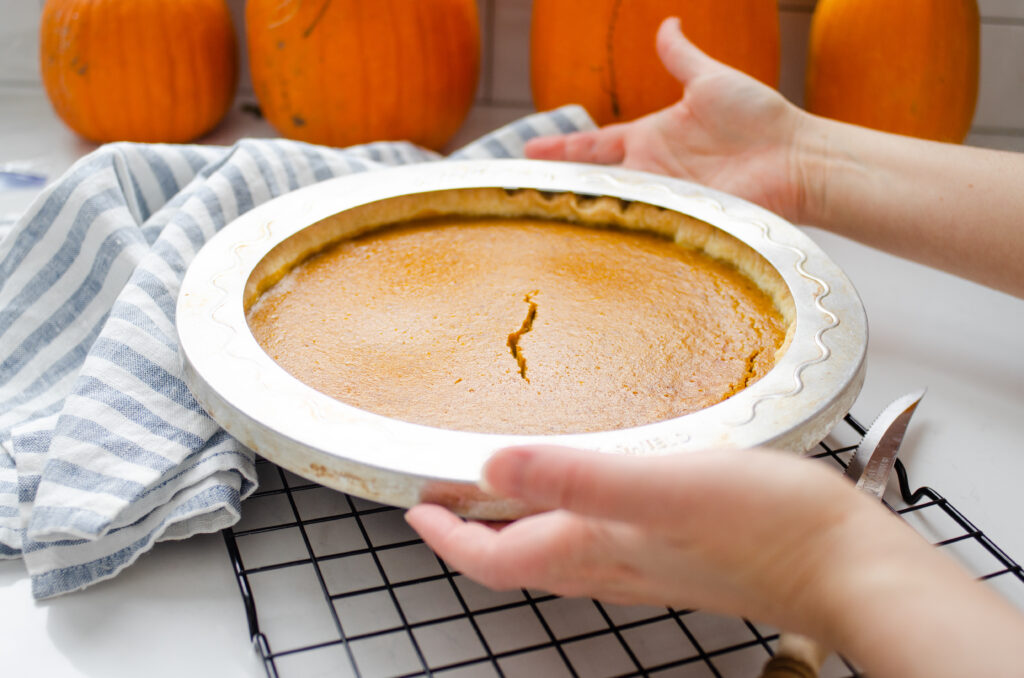
It’s actually really easy to test to see if a pumpkin pie is done! Simply give the pie pan a wiggle. You’re looking for the edge of the filling to be set, but the middle to still be a bit wobbly.
You don’t want it completely wet in the middle, but not completely set either!
The Knife Test:
Another way to test for doneness is to perform the knife test: Insert a knife in the center of the pie crust. If the knife comes out clean, your pie is done baking!
Now the knife test will leave a hole in the middle of the filling, but in the end it doesn’t really matter. You can always slice around it and no one will know!
The Temperature Test:
Another way to test for doneness is to use an instant-read thermometer or probe thermometer. You should take the pumpkin pie out of the oven when it registers an internal temperature of 175 degrees Fahrenheit (79.5 degrees Celsius) in the center.
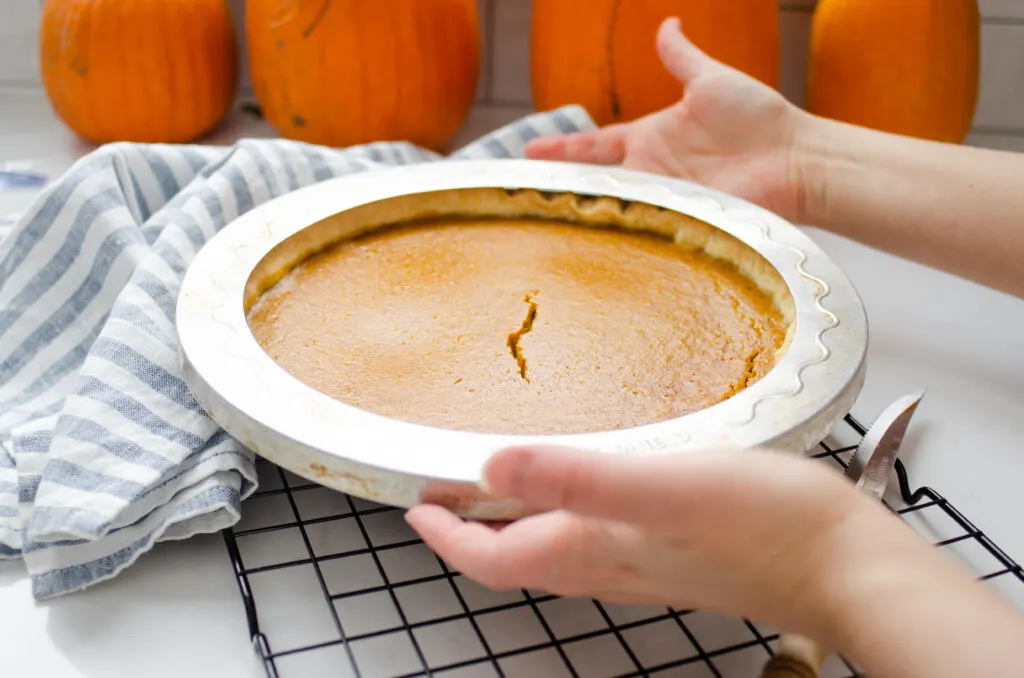
Cooling:
Remove the baked pumpkin pie to a wire rack. Let the pie cool to room temperature. As the pie cools, it will set up.
Now my mom likes to serve her pumpkin pie at room temperature. Which is totally an option! Just know that the pie will be softer and less “set”.
To chill the pie before serving, cover with a piece of plastic wrap and place in the refrigerator to chill for 1-2 hours.
If you don’t mind a softer pumpkin pie, you can chill for just 1 hour. But if you like it to be fully set, go for the full 2 hours.


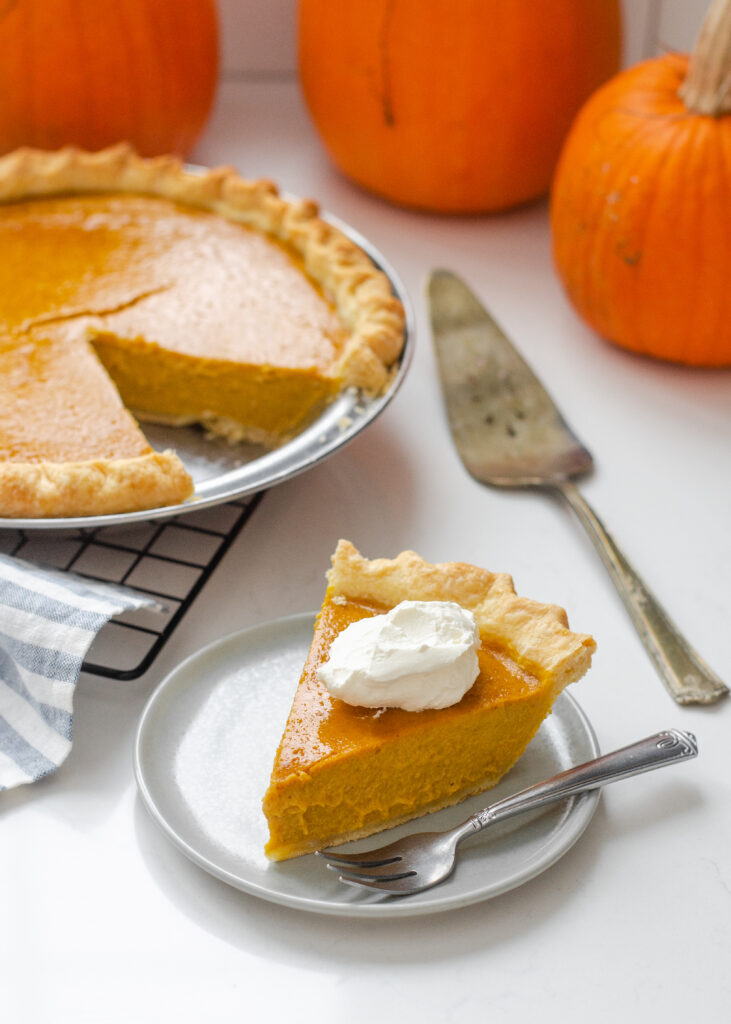
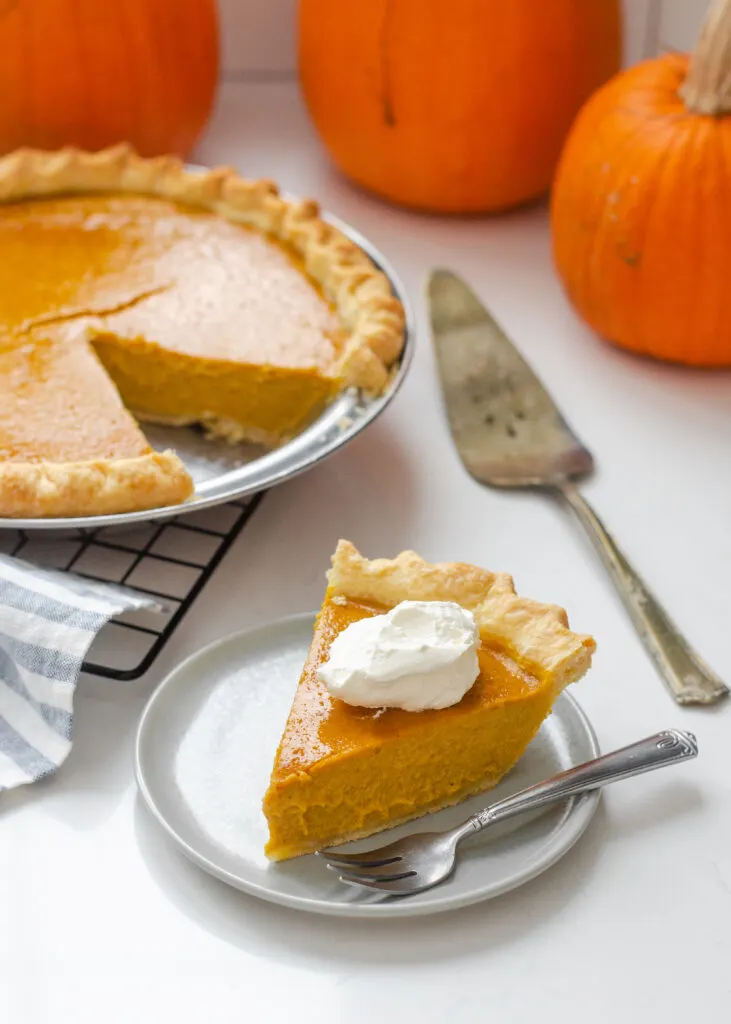
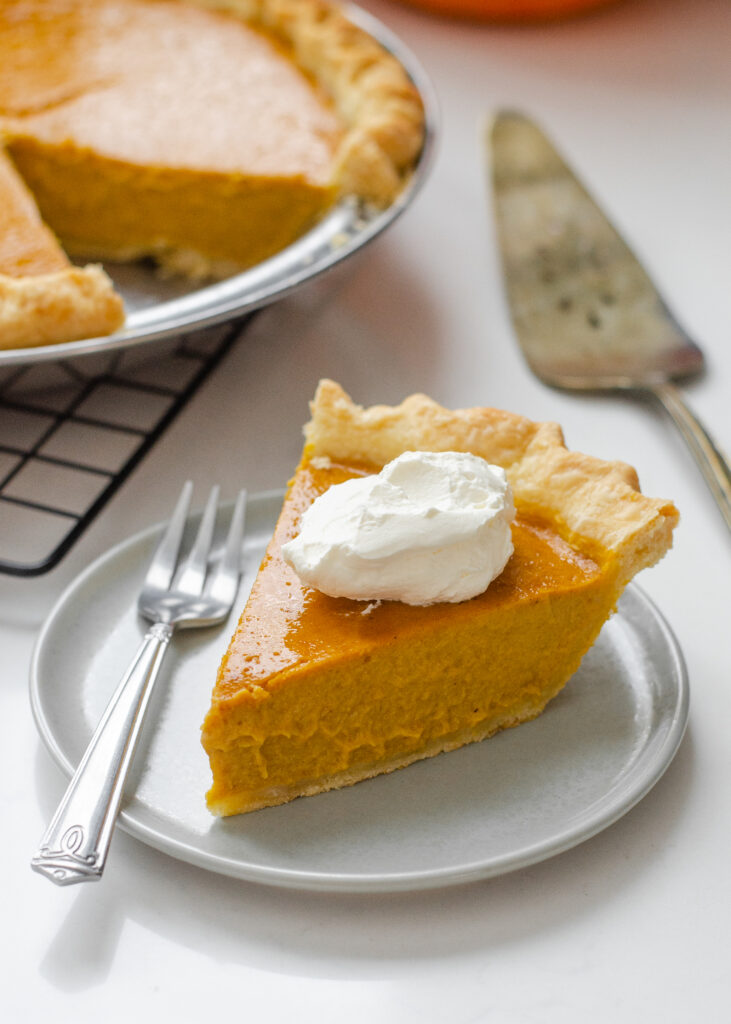
Serving:
Call me boring, but I like my slice of pumpkin pie served with a (generous) dollop of whipped cream.
Of course you could opt for ice cream and a drizzle of caramel sauce to make it fancier.
How to Store Pumpkin Pie:
The most ideal way to store a pumpkin pie would be to store it in a special airtight container made for pie. Or bake it in the OXO glass pie plate that has a lid.
If you don’t want to transfer it to an airtight container, you can also place a layer of plastic wrap on the surface of the pie, then wrap the whole pie well in aluminum foil.
It isn’t the absolute best way to store it (you have to waste plastic wrap and aluminum foil), but then you don’t have to dirty up a storage container.
You can store any leftover pieces of pumpkin pie in the same way.
How long does pumpkin pie last in the fridge?
If you store the homemade pumpkin pie in an airtight container, it should last in the refrigerator for 3-4 days. After that, you might start to get a soggy crust.
I personally would eat the pie after 4 days, but it’s up to your own personal judgement if you want to risk it for food poisoning purposes. Definitely discard it if you see any mold or detect an off smell.
Don’t just place your pie in the refrigerator uncovered. Properly covering your pie prevents harmful bacteria from getting onto the surface of the pie.
For store-bought pies, you should refer to the instructions on the packaging for proper defrosting, sell-by date, best-by date, expiration date, etc.

How much Sugar is in the Final Pie?
If you cut the pie into 9 pieces, each piece will contain about 14 grams of sugar. It also contains 4 grams of protein per serving.
Suggested Timeline of Baking:
- 2 Days Before the Big Day: Make your pie dough and refrigerate it (if using a traditional pie crust recipe).
- 1 Day Before the Event: Bake the pie, allow to cool completely, and wrap well and refrigerate.
- The Big Day: Take the pie out of the refrigerator if you prefer a non-chilled pie. Make the whipped cream just before serving.
More Thanksgiving Desserts:
Here are some more dessert options for your Thanksgiving Dinner:
- Crustless Pumpkin Pie Recipe (AKA Baked Pumpkin Custard)
- Spiced Pear Pie
- Pumpkin Pudding
- Cranberry Clafoutis
- Perfect Pumpkin Pie (Classic Pumpkin Pie Recipe)
Other Thanksgiving Recipes:
- Homemade Organic Cranberry Sauce
- Sourdough Stuffing
- Green Bean Casserole From Scratch
- Simple Sage Stuffing
- Sourdough Pull Apart Rolls
- Sourdough Pumpkin Dinner Rolls
Low Sugar Pumpkin Pie Recipe


Ingredients
- 1 unbaked pie crust (see note)
- 1 15-oz. can pumpkin puree (see note)
- 1 1/4 cups heavy cream
- 3 large eggs
- 1 tablespoon vanilla extract
- 1 tablespoon cornstarch
- 1 teaspoon cinnamon
- 1/4 teaspoon cloves
- 1/4 teaspoon ginger
- 1/4 teaspoon nutmeg
- 1/8 teaspoon salt
- 1/2 cup sugar (see note)
Instructions
- Preheat oven to 425 degrees Fahrenheit (218 degrees Celsius).
- Roll out your pie crust and line your pie tin with it. You’ll want to roll the pie crust a couple inches bigger than your pie pan. Trim the edges to about an inch larger than the pie pan all the way around. Fold the edges of the pie crust under. Crimp the edges and place the pie dish in the fridge while you mix together the filling.
- Place the chilled pie crust on a baking sheet. This just makes it easier to transfer the pie to the oven and prevent sloshing pie filling onto your oven floor.
- In a large bowl, whisk together all of the filling ingredients. Pour the pumpkin mixture into the pie crust.
- Transfer to the preheated oven and bake for 15 minutes. Then lower the oven temperature to 375 degree Fahrenheit (190 C), and continue to bake for about 25-40 minutes longer. You can place a pie crust shield around the outer crust if you find that it’s browning too much before the pie is finished baking.
How to tell if a pumpkin pie is done:
- The Wiggle Test:
It’s actually really easy to test to see if a pumpkin pie is done! Simply give the pie pan a wiggle. You’re looking for the edge of the filling to be set, but the middle to still be a bit wobbly. - The Knife Test:
Another way to test for doneness is to perform the knife test: Insert a knife in the center of the pie crust. If the knife comes out clean, your pie is done baking! - The Temperature Test:
You should take the pumpkin pie out of the oven when it registers an internal temperature of 175 degrees Fahrenheit (79.5 degrees Celsius) in the center.
Cooling:
- Remove the baked pumpkin pie to a wire rack. Let the pie cool to room temperature. As the pie cools, it will set up.
- To chill the pie before serving, cover with a piece of plastic wrap and place in the refrigerator to chill for 1-2 hours. If you don’t mind a softer pumpkin pie, you can chill for just 1 hour. But if you like it to be fully set, go for the full 2 hours.
Notes
- Now if you like a well done pie crust, you can blind bake or par-bake the crust first. It’s up to you! I usually skip this step since I’m okay with a softer bottom crust.
- You could use a regular pie crust, my sourdough pie crust, a store-bought pie crust, a gluten free pie crust, etc.
- Instead of a can of pumpkin puree, you can use 1 7/8 cups of homemade pumpkin puree.
- I like to use brown sugar, but you can substitute regular sugar, coconut sugar, etc.
Recommended Products
As an Amazon Associate and member of other affiliate programs, I earn from qualifying purchases.


Nutrition Information:
Yield:
9Serving Size:
1Amount Per Serving: Calories: 317Total Fat: 20gSaturated Fat: 11gTrans Fat: 0gUnsaturated Fat: 8gCholesterol: 99mgSodium: 168mgCarbohydrates: 30gFiber: 2gSugar: 14gProtein: 4g
Elizabeth
Saturday 29th of November 2025
I was looking for a lower sugar pumpkin pie recipe and settled on this one. I think it may be my favorite pumpkin pie of all the ones I’ve made. Thank you !!
Erica Kastner
Sunday 30th of November 2025
Aw, that makes me so happy! Glad you enjoyed!
Annelise
Wednesday 26th of November 2025
This is my favorite pumpkin pie. Such a fresh taste with the perfect spices!