This sourdough focaccia recipe makes a flat bread with a chewy crumb that’s also light and creamy with loads of flavor.

Are you ready for probably the best homemade focaccia of your life?
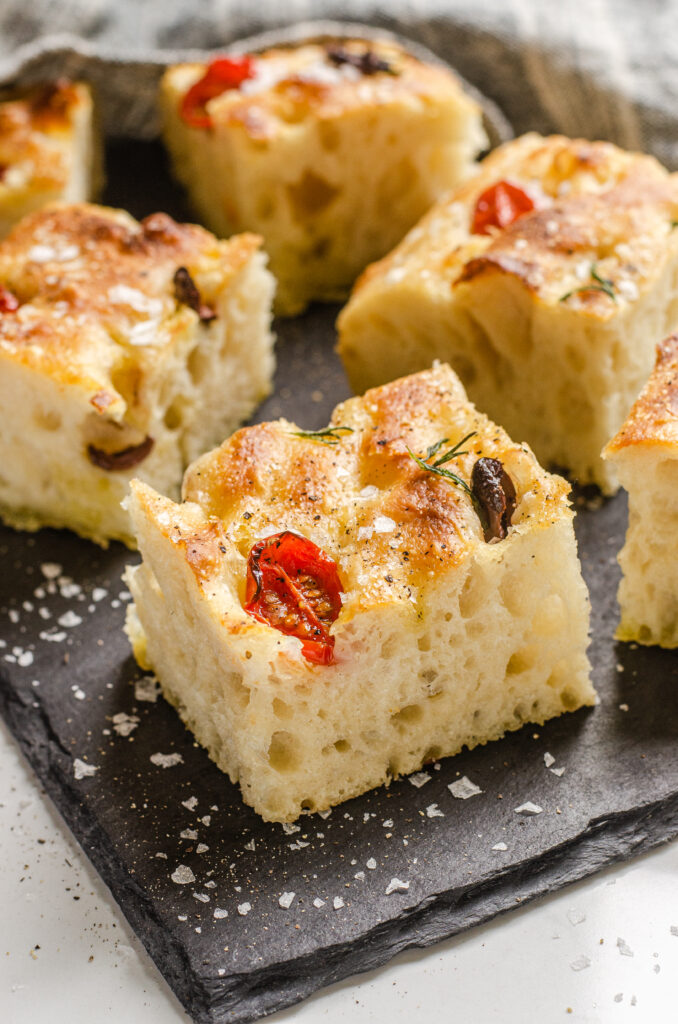
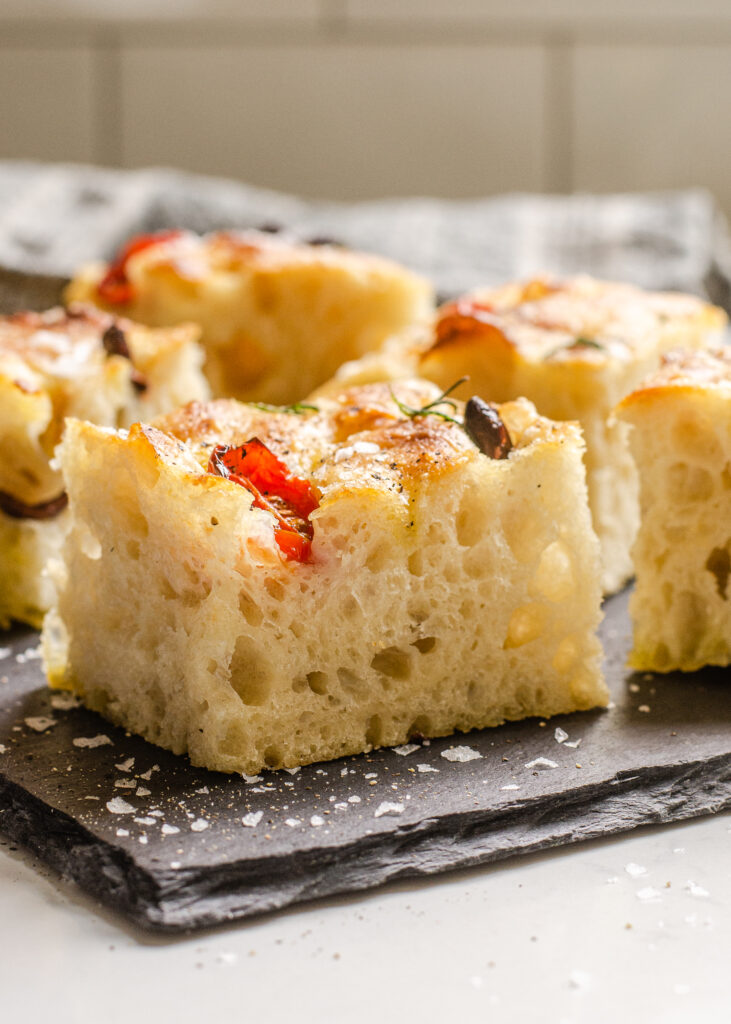
This Sourdough Focaccia is nice and light with plenty of lovely air holes, but it’s also rich and decadent thanks to a generous amount of flavorful extra virgin olive oil.
This does require a little effort to achieve the best results, but the amazing flavor and texture is so worth it.
Okay, let me show you how to make my simple sourdough focaccia recipe!
Here’s what we’ll cover in this post:
- Ingredients
- Sourdough Starter
- Mixing the Dough
- Autolyse
- Stretch and Fold Sequence
- First Rise
- Shaping
- Second Rise
- Dimpling and Topping
- Baking
- Serving
- Storing
- Sample Baking Schedules
- FAQ
Here’s a video tutorial in case you learn better that way.
The written tutorial is below!

Note: Some links are affiliate. If you click a link and make a purchase, I will earn a small commission. This has zero impact on the price you pay, and it helps Buttered Side Up out!
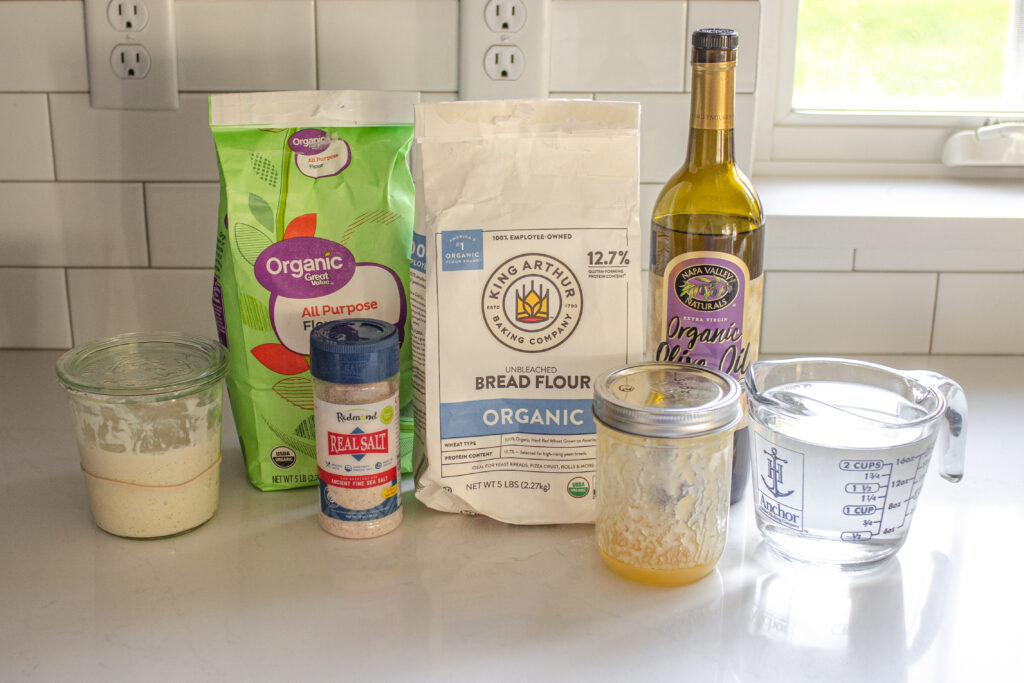
Ingredients for the Dough:
This recipe actually calls for pretty simple ingredients.
You’ll notice that some of the measurements are given in weights. I highly recommend investing in a good digital scale since it’s much more accurate to measure that way.
- 400 grams water: Make sure to use filtered water, or at least water that hasn’t been treated with chlorine. The chlorine can be hard on your starter and prevent it from being as active. If your kitchen is cold you can use warm water (no more than 110 degrees F), and if your kitchen is on the warm side you can use room temperature water.
- 150 grams sourdough starter: You’ll want to use an active starter, which I’ll discuss more in the next section.
- 300 grams all purpose flour: I personally like to use organic all purpose flour. Walmart carries a nice organic all purpose flour for a reasonable price. I use all white flour in the recipe to keep things really light. You could experiment with a small amount of whole wheat flour, but keep in mind that it will affect the texture.
- 225 grams bread flour: Since this is a sticky, wet dough you need the extra gluten from the bread flour to help it maintain its structure. If you absolutely must you could use more all purpose flour, but using part bread flour will yield the best result.
- 1 1/2 tablespoons honey: This is optional, but it adds a hint of sweetness and also boosts the fermentation of the starter.
- 1 1/2 tablespoons olive oil: This is also optional, but it adds a little extra softness, richness, and flavor to the focaccia dough. I like to use extra virgin olive oil since it’s so flavorful.
- 2 1/2 teaspoons unrefined sea salt: I use Redmond Real Salt in the majority of my sourdough bakes. If you’re using table salt, you’ll probably want to reduce the salt a bit since unrefined sea salt can taste less salty than regular salt.
- 5 to 7 tablespoons extra virgin olive oil: You’ll also need an extra few tablespoons of olive oil to grease the pan and pour on top of the sourdough focaccia dough.
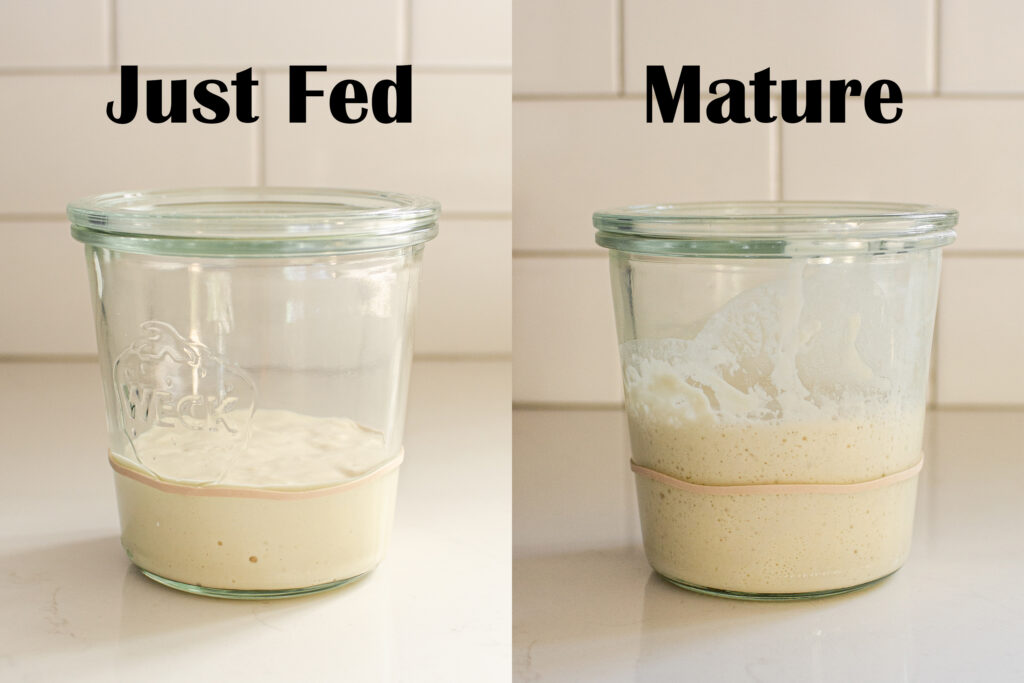
Sourdough Starter:
Let’s take a moment to discuss the sourdough starter in more depth.
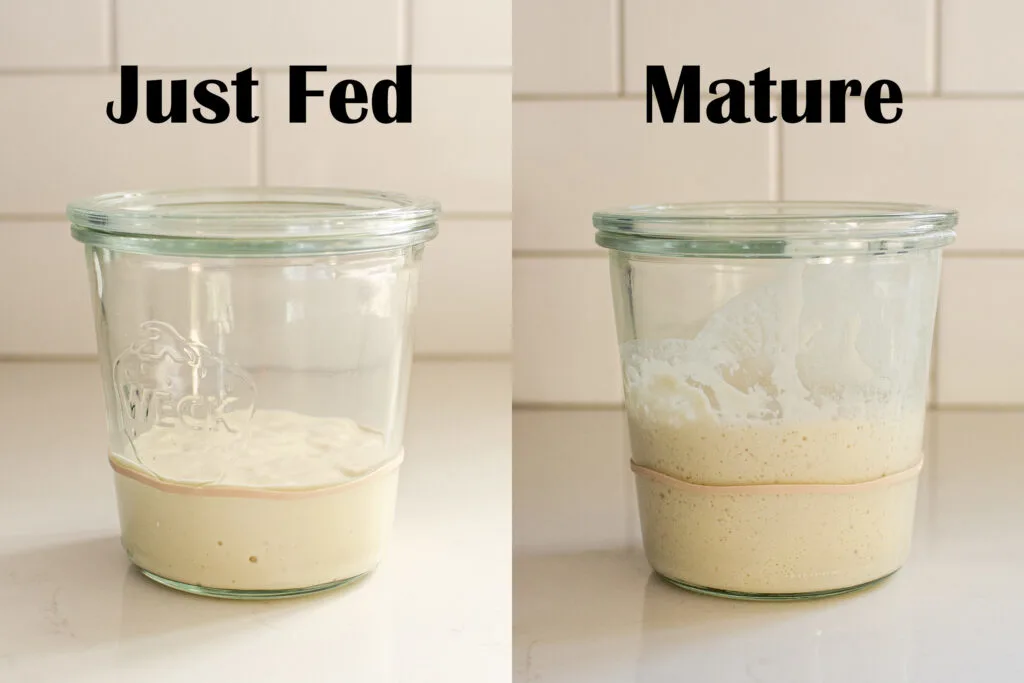
For this recipe you’ll want to use an active starter, NOT sourdough discard. An active sourdough starter is one that’s been fed 4-12 hours previously, is active and bubbly, has doubled in volume, and passes the float test.
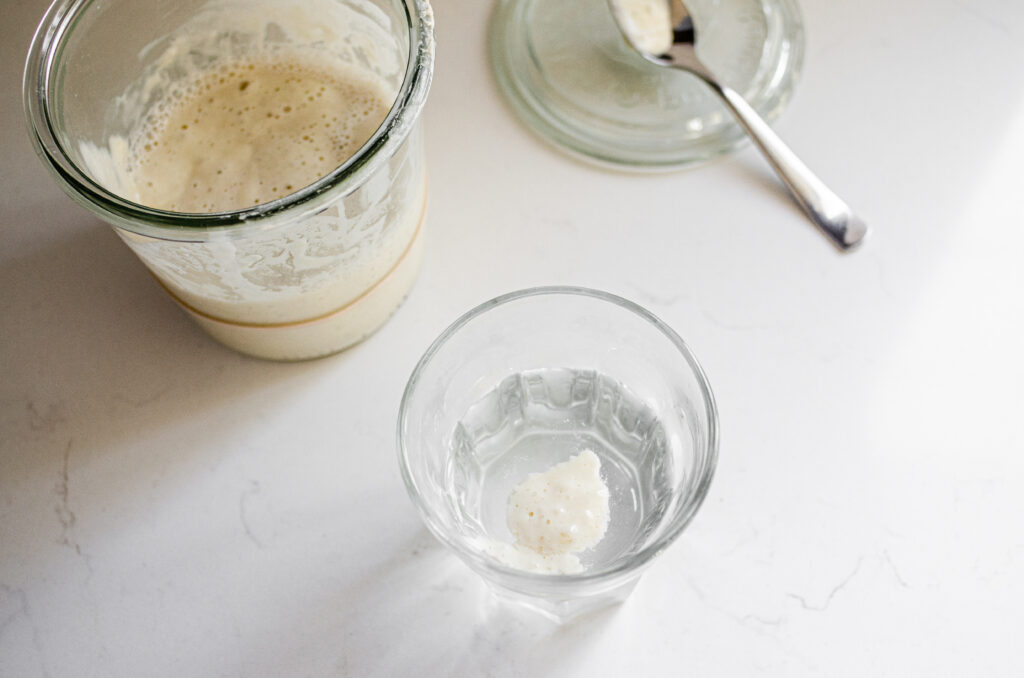
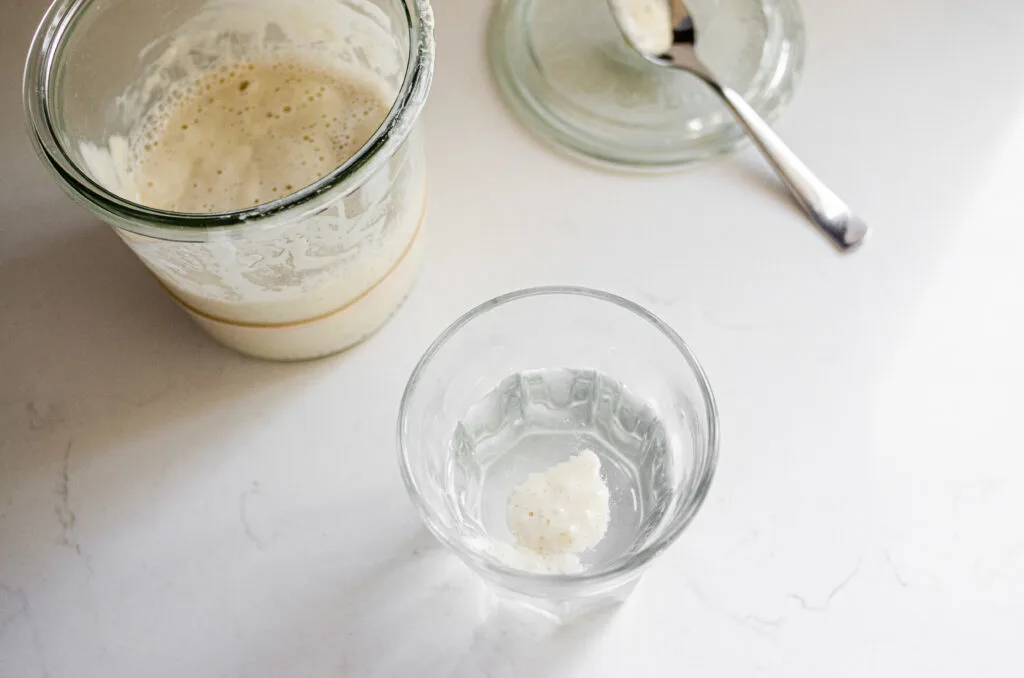
To perform the float test, drop a small amount of starter into a glass of room temperature water. If it floats, it passes the test. If your starter goes too long it will sink. Feed it again before using.
I like to feed my starter late at night, and then mix together the focaccia dough the next day.
If you’re at the beginning of your sourdough journey and you don’t have your own sourdough starter yet, make sure to check out my How to Make a Sourdough Starter from Scratch post. And if you’re having trouble with your starter, make sure to check out my Sourdough Starter Troubleshooting post.

How to Make Sourdough Focaccia:
Okay, let’s make the focaccia dough!
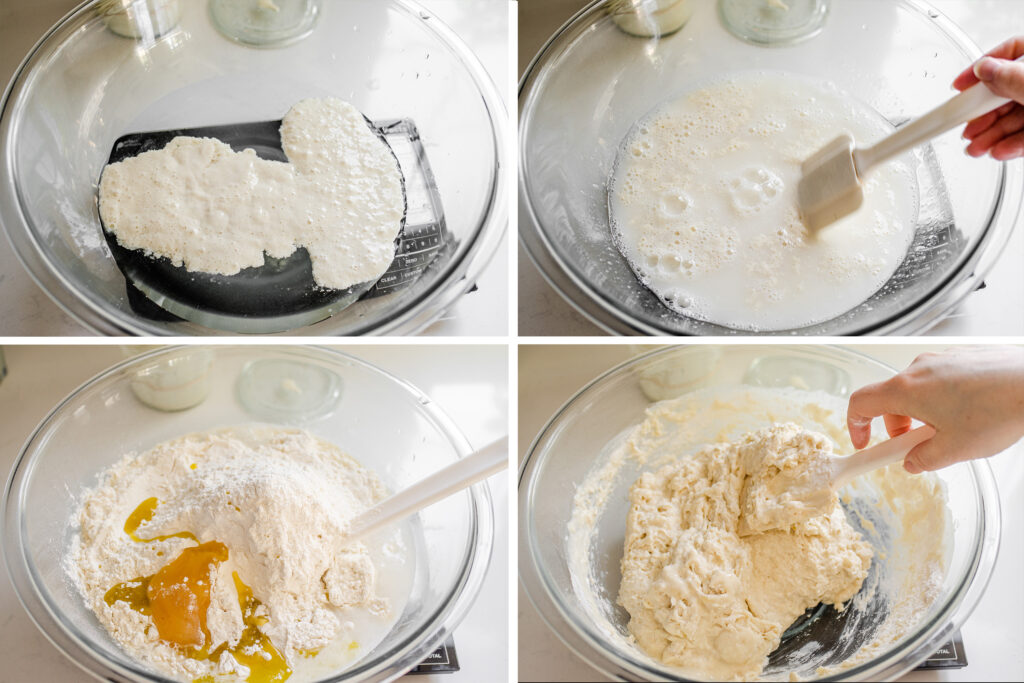
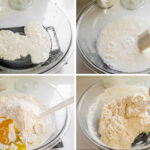
Start by placing the water and sourdough starter in a large bowl.
Mix them together with a spatula or Danish dough whisk or hook. I don’t recommend a wooden spoon since the sourdough tends to stick to it badly.
Add the all purpose flour, bread flour, honey, and extra virgin olive oil to the large mixing bowl.
Mix with the spatula until it comes together into a shaggy dough, and there aren’t any dry bits of flour. This should only take a couple of minutes.
Autolyse:
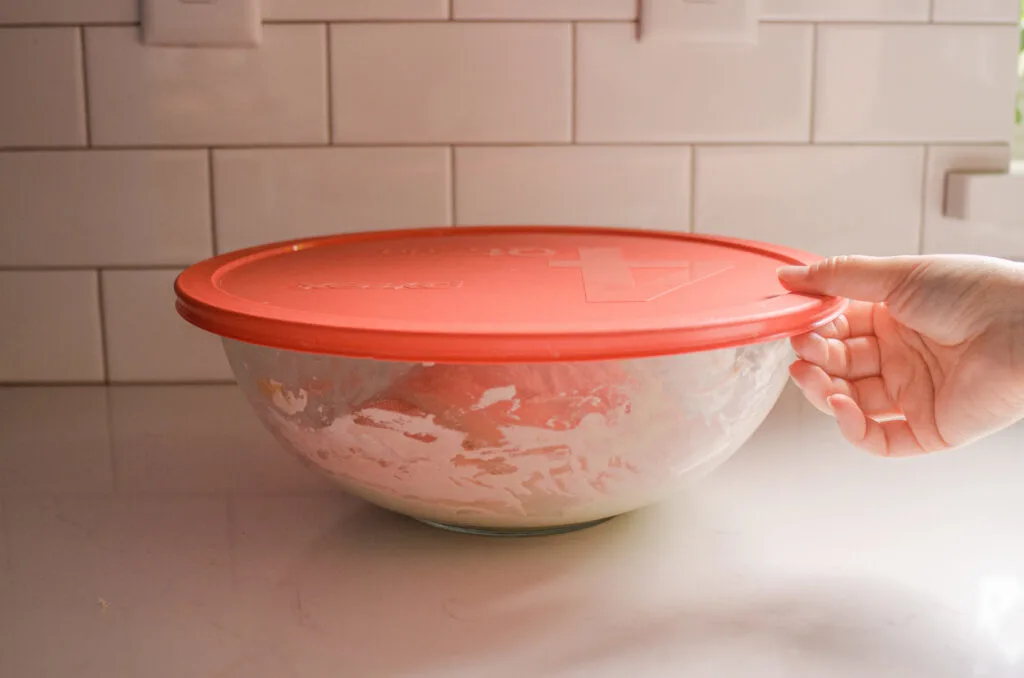
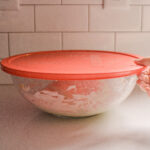
Cover and the dough rest or autolyse for 1 hour.

Adding the Salt:
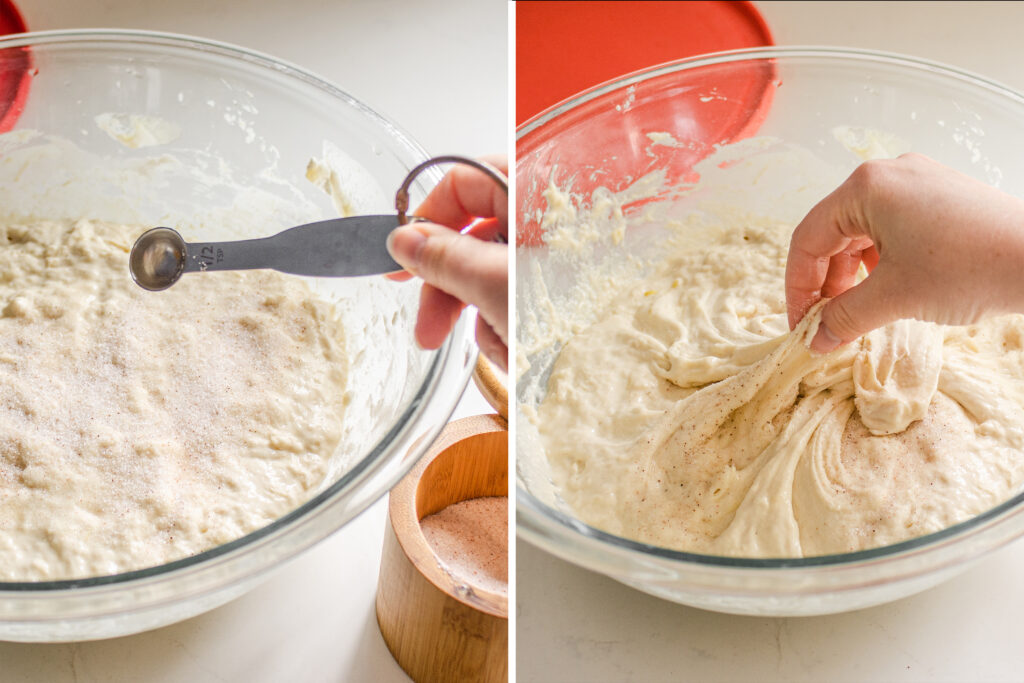
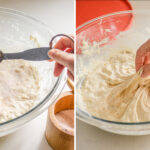
After the hour is up, sprinkle the salt on top of the dough.
With wet hands, start to pinch the salt into the dough to begin to incorporate it.

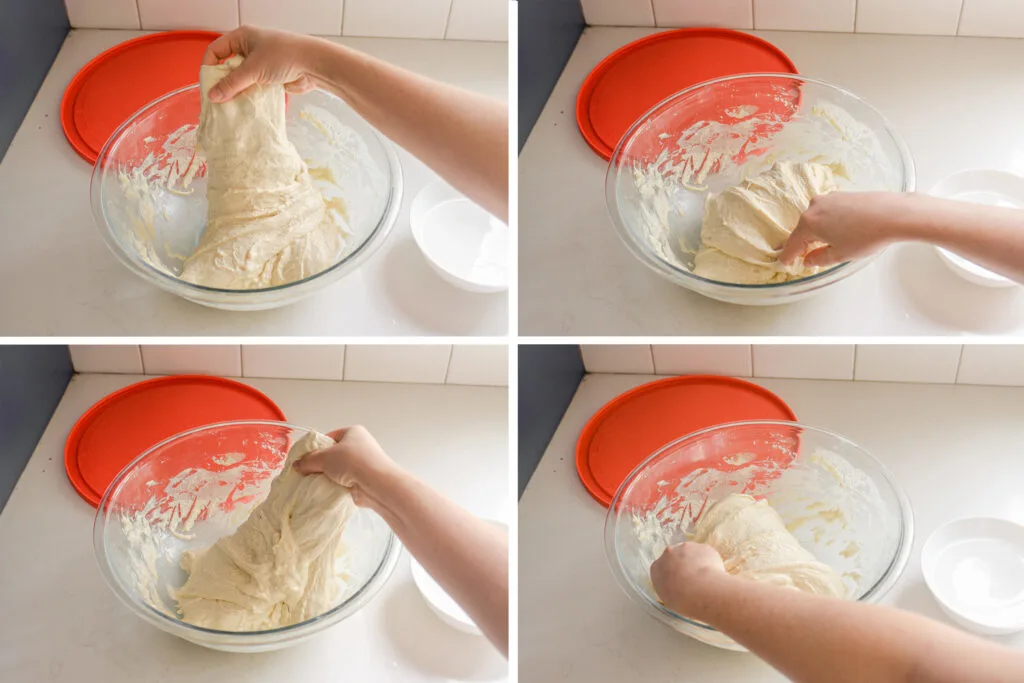
Stretch and Fold Sequence:
Now it’s time to do the first stretch and fold sequence. This will build the gluten strands, allowing the dough to gain strength and stretchiness.
With wet hands, grab one “corner” of the dough and stretch it up as far as it will go…
…and then fold it over to the other side of the dough.
Get it? Stretch and fold!
Repeat with the other 3 “corners” of the dough.
Cover and allow to rest for 30 minutes.
Repeat this process of stretch-and-fold, rest for 30 minutes 4-5 more times for a total of 5-6 stretch and fold sequences.
This whole stretch and fold process should take about 2 to 2 1/2 hours.

Bulk Fermentation or First Rise:
After you’ve performed the final stretch and fold sequence, let the dough rise and ferment, covered, at room temperature for 1 hour.
After the hour, transfer the dough to the refrigerator for 20 to 72 hours.
You can also skip the cold fermentation and go right into shaping the dough. But this sourdough focaccia will have the best flavor if you allow it to do the cold, long rise.
You can also place the dough into the baking pan to do the cold ferment instead of in the bowl. It’s up to you when you want to prep the pan and shape the focaccia!
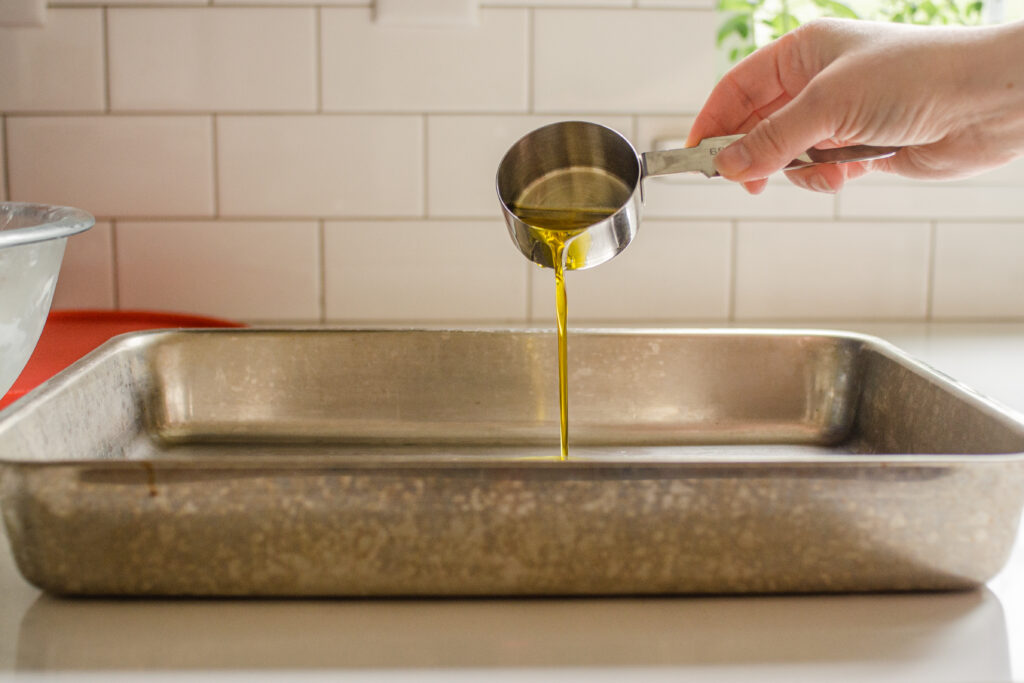
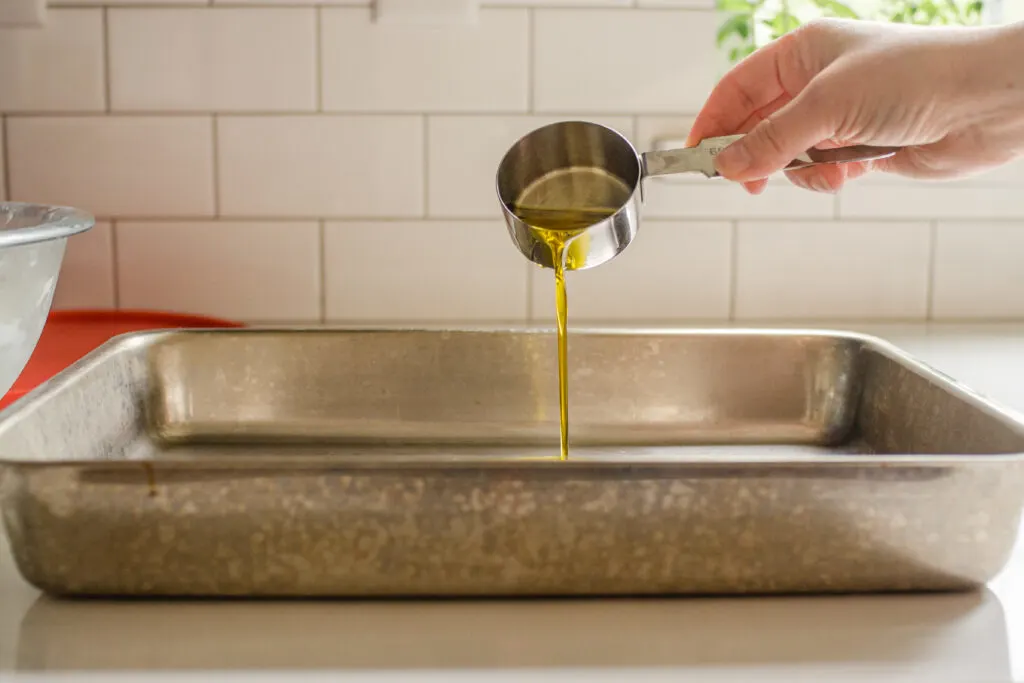
Preparing the Pan:
After the bulk fermentation is complete, it’s time to prepare the pan and shape the focaccia.
Pour 3-4 tablespoons of extra virgin olive oil into the bottom of a 13×9 inch baking pan.
Spread it out to evenly coat the bottom.

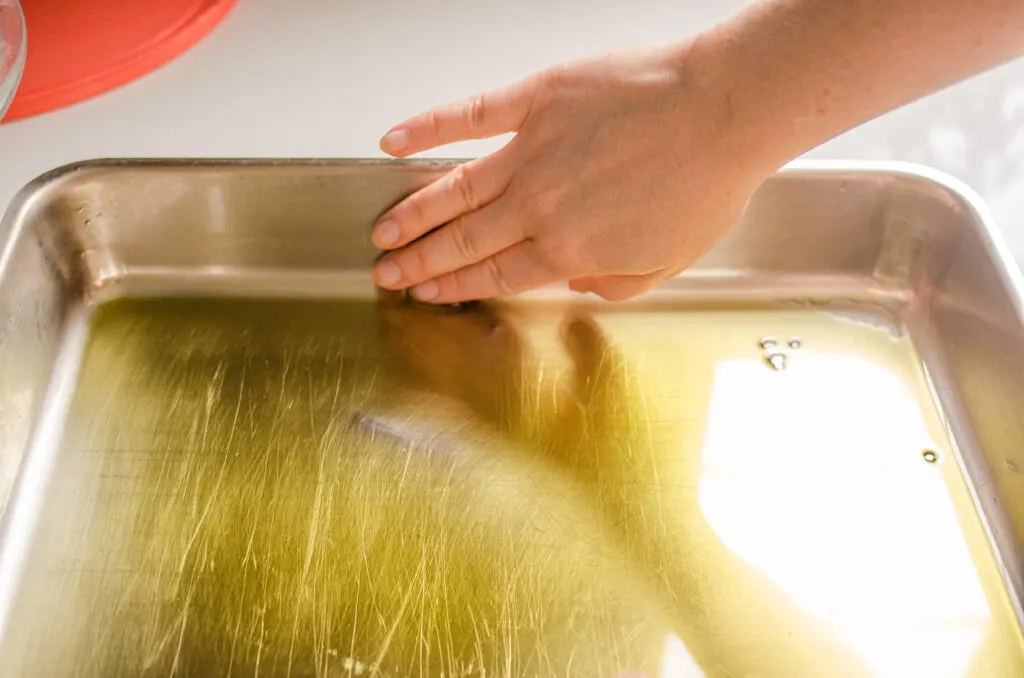
Coat the edges of the pan as well. Sourdough tends to stick to the pan more than regular dough, so you want to grease the pan thoroughly.
And you could also line the pan with parchment paper first to ensure an easy removal of the baked focaccia.
You can also use a rimmed baking sheet if you prefer a flatter focaccia.

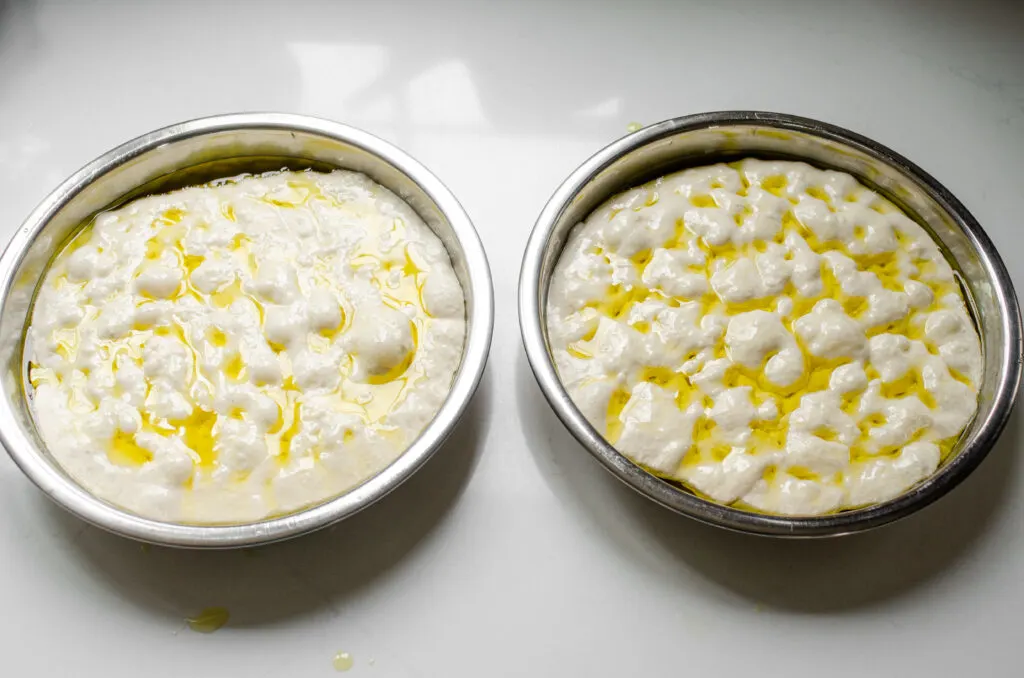
Or you can use 2 cake pans instead of the 13×9 inch pan. You’ll want to reduce the cooking time by 5-10 minutes to compensate for the smaller cake pan.
Shaping:
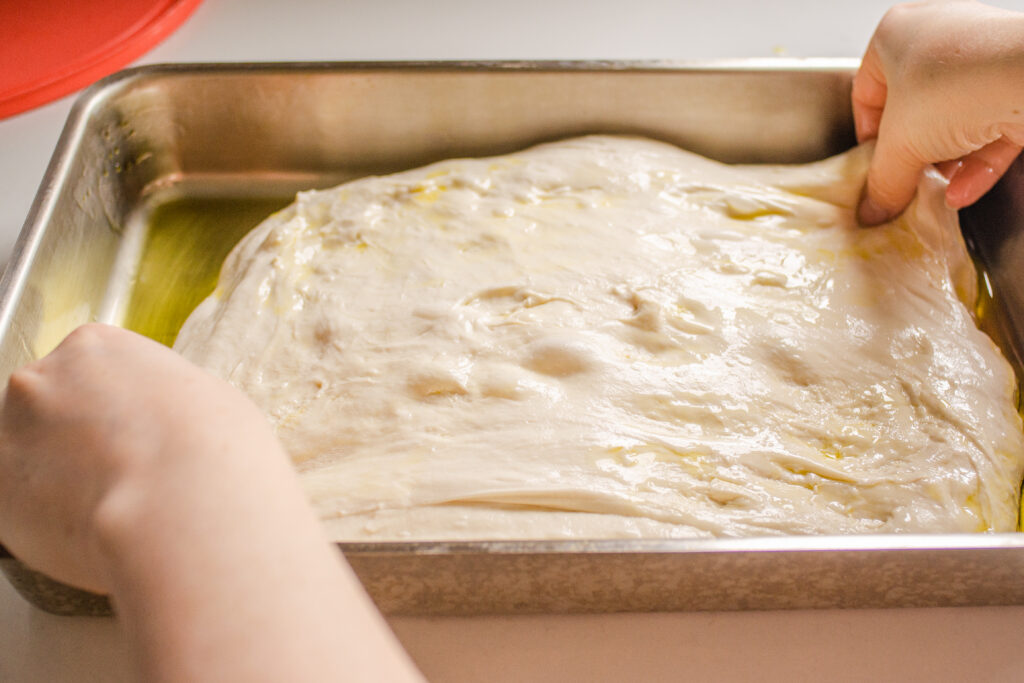
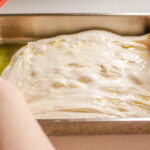
Place the fermented focaccia dough into the prepared baking dish or sheet pan.
Begin to stretch it out to the corners of the pan.
When the dough won’t stretch out any more, let it rest for 30-45 minutes.


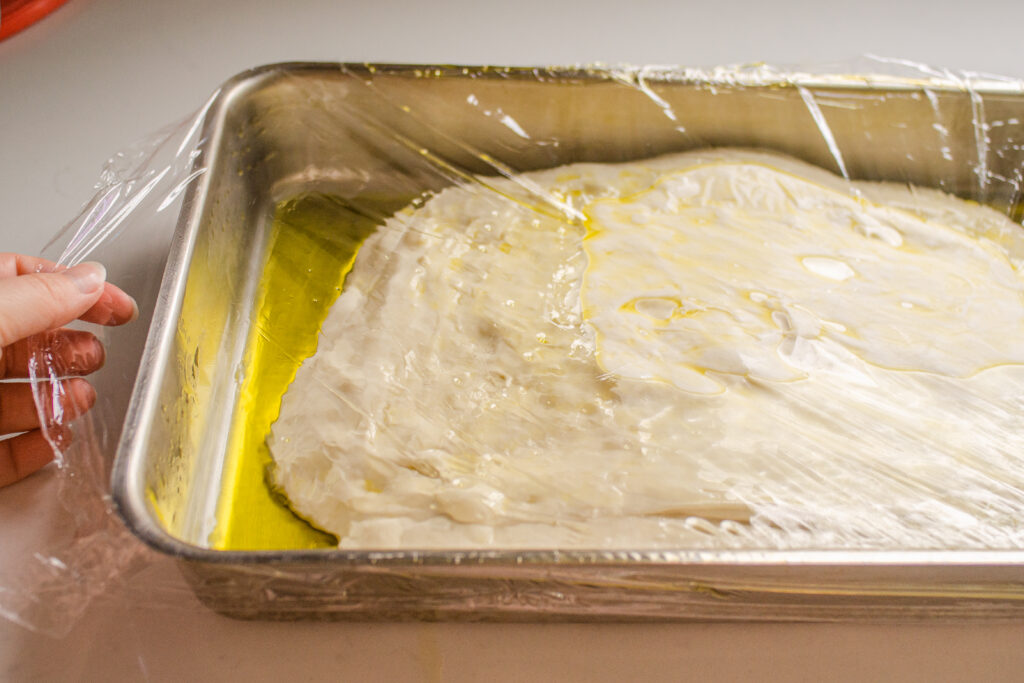
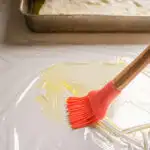
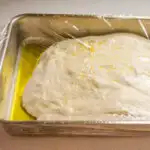
Grease a pieces of plastic wrap with olive oil and place over the dough in the pan while it rests. A pastry brush is great way to distribute the oil evenly over the cling film.
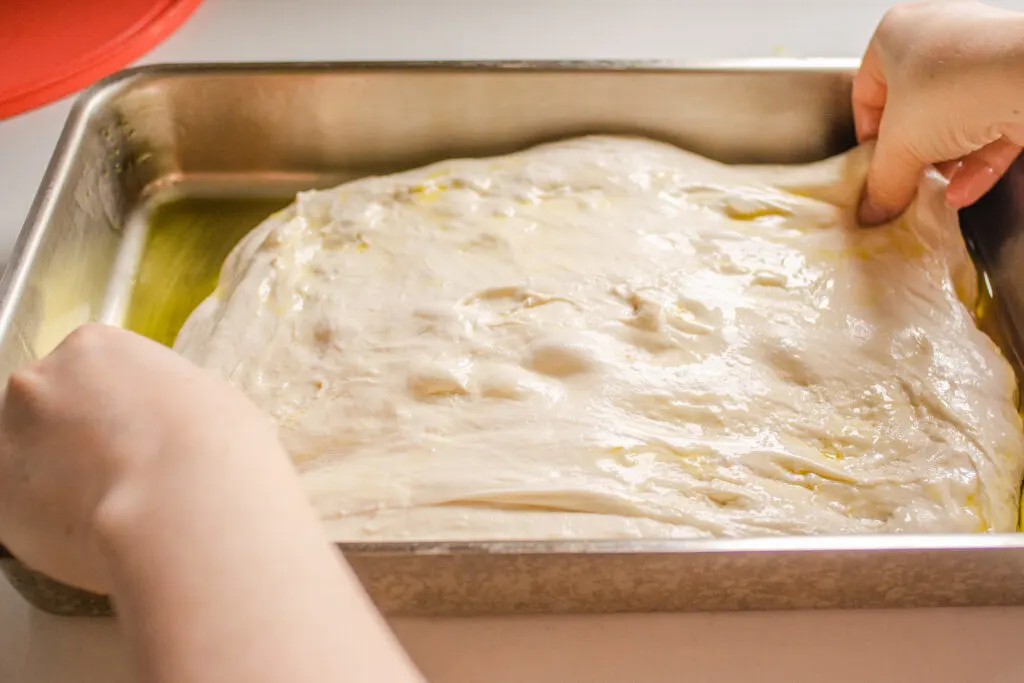
When you come back the gluten will have relaxed, and you’ll be able to stretch the dough out more.
Continue to stretch, then rest until the dough mostly fills the pan.

Second Rise:
While the dough is stretching, it’s also rising. It will take around 1-4 hours for the dough to rise properly.
It will gain volume, and there will be some nice air bubbles throughout.
To see if it’s done rising, you can do the poke test. Gently poke your finger into the dough.
If it slowly springs back and doesn’t quite fill in, it’s done fermenting. If it springs back really quickly, and completely fills in, it’s not done proofing yet. And if it doesn’t spring back at all, it’s most likely over proofed and you need to get it in the oven ASAP.
Allow the dough to rise for a total of 1 to 4 hours, including the time it takes to stretch it out.
The time it takes for your sourdough focaccia dough to rise will depend on the temperature of your kitchen and how active your sourdough starter is.
Go by sight and feel more than by time. If the dough seems nice and puffy and passes the poke test, preheat your oven even if it’s only been 1 hour.
However, it’s really important to not under-proof the dough. This will result in doughy, gummy, and flat focaccia. It’s better to over ferment a tad than under ferment.

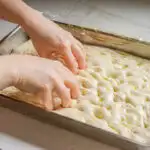
Dimpling and Topping:
When the dough is almost done rising, preheat your oven to 450 degrees F or 232 degrees C.
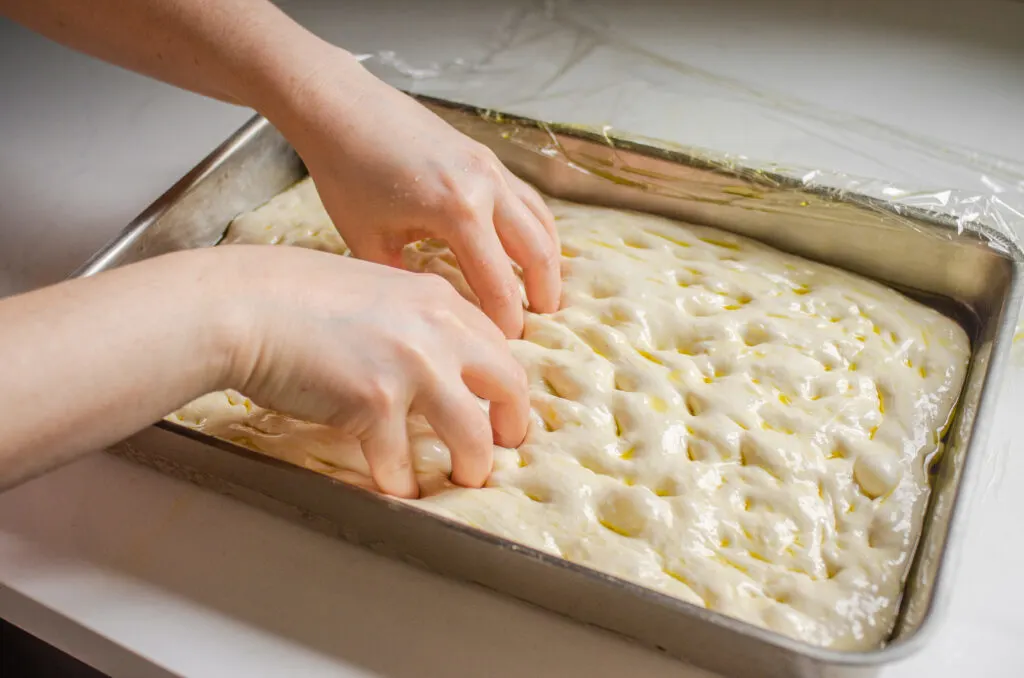
Now it’s time to dimple your focaccia. One of the purposes of dimpling is that it helps the dough to have a more even oven spring. If you don’t do this, it will rise really high in the center and create a dome.
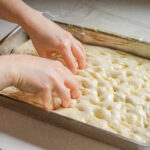
Okay, wet your hands, and then gently poke the dough all over with your fingertips. You want to go all the way down to the bottom of the pan. Don’t be shy about it!
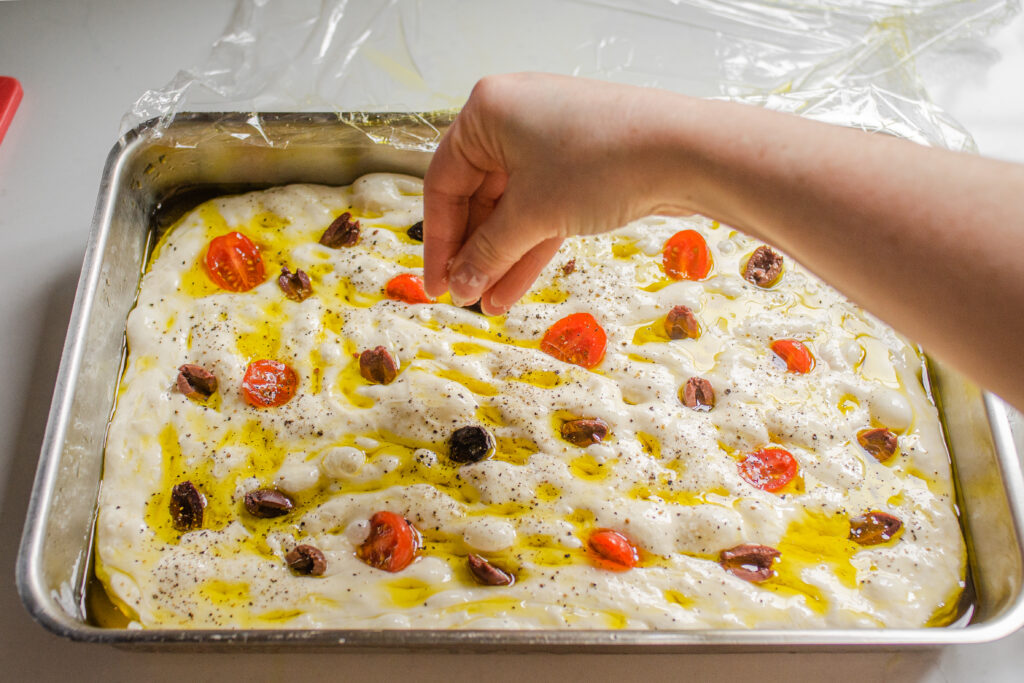
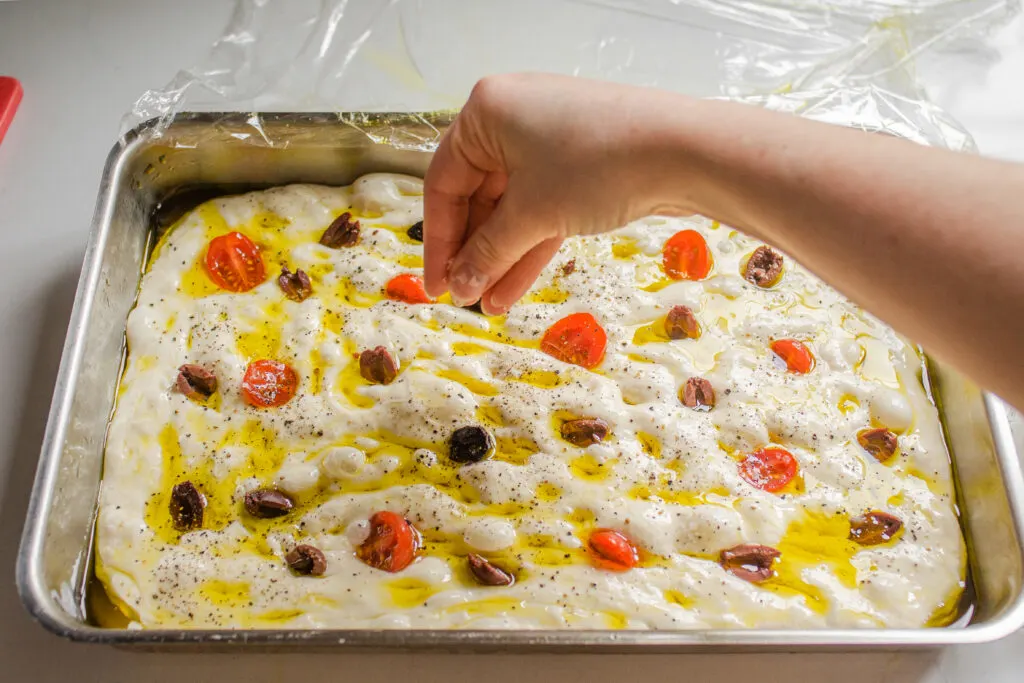
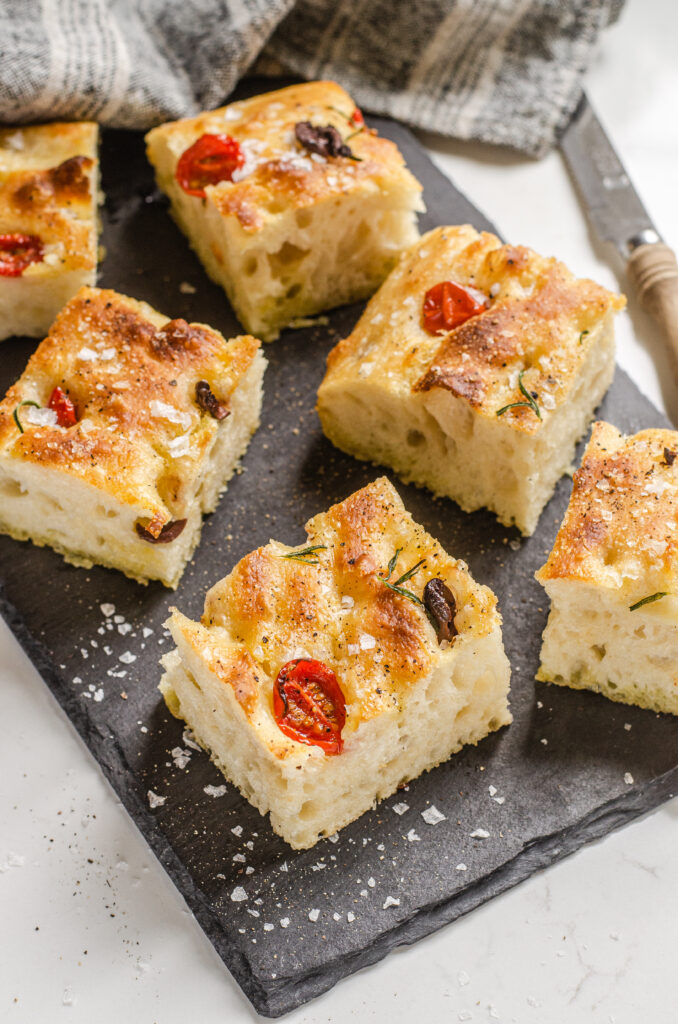
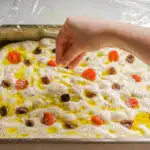
Now it’s time to top the focaccia. You can simply sprinkle it with freshly ground black pepper and flaky coarse sea salt and it will be delicious.
But if you’d like to experiment with different toppings, here are some suggestions:
Halved cherry tomatoes, Kalamata olive, capers, fresh herbs such as fresh rosemary, basil, or thyme, parmesan cheese, garlic, and caramelized onions.
If you’re opting for the larger toppings such as cherry tomatoes, olives, or garlic, you can poke them into the dimples. If you’re using fresh herbs or parmesan cheese, I recommend that you don’t add them until the last 5 minutes of baking to prevent burning.

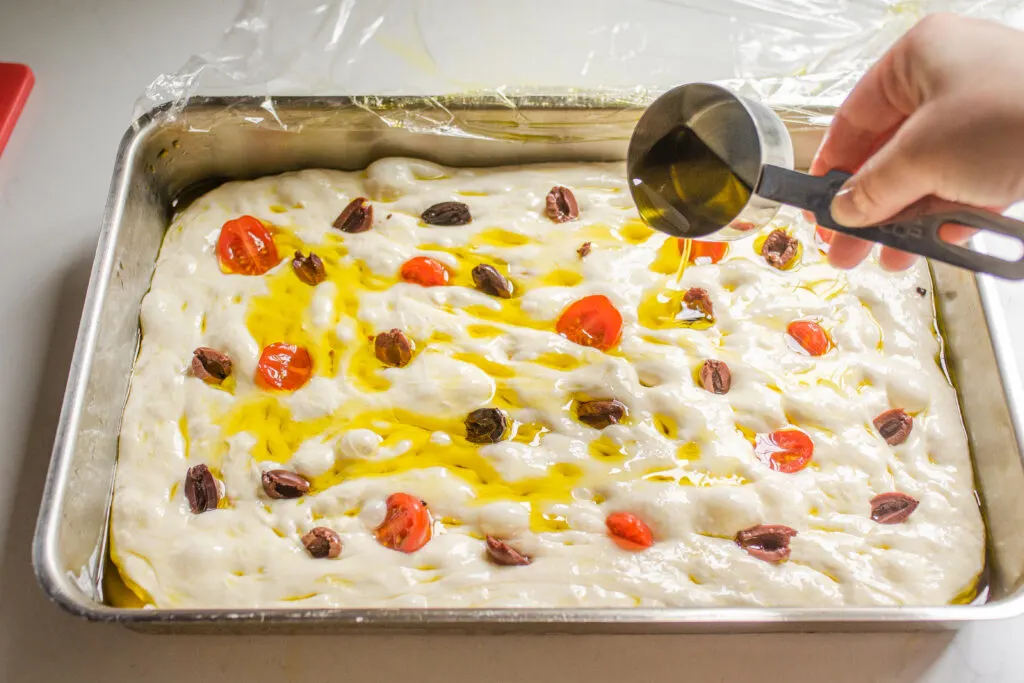
After you’ve dimpled and topped the whole focaccia, drizzle 2-4 tablespoons of extra virgin olive oil over the dough.
The amount of olive oil you use will depend on how richly saturated with oil you want the final focaccia to be. If you prefer a drier focaccia, go for the lower amount of olive oil.

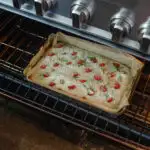
Baking:
Once you’ve topped your focaccia to your liking, it’s time to bake! Place in the preheated oven on the center rack and bake for 25-30 minutes, turning once halfway through baking, until the focaccia is a deep brown color.
If the top of the focaccia is getting done too quickly, you can bake it on the bottom rack instead of the middle. But the middle is the sweet spot for me.
Cooling:
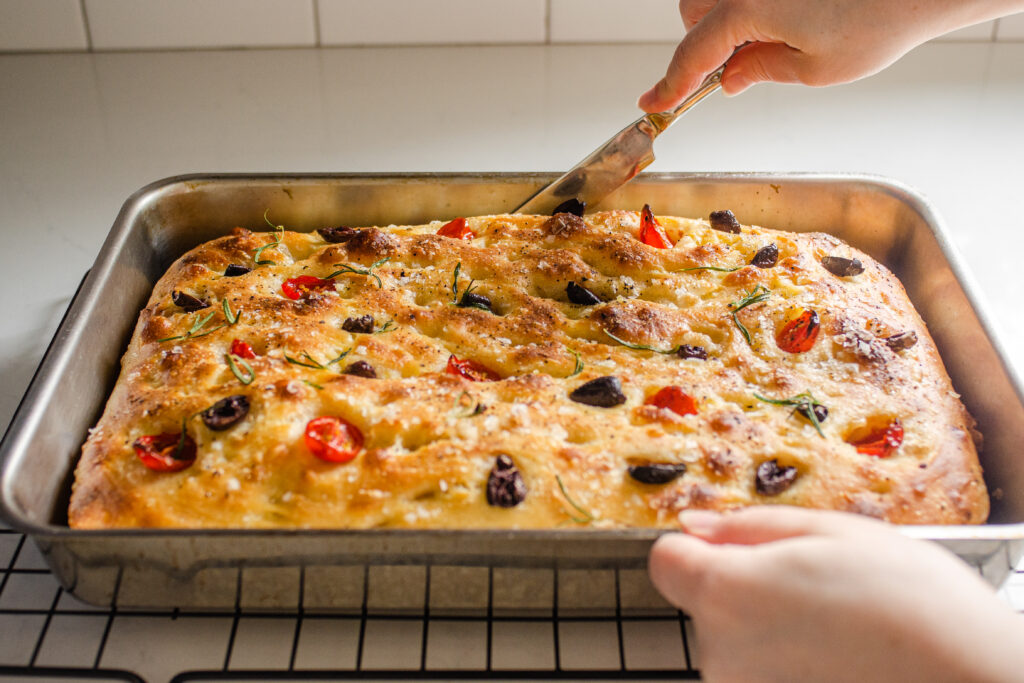
When the focaccia is done baking, remove it from the oven and allow to cool in the pan for 10 minutes.
Then transfer to a wire cooling rack to cool until warm before slicing. You may need to run a knife all the way around the pan in order to loosen the focaccia.
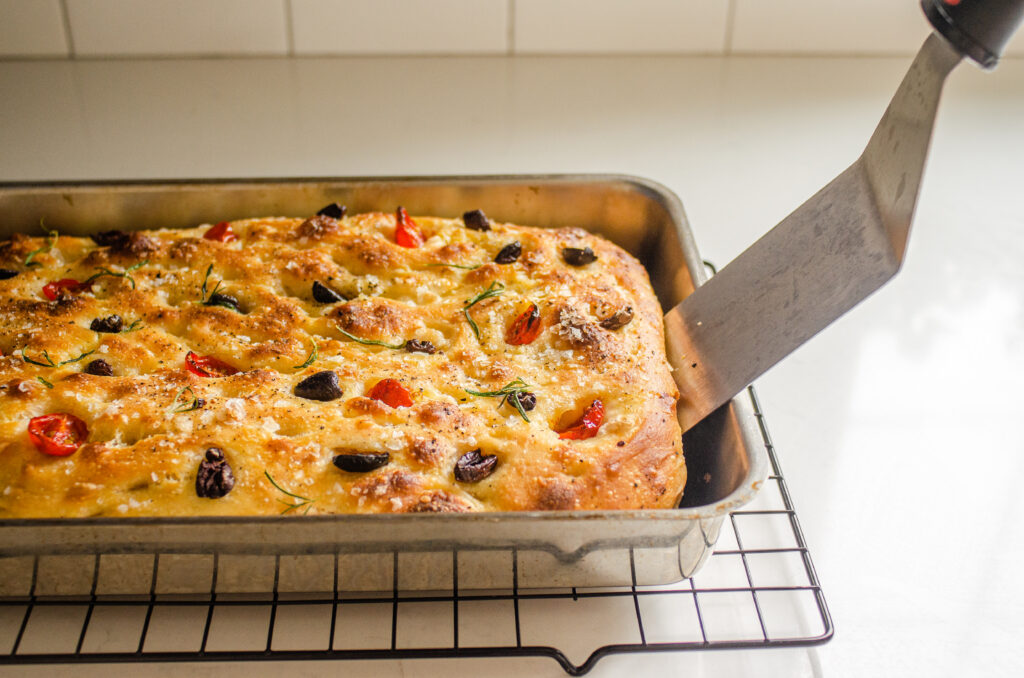
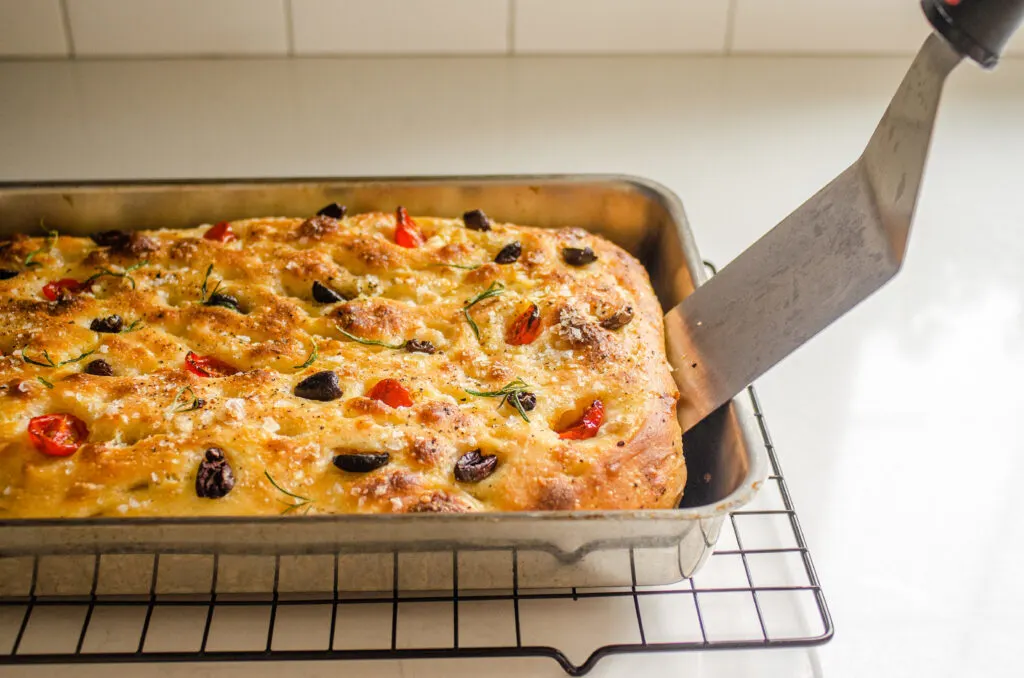
I find it helpful to use a metal spatula to remove the focaccia from the pan.
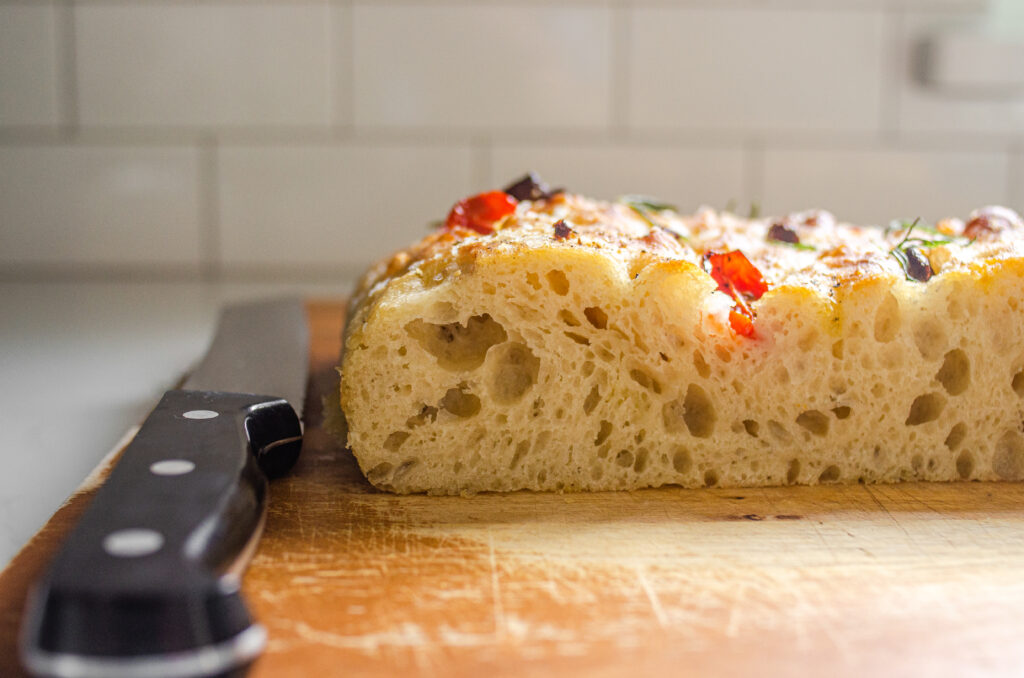

The best part is slicing into the focaccia and seeing all the lovely air holes.
Isn’t that crumb just lovely?!
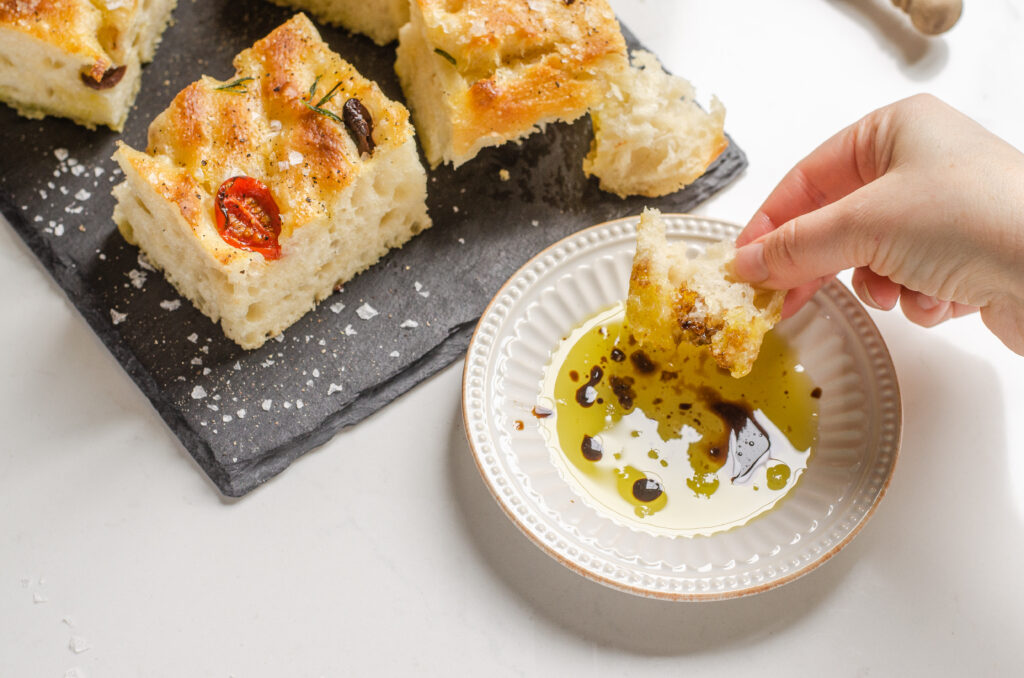
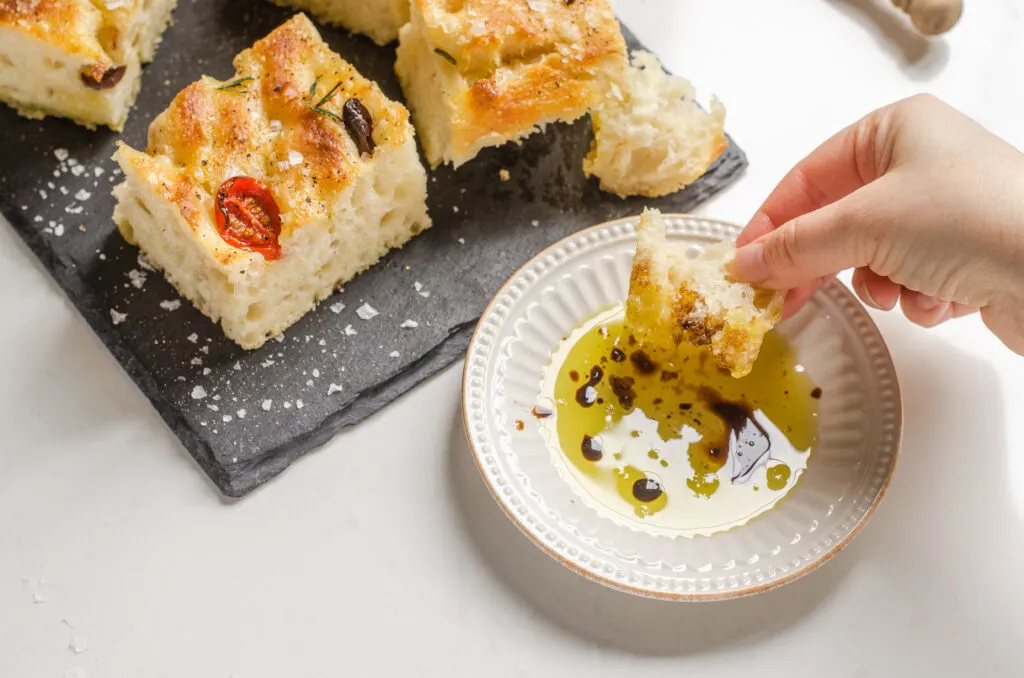
Serving:
You can serve this with good quality butter, or with a mix of extra virgin olive oil and balsamic vinegar for dipping.
If you haven’t tried olive oil and balsamic for dipping, I highly recommend giving it a go!
Leftovers:
If you have any leftovers, you can transform them into something delicious!
You can slice the focaccia in half and toast slices. Top with butter and enjoy!
Or you can use them as sandwich “bread” or make panini out of them.
Or you could make mini pizzas by spreading the focaccia with pesto or pizza sauce, adding some meat and cheese, and toasting it all in the oven.
Storing:
Store any leftovers in an airtight container at room temperature for up to 1 day, or in the refrigerator for up to 5 days.

Sample Baking Schedule:
here are a couple of baking schedules, one for a cool kitchen and the other for a warm kitchen.
For a Cool Kitchen:
- 2 Days Before Baking: Feed your sourdough starter before going to bed.
- The Next Morning: Mix together the dough, then place in the refrigerator for a cold ferment.
- The Next Day: Shape and bake the focaccia after it has fermented for 20+ hours.
For a Warm Kitchen:
Day 1: Feed your starter in the morning. Mix together the dough in the afternoon and place in the refrigerator.
Day 2 or 3: Shape and bake the focaccia after it has fermented for 20+ hours.
Why is My Sourdough Focaccia Dense?
There are several factors that could be causing dense sourdough focaccia bread. If your starter was not strong and active, it won’t have enough fermentation powder to raise the dough and create air bubbles. It also possible that your water was too hot and killed the beneficial wild yeast and bacteria in your starter. Or you may have under proofed the dough, and there wasn’t enough time for the air bubbles for form properly.
I found that using too much water also contributed to a dense sourdough focaccia. It seems counter-intuitive, but that was my experience!
What is Special About Focaccia Bread?
Focaccia is different from other types of bread because of the way it’s shaped and topped. The bottom of the pan is coated with a generous amount of olive oil, giving the focaccia a rich taste and texture. It’s also more flat than other types of bread, which makes it great for sandwich bread!

So there’s my sourdough focaccia recipe! Here are some more sourdough recipe in case you’re looking for another delicious project!
More Sourdough Recipes:
- Sourdough Pizza Crust Recipe
- Soft Sourdough French Bread without Yeast
- BEST Sourdough English Muffins
- Sourdough Tortillas
- Sourdough Donut Recipe
- Homemade Sourdough Hamburger Buns
- Sourdough Pull Apart Dinner Rolls
- Sourdough Brioche
- Healthy Whole Wheat Sourdough Sandwich Bread
- Sourdough Sandwich Bread
- Artisan Sourdough Bread
- Soft Sourdough French Bread
Sourdough Starter Discard Recipes:


Sourdough Focaccia Recipe
Flavorful, light yet rich dough cooked in olive oil.
Ingredients
- 400 grams water (no more than 110°F)
- 150 grams active sourdough starter (see note)
- 300 grams organic all purpose flour
- 225 grams organic bread flour
- 1 1/2 tablespoons honey (optional)
- 1 1/2 tablespoons extra virgin olive oil (optional)
- 2 1/2 teaspoons unrefined sea salt
- 5 to 7 tablespoons extra virgin olive oil (for pan and topping)
- salt and pepper (for topping, optional)
Instructions
Mixing Dough + Autolyse
-
Measure the water and sourdough starter into a large mixing bowl. Mix together with a spatula or Danish dough hook. Add the all purpose flour, bread flour, honey, and olive oil if using. Mix until the mixture comes together into a shaggy dough.

-
Cover and allow to rest or autolyse for 1 hour.

-
After the autolyse is complete, add the salt. Using wet hands, pinch the salt into the dough to begin to incorporate it.

Stretch and Fold Sequences
-
Now it’s time to perform the first stretch and fold sequence. I like to keep a bowl of water on hand to wet my hands to keep them from sticking to the dough.


-
Pretend that the dough has 4 corners. Grab one of the corners and stretch it up as far as you can without breaking the dough, and then fold it over to the opposite side of the dough.
-
Repeat with the remaining 3 corners of the dough. You can repeat this process 1 more time on the first stretch and fold round to get the gluten development jumpstarted.
-
Cover and allow to rest for 30 minutes. Come back and perform another set of 4 stretches and folds.
-
Repeat the stretch-and-fold, rest for 30 minutes sequence until you’ve performed a total of 5-6 stretch and fold sequences. You want the dough to be nice and stretchy and smooth. If it doesn’t seem to have developed enough gluten, just add in 1 more stretch and fold sequence. This whole process should take around 2 to 2½ hours.
Bulk Fermentation
-
Cover the dough and allow to rise at room temperature for 1 hour. Transfer to the refrigerator, and allow to ferment there for 20 to 72 hours (see note).
Shaping
-
After the cold fermentation, it’s time to shape the dough! Take the dough out of the refrigerator. Place 3-4 tablespoons of extra virgin olive oil in the bottom of 13x9 inch baking pan (see note). Grease the sides of the pan as well.


-
Transfer the dough to the prepared pan, and begin stretching it out to the 4 corners of the pan. When the dough won’t stretch any more, let it rest for 30-60 minutes. Come back and stretch it again until it won’t stretch any more. If you keep coming back and stretching it after letting it rest, it will eventually fill the pan.

-
Grease a piece of plastic wrap and place it on top of the dough while it rests.

Second Rise
-
While the dough is stretching, it’s also rising. It will take around 2-4 hours for the dough to rise properly. It will gain volume, and there will be some nice air bubbles throughout. To see if it’s done rising, you can do the poke test. Gently poke your finger into the dough. If it slowly springs back and doesn’t quite fill in, it’s done fermenting. If it springs back really quickly, and completely fills in, it’s not done proofing yet. If it doesn’t spring back at all, it’s most likely over proofed and you need to get it in the oven ASAP.

Dimpling and Topping
-
Once the focaccia is almost done proofing, preheat your oven to 450 degrees F or 232 degrees C.
-
Now it’s time to dimple your focaccia. One of the purposes of dimpling is that it helps the dough to have a more even oven spring. If you don’t do this, it will rise really high in the center and create a dome.
-
Wet your hands, and then gently poke the dough all over with your fingertips. You want to go all the way down to the bottom of the pan. Don’t be shy about it! After you’ve dimpled the whole focaccia, drizzle 2-4 tablespoons of extra virgin olive oil over the dough (see note).
-
Now it’s time to top the focaccia. You can simply sprinkle it with freshly ground black pepper and flaky sea salt and it will be delicious. You can also use halved cherry tomatoes, kalamata olive, capers, fresh herbs such as rosemary, basil, or thyme, parmesan cheese, garlic, and caramelized onions.

-
If you’re opting for the larger toppings such as cherry tomatoes, olives, or garlic, you can poke them into the dimples. If you’re using fresh herbs, caramelized onions, or parmesan cheese, I recommend that you don’t add them until the last 5 minutes of baking to prevent burning.

Baking and Cooling
-
Once you’ve topped your focaccia to your liking, it’s time to bake! Place in the preheated oven on the center rack and bake for 25-30 minutes, turning once halfway through baking, until the focaccia is a deep brown color.


-
When the focaccia is done baking, remove it from the oven and allow to cool in the pan for 10 minutes. Then transfer to a wire cooling rack to cool until warm before slicing.


Recipe Notes
- An active sourdough starter is one that's been fed 4-12 hours previously, is active and bubbly, has doubled in volume, and passes the float test.
- You can also go ahead and place the focaccia in an oiled 13x9 pan before placing it in the refrigerator. It’s up to you if you’d rather form the focaccia before or after the cold ferment.
- You can also skip the cold ferment altogether if you need to, but the focaccia will have the best flavor if you allow it to do a long, cold ferment.
- You can also use two 9-inch cake pans instead of the 13x9 inch pan if you prefer. You’ll need to reduce the baking time by about 10 minutes or so if you use cake pans.
- The amount of olive oil you put on top of the focaccia will depend on how richly saturated with oil you want the final focaccia to be. If you prefer a drier focaccia, go for the lower amount of olive oil.
- If the top of the focaccia is getting done too quickly, you can bake it on the bottom rack instead of the middle. I find the middle rack is just right for me.
- Calories calculated from 1/12 of the focaccia.
Hank
Wednesday 14th of September 2022
Thanks for the detailed recipe only question I have I had excessive rise in a portion of the dough when baking Like a big bubble I pushed down when cooling and taste is good but what have I done wrong I forgot to do poke test could it have been over proofed
Thanks Hank
Erica Kastner
Wednesday 14th of September 2022
There are several things that could result in a large bubble. Over proofing could be one of them. Also, if you don't push your fingers all the way to the bottom of the pan when doing the dimpling, it could result in an uneven rise, or a dome.