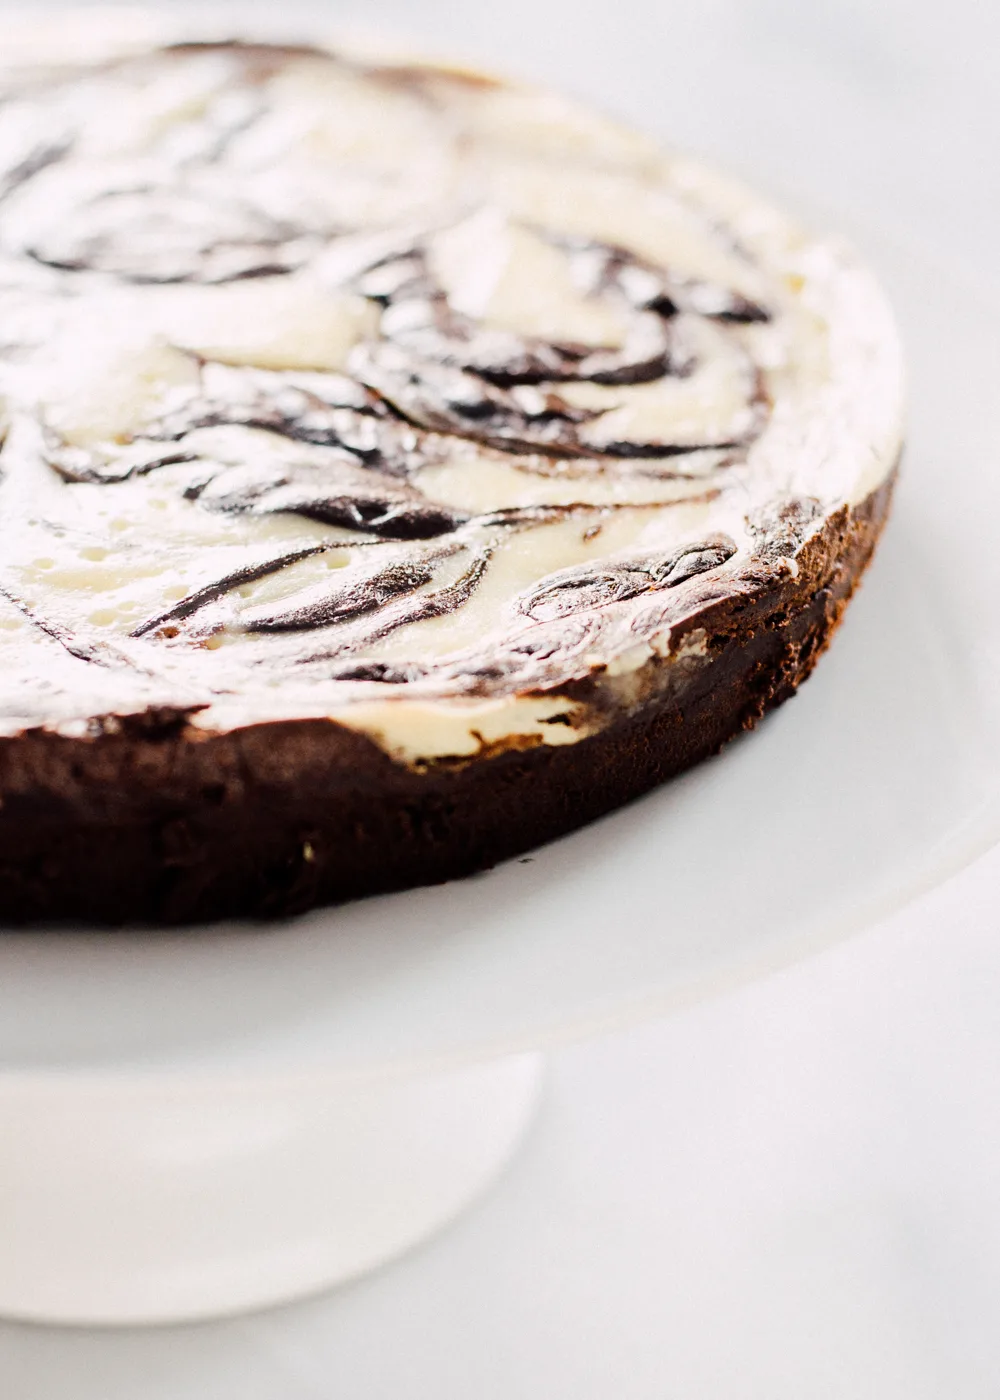
This Flourless Chocolate Marble Cheesecake is not only decadent, it’s naturally gluten free! The rich chocolate is swirled with tangy cream cheese for a truly scrumptious and impressive dessert.


If you’re looking for an easy yet decadent dessert to enjoy, this is it.
It looks all fancy with the beautiful swirls, but it’s actually pretty simple to pull off.
Plus it’s a cheesecake that doesn’t require you to own a springform pan or do a water bath. Win!
Okay, let me show you how to make this scrumptious flourless chocolate marble cheesecake!

This post contains affiliate links. All opinions are my own. If you click on a link and make a purchase, I will make a small commission. This has zero impact on the price you pay, and it helps to keep Buttered Side Up running. Thank you so much!
Ingredients:
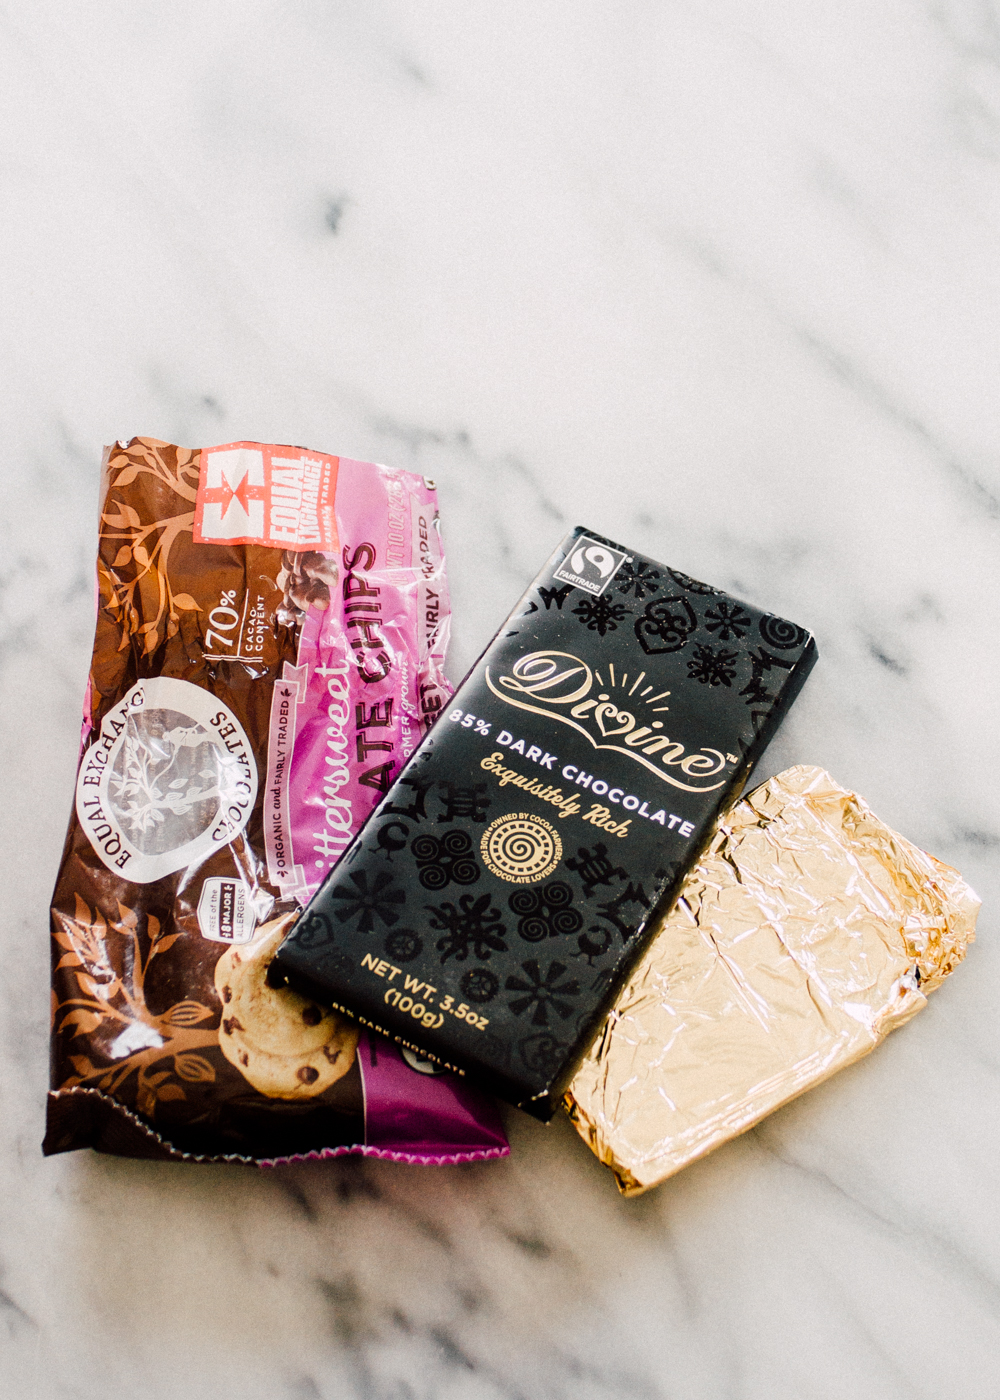
First, let’s chat ingredients! This cake is made with 2 batters: vanilla cheesecake and dark chocolate!
For the cheesecake batter you’ll need:
- 8 oz cream cheese: I like to use Organic Valley cream cheese, but of course Philadelphia will work here. Make sure to take this out of the fridge to soften for at least half an hour before you begin!
- 1/3 cup sugar: I use organic cane sugar, but granulated sugar will work as well.
- 1 large egg: It’s best if this is at room temperature as well.
- 1 teaspoon vanilla extract: Please use real vanilla extract, not imitation! Unless you like the flavor, of course!
- a pinch of salt: A little salt will draw out the flavors. I use Redmond Real Salt.
For the chocolate batter you’ll need:
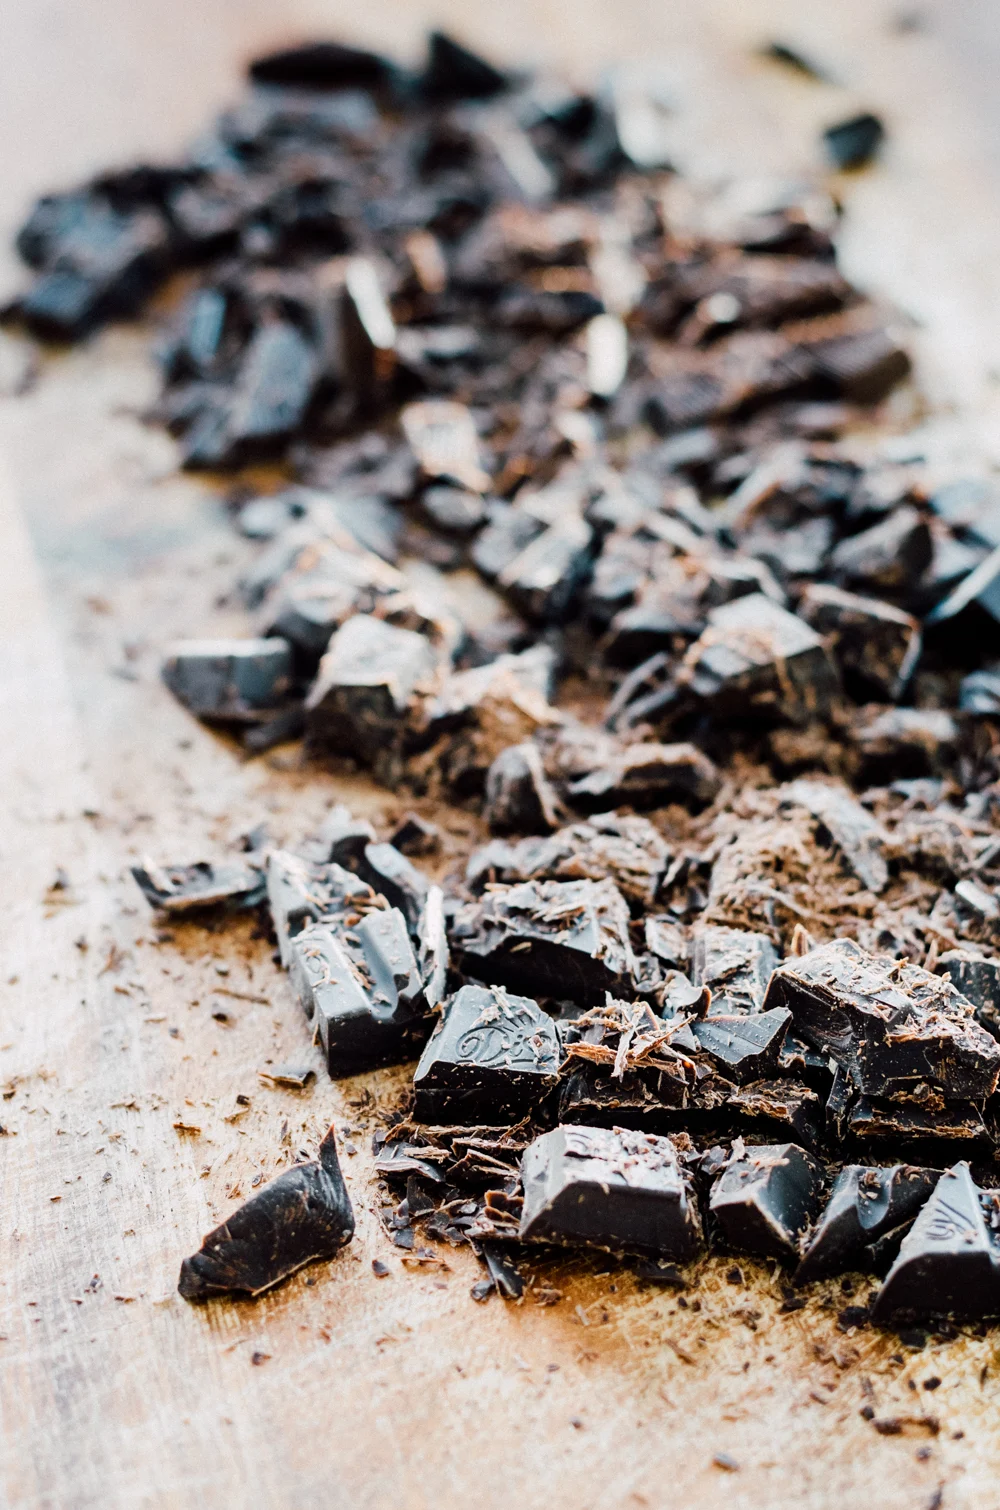
- 10 ounces bittersweet chocolate, finely chopped: Choose something between 60% – 85% cacao. Of course the chocolate with less sugar will yield a more intensely chocolate flavor. You can also use a mix if that’s what you have on hand.
- 10 tablespoons butter: I like to use grass-fed butter, but you do you! It’s going to be melted, so don’t worry about getting it to room temperature.
- 3 large eggs
- 1/3 cup organic cane sugar
- 1 tablespoon espresso or very strong coffee: you could use instant coffee mixed with hot water if that’s all you have on hand.
- 1 teaspoon vanilla extract: You could increase to 2 teaspoons vanilla if you just can’t get enough vanilla flavor.
- a pinch of real salt
Equipment:
- 9 inch cake pan: I use a stainless steel cake pan, but I’m sure aluminum would work as well.
- Parchment paper: This is to place on the bottom of the pan to prevent sticking.
- Knife and Cutting Board: You’ll want to chop the chocolate finely to help it melt faster. You could use a good old fashioned knife and cutter board, or a food processor to do the job.
- Electric mixer: You’ll mix together the cheesecake batter with a hand mixer, and the chocolate batter with a stand mixer. See explanation below!
- Stand Mixer: It’s best to use a stand mixer since you’ll need to beat the eggs for 3-4 minutes. But if you don’t mind mixing with a hand mixer or by hand, feel free to to that instead!
- Double Boiler: This is to melt the chocolate. You can just use a heatproof bowl set over a bowl of simmering water if you don’t own a double boiler. Or, if you own a microwave, you could melt the chocolate in a microwave-safe bowl instead.
- Table knife, Spatula, and Cooling Rack: You’ll also need a few miscellaneous cooking tools to complete the recipe.

Making the Cake:
Okay, let’s go over how to make this delicious dessert!
First, you’ll preheat your oven to 300 degrees F (149 C). Then, you want to butter your 9-inch cake pan and line the bottom with a round of unbleached parchment paper. Set that aside for later.
Mixing the Cheesecake Batter:
Now to make the cheesecake batter!
You basically beat the cream cheese in a large bowl on medium speed until smooth, then add the rest of the ingredients. Easy peasy!
Mixing the Chocolate Batter:
The chocolate batter is a little bit more involved, but it’s still pretty simple.
First, you’ll melt the chocolate in a double boiler.
Next, beat your eggs, sugar, espresso, vanilla and salt until pale and thick, which takes about 3-4 minutes using a stand mixer.
Then you turn the mixer down to low speed and slooooowly pour in the melted butter and melted chocolate. And done!
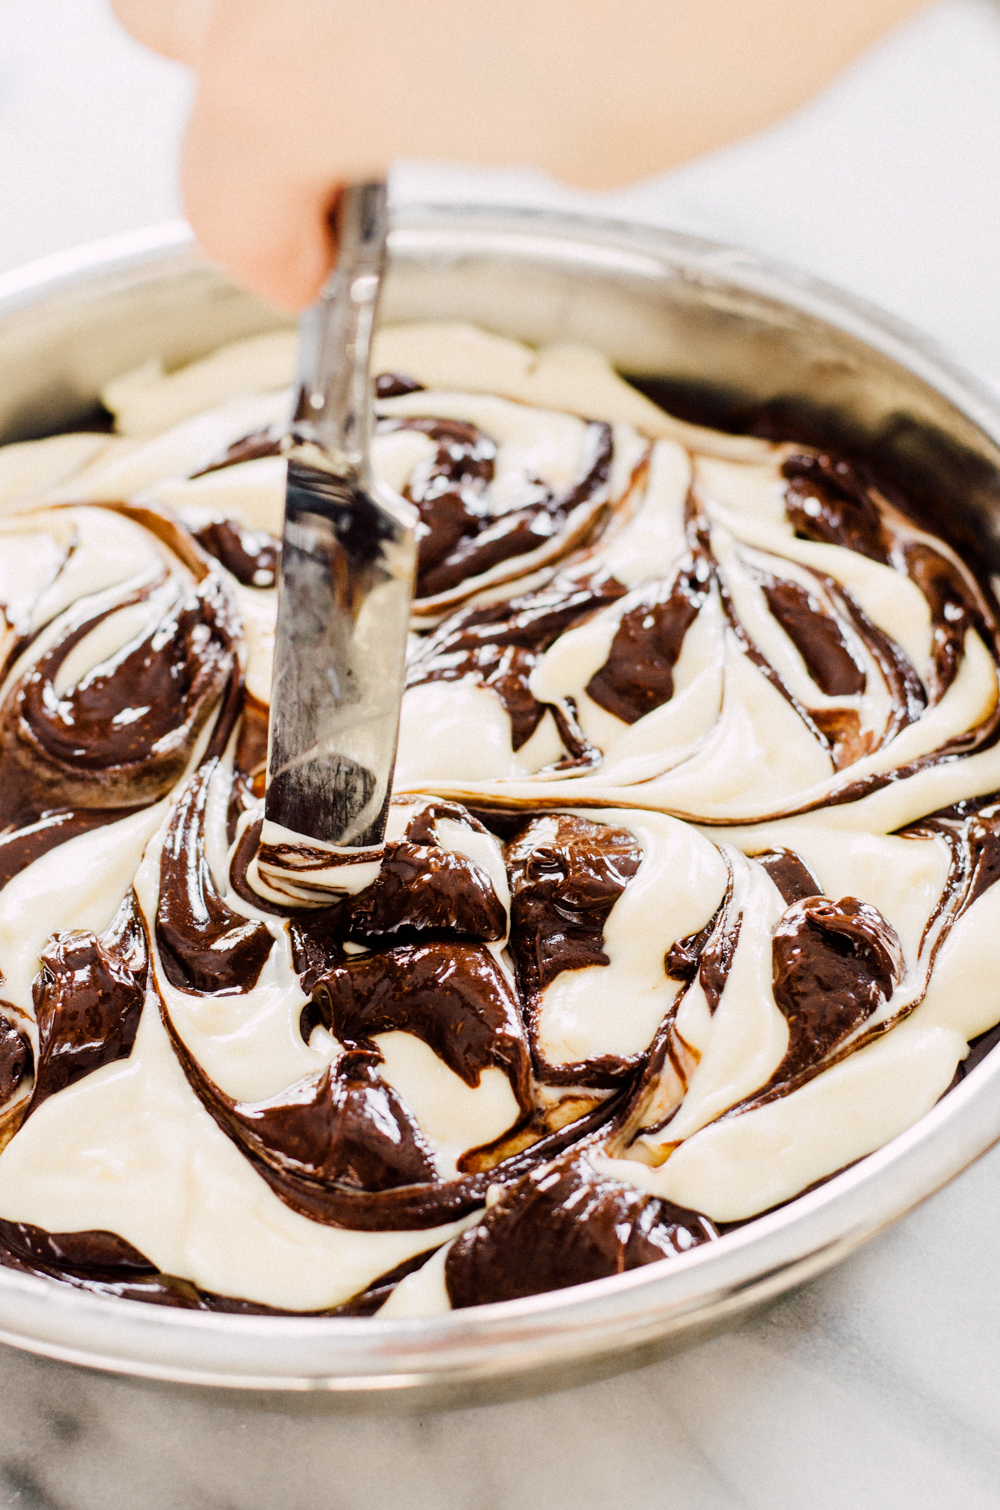

Swirling the Cheesecake and Chocolate Batter Together:
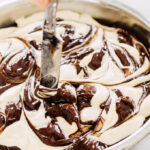
Okay, remember the pan you prepared earlier? Pour a bit over half of the (mouthwatering) chocolate batter into that.
Now switch between dolloping spoonfuls of the cream cheese mixture and the remaining chocolate mixture on top of the chocolate base.
Then all that’s left to do is the fun part!
Gingerly swirl the two batters together with a knife.
This part is really an art. To get that distinct marble effect, you have to feel it! (Too much?)
Baking Time:
Now comes the tricky part.
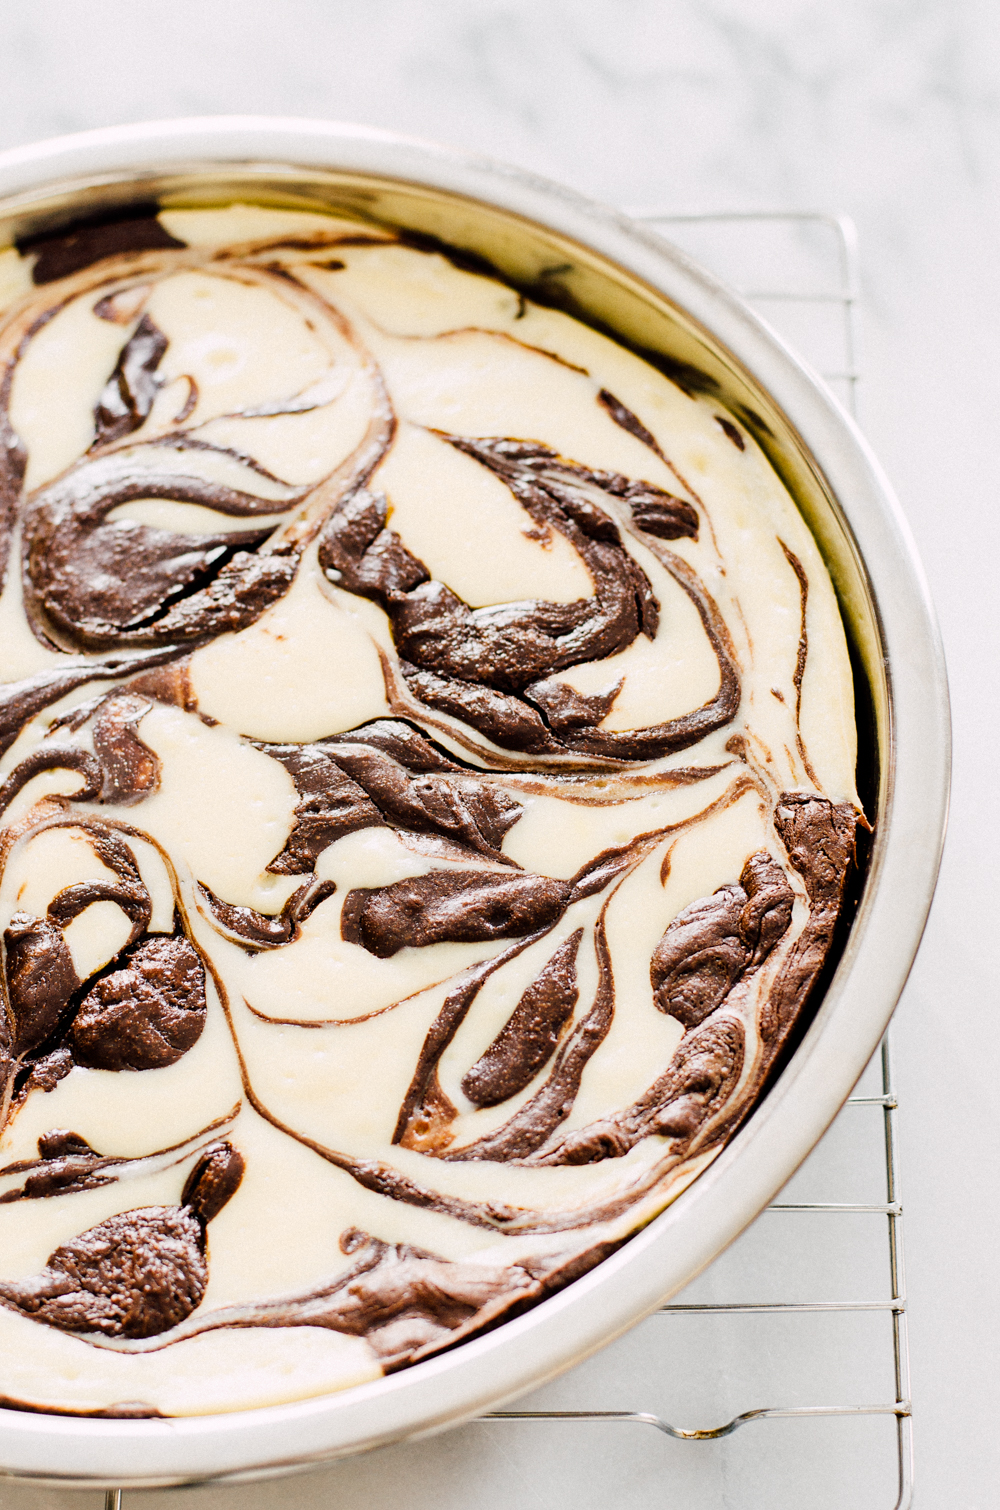
Bake in preheated oven until a toothpick inserted about 2 inches from the edge comes out with moist pieces of the cake sticking to it.
You don’t want the cake to still be liquid, but you definitely don’t want to over-bake it and dry it out. The edges will start to peel away from the sides of the pan.
This should take about 40-45 minutes. Start cracking open that oven door and checking at 35 minutes. DON’T BAKE IT TOO LONG.
Sorry to be so strict, but it’s important, okay?!

Cooling:
Remove from oven and allow to cool to room temperature on a wire rack. Run a butter knife around sides of pan and flip the cake out onto a plate.
Flip it back over onto your serving plate.

Serving:
You can serve this room-temperature or chilled. Make sure to cut with a sharp knife and clean between slices if necessary.
A word of caution, however: this cake is quite rich. Let me repeat myself: THIS CAKE IS QUITE RICH. It has loads of butter, eggs, dark chocolate, and cream cheese. When serving, make sure to start with small slices.
A raspberry sauce or fresh raspberries goes really well here, and would be perfect for Valentine’s Day. Of course strawberries would be another good option.
You could dust some cocoa powder on top as a garnish. Or sprinkle some mini chocolate chips or shaved chocolate on top.
A small scoop of vanilla ice cream would also be quite welcome.
Storing:
You can wrap the cake in plastic wrap and store in the refrigerator for a few days.
For more long-term storage, you can wrap the cake in plastic wrap, then aluminum foil, then place it in a resealable freezer bag. Store in the freezer for a few months.

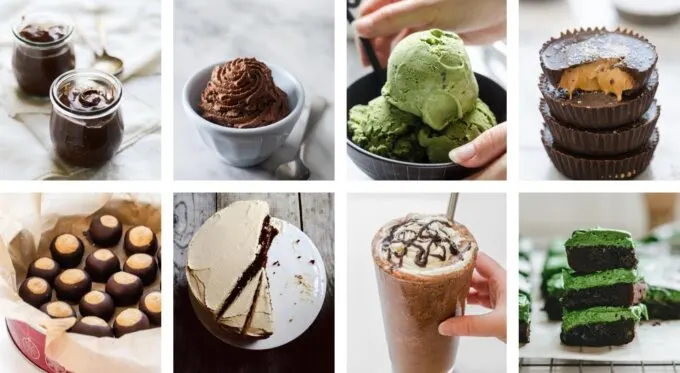
So that’s my chocolate marble cheesecake recipe! Make sure to check out these other delicious desserts as well!
More Delicious Chocolate Dessert Recipes:
- Buckeye Recipe (without Shortening!)
- Matcha Brownies (without white chocolate)
- Homemade Dark Chocolate Peanut Butter Cups
- Matcha Chocolate Chunk Ice Cream
- Egg-Free Dark Chocolate Mousse
- Chocolate Layer Cake with Peanut Butter Frosting
- Homemade Chocolate Pudding
- Starbucks Double Chocolate Chip Creme Frappuccino
- Dark Chocolate Covered Pretzels
Recipe Card

Flourless Chocolate Marbled Cheesecake
Ingredients
For the cheesecake batter:
- - 8 oz organic cream cheese softened
- - 1/3 cup organic cane sugar
- - 1 large egg
- - 1 teaspoon organic vanilla extract
- - a pinch of real salt
For the chocolate batter:
- - 10 ounces bittersweet 60%-85% cacao chocolate, chopped
- - 5 ounces 10 tablespoons butter, chopped
- - 3 large eggs
- - 1/3 cup organic cane sugar
- - 1 tablespoon espresso or very strong coffee
- - 1 teaspoon organic vanilla extract
- - a pinch of real salt
Instructions
-
Preheat oven to 300 degrees F (149 C). Butter a 9-inch cake pan and line the bottom with a round of unbleached parchment paper.
To make the cheesecake batter:
-
In a medium-large mixing bowl, beat the cream cheese with a hand mixer until it doesn't have any lumps. Add the sugar, egg, vanilla, and salt and mix just until incorporated (if you beat too long the cheesecake will be too airy).
To make the chocolate batter:
-
In a double boiler (or a heat-proof bowl set over a bowl of simmering water), melt the chocolate and butter. Remove from heat and allow to cool a bit.
-
Place the eggs, sugar, espresso, vanilla and salt in the bowl of a stand mixer fitted with the whisk attachment. Beat on high until the eggs are pale and thick, about 3-4 minutes. Turn the mixer down to low and slowly drizzle in the melted chocolate and butter. Mix just until well combined.
-
Pour a little over half of the chocolate batter into the prepared cake pan. Alternated between dolloping spoonfuls of the cheesecake batter and the remaining chocolate batter. Gingerly swirl the cake batters together with a knife. Tap the cake pan on the counter to even out the surface.
-
Bake in preheated oven until a toothpick inserted about 2 inches from the edge comes out with moist pieces of the cake sticking to it. You don't want the cake to still be liquid, but you definitely don't want to over-bake it and dry it out. The edges will start to peel away from the side of the pan. This should take about 40-45 minutes. Start checking at 35 minutes. DON'T BAKE IT TOO LONG.
-
Remove from oven and allow to cool to room temp on a wire cooling rack. Run a knife around the edge of pan and flip the cake out onto a plate. Flip it back over onto your serving plate. You can serve it room-temperature or chilled.
-
You can freeze this cake, well-wrapped, for up to a month.
Recipe Notes
NOTE: I cut the sugar in the cheesecake batter in half. It was the perfect amount of sweetness for me, but if you have a sweet tooth you might want to increase it slightly (the original recipe called for 1/2 cup).
Adapted from Fine Cooking
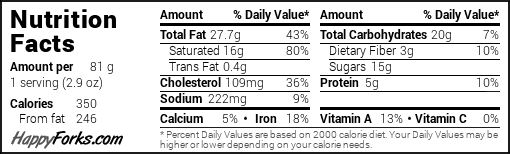
Note: The daily value is calculated from 1/12 of the cake.
Updated on August 31, 2022
SamQ
Wednesday 12th of June 2019
I’ve made several this times since your first posting, always for a special occasion and it never fails to impress. Glad a search led me here! It’s great for the holidays, frozen ahead and defrosted in the morning. Sometimes I serve it with a simple raspberry sauce too. Yummy!
Erica Kastner
Thursday 13th of June 2019
Thank you so much for your review! This is definitely one of our all-time favorite desserts. :) Great idea to serve with a raspberry sauce! ❤
Top 10 Posts of 2017 - Buttered Side Up
Saturday 30th of December 2017
[…] 1) Flourless Chocolate Marbled Cheesecake – this is an all-time favorite dessert for our family. So decadent! […]
Erica Lea
Monday 17th of April 2017
So glad you liked the cake, Karen! It's one of my all time favorites. :)
Karen S. Adams
Saturday 15th of April 2017
Made this cheesecake for my friends and not a single slice was left!!!There was a slight argument over the last slice to be totally honest. I'm definitely making three for for upcoming holidays :D
Erica Lea
Tuesday 7th of February 2017
Oops...sorry! :D I know what you mean - sometimes I want to make a dessert, but it's so much for our little family to eat up! Freezing is a great idea.