Learn how to make a pumpkin pie with a graham cracker crust with this easy recipe and tutorial! Perfect to accompany Christmas or Thanksgiving dinner!

I am not ashamed to admit that my favorite Thanksgiving pie is pumpkin.
But I am perhaps a tiny bit ashamed to admit that traditional pie crust and I don’t always agree. Don’t get me wrong, I love it dearly. But sometimes I just can’t be bothered to slave over one.

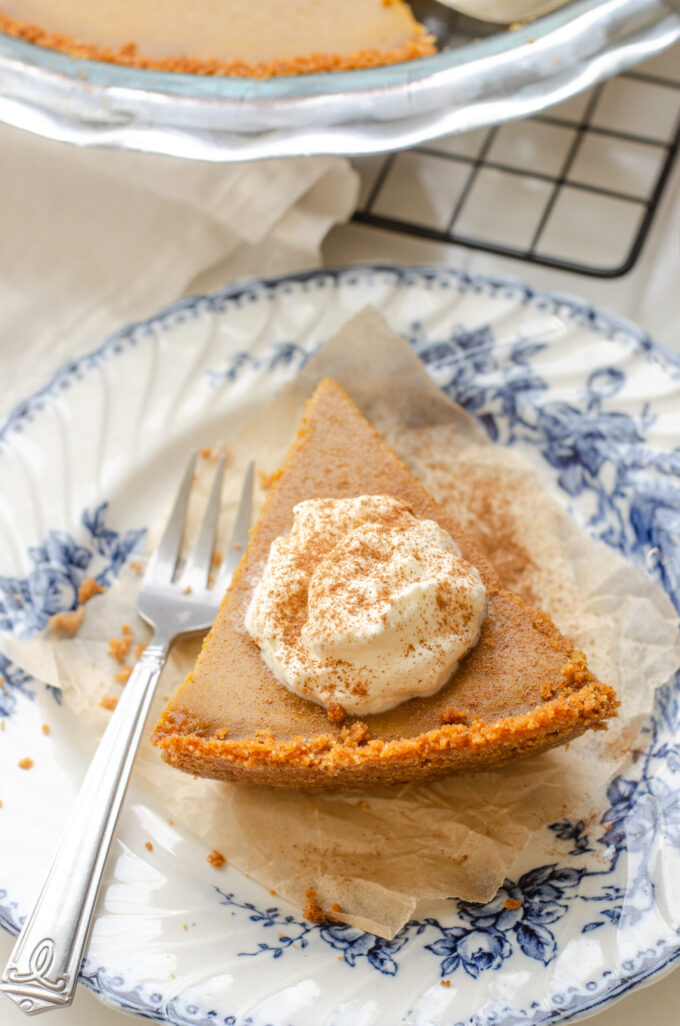
Thankfully there is such a thing in this world as graham cracker pie crusts.
They are SO much easier to pull off than regular pie crusts, and they’re delicious to boot!
And I’m happy to report that a graham cracker crust suits pumpkin pies very well. In fact, this might be my new standard way to make a pumpkin pie!
And thanks to the crust, this may be the easiest pumpkin pie recipe you’ll ever make!
Okay, let me show you how to put a graham cracker crust pumpkin pie together!
Video Tutorial
He’s a video overview of the process in case you prefer to learn by watching a demo! The full written tutorial (with helpful tips) and printable recipe are below!
Ingredient Notes:


For the Graham Cracker Crust Recipe:
This is such a simple graham cracker crust recipe, but let’s go over the ingredients in a little more detail:
- Graham Crackers: I used honey graham crackers to test this recipe, but I’m sure cinnamon would be lovely as well!
- Butter: Salted butter is my recommendation for the best flavor.
- Sugar: To sweeten up the crust a bit, you’ll be adding some sugar. I used organic cane sugar.
- Salt (optional): I like a salty crust, so I added a pinch to the crust even though I used salted butter. You can leave this out if you prefer a less salty crust.

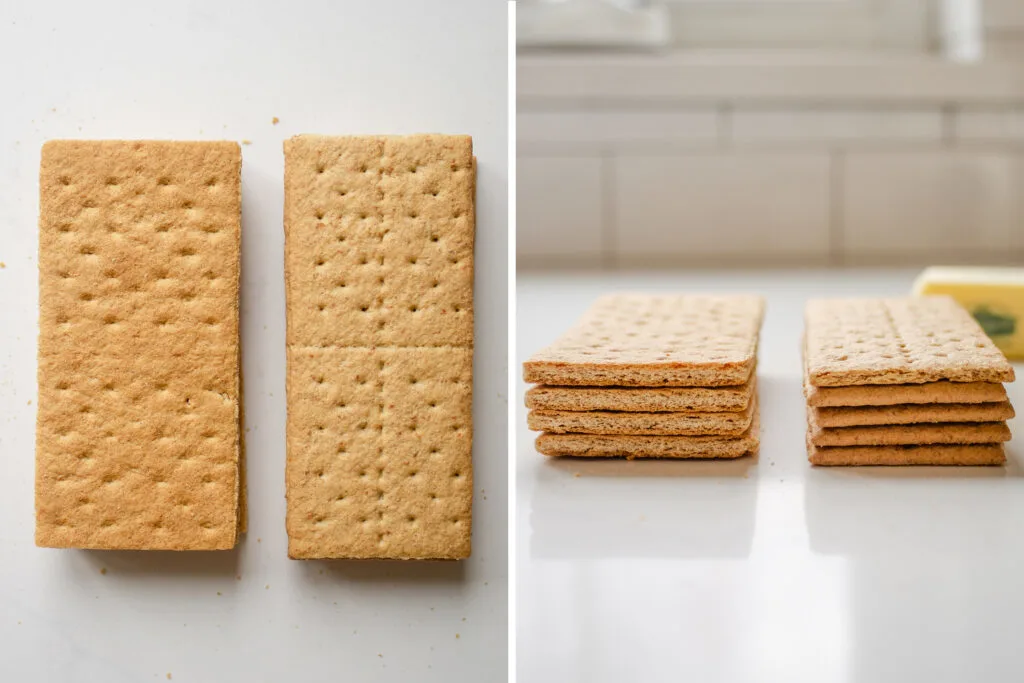
A quick note about graham cracker brands: As you can see from the photo above, the size of the actual graham crackers can vary in width and thickness from brand to brand. The stack of 4 graham crackers on the left is the same height as the stack of 5 graham crackers on the right.
Because of this, I gave a weight measurement as well as the number of graham crackers so you can ensure that you’re close to the amount needed for this recipe without pulling out a measuring cup.

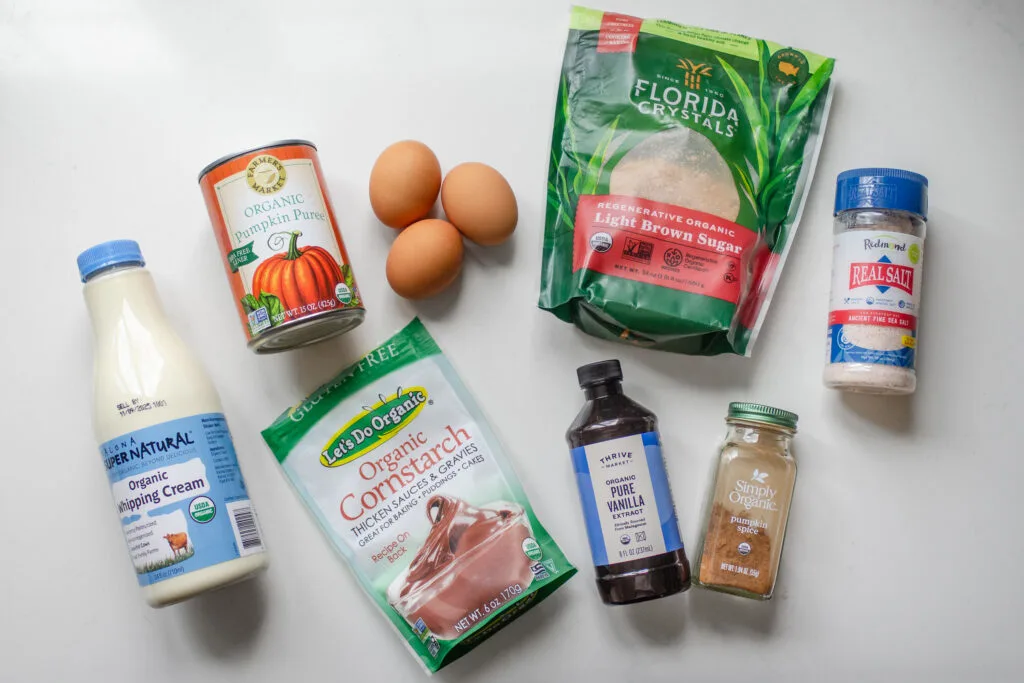
For the Pumpkin Custard:
- Pumpkin Purée: Please make sure you’re purchasing pure pumpkin puree, NOT pumpkin pie filling. They are not the same thing! We’ll discuss pumpkin puree a little more below.
- Heavy Cream: I developed this recipe to use heavy cream so you don’t have to purchase a can of sweetened condensed or evaporated milk. Please use heavy cream to ensure a rich, creamy pumpkin pie filling.
- Eggs: Please use large eggs!
- Pure Vanilla Extract: I love the flavor of vanilla in pumpkin pie, so I added a whole tablespoon!
- Cornstarch: I find that adding a tablespoon of cornstarch helps to improve the flavor and texture of the final pie.
- Pumpkin Pie Spice: You can use a premade spice blend, or mix together my Homemade Pumpkin Pie Spice. I highly recommend choosing a blend that contains at least ginger and nutmeg along with the cinnamon base. If you like a really spicy pumpkin pie, you can add a little ground black pepper and/or cardamom.
- Salt: A little salt helps to draw out the other flavors.
- Brown Sugar: The brown sugar adds a nice rich, caramel flavor. You can substitute granulated sugar if you prefer.
A Note About Pumpkin Puree:

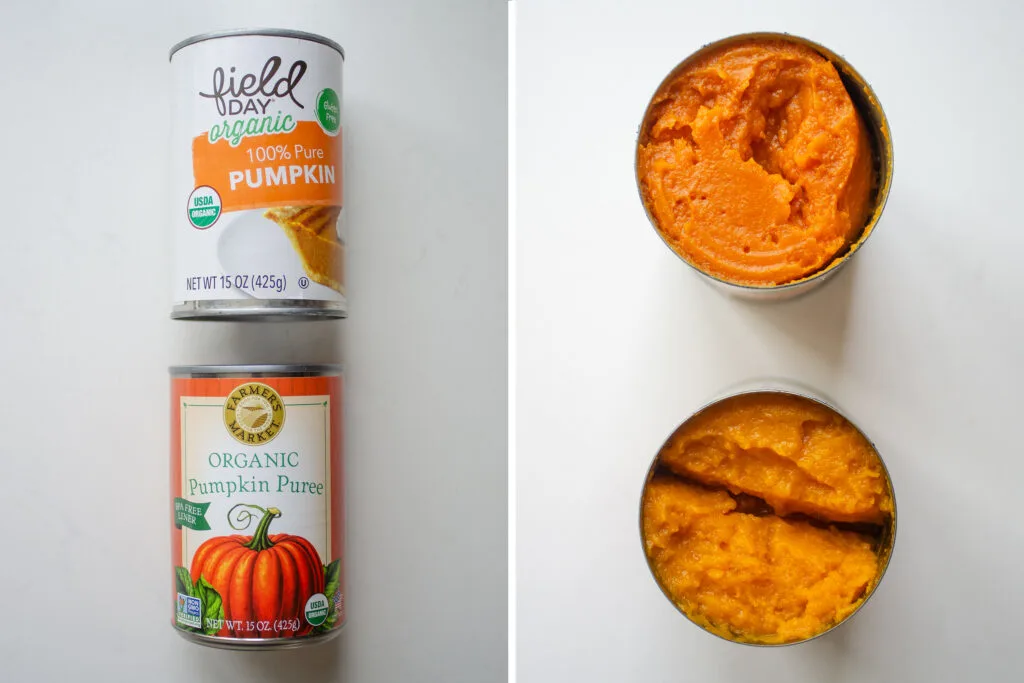
One important thing to note is that different brands of pumpkin puree can have differing water contents. And it can even vary from can to can!
I have personally found that the Field Day Organic pumpkin puree is a bit drier than the Farmer’s Market pumpkin puree. It’s also a bit darker, so I assume they use different varieties of squash/pumpkin.
If your can of pumpkin puree seems particularly watery, make sure to reduce the amount of heavy cream a bit to compensate.
And if you use homemade pumpkin puree, make sure to pay attention to how watery it is!
Step-by-Step Instructions:
We’re going to begin by par-baking the crust, so let’s work on that first.
Preheat your oven to 350 degrees Fahrenheit.

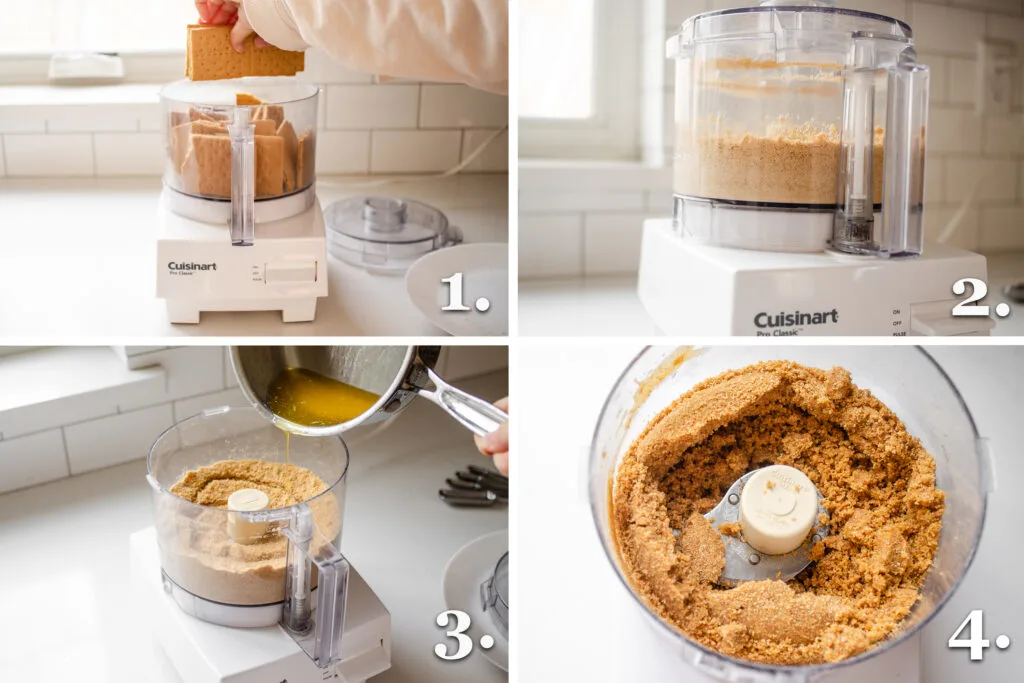
- Break the graham crackers in half and place them in a food processor. Add the sugar and (optional) salt.
- Pulse until fine crumbs form.
- Pour the stick of melted butter over the graham crack crumbs.
- Pulse until everything comes together and is evenly mixed.
This can also be done in a large mixing bowl by hand, but it’s so much easier to crush the graham crackers with the food processor.
If crushing by hand, you can either press the graham crackers against the bottom/sides of the bowl with a cup, or place them in a large Ziploc bag and roll with a rolling pin.

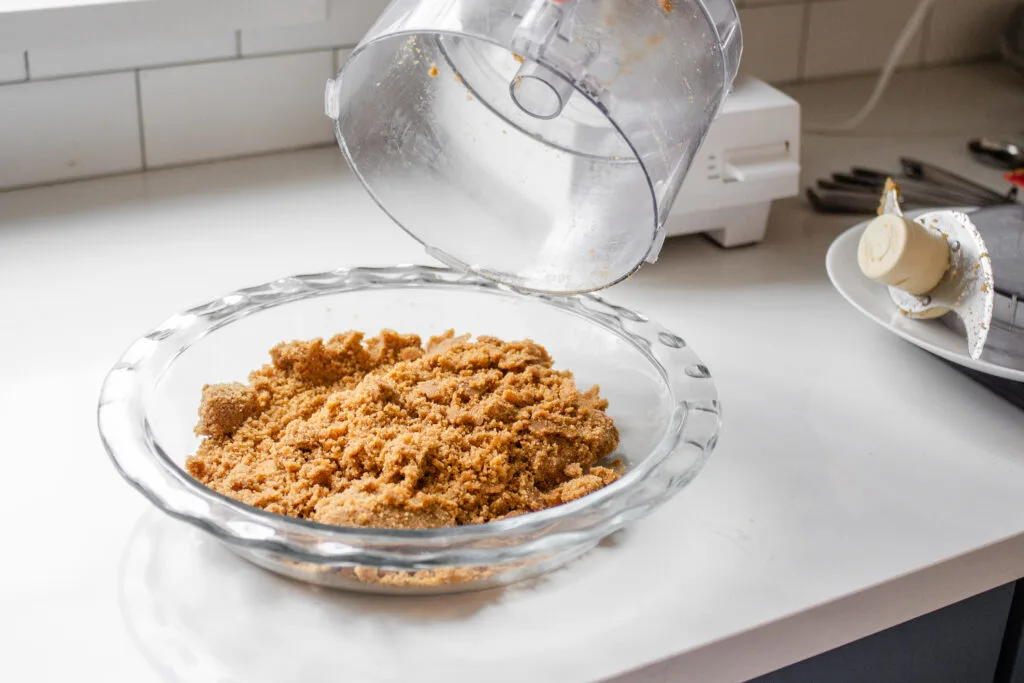
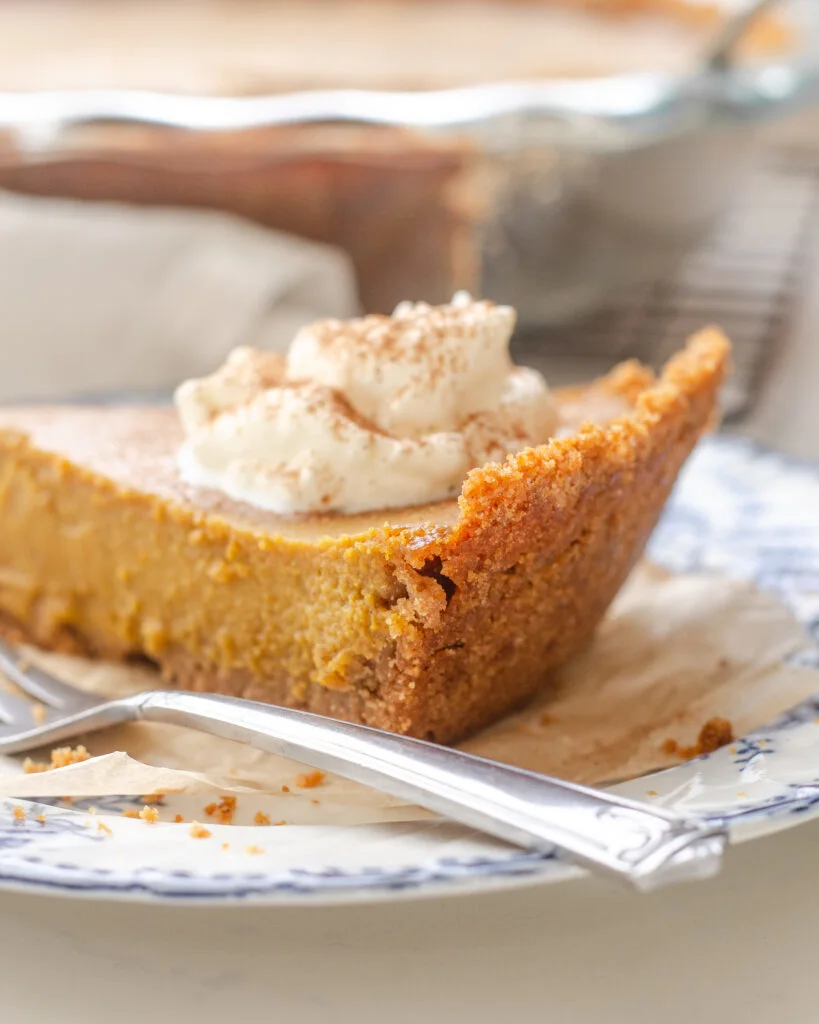
Dump the buttery graham cracker crust mixture into a deep dish pie pan.
This can also be made in a regular pie pan, but you may need to bake some of the crust and custard in a couple of ramekins if the crust is too thick and there’s too much filling for your pie dish.

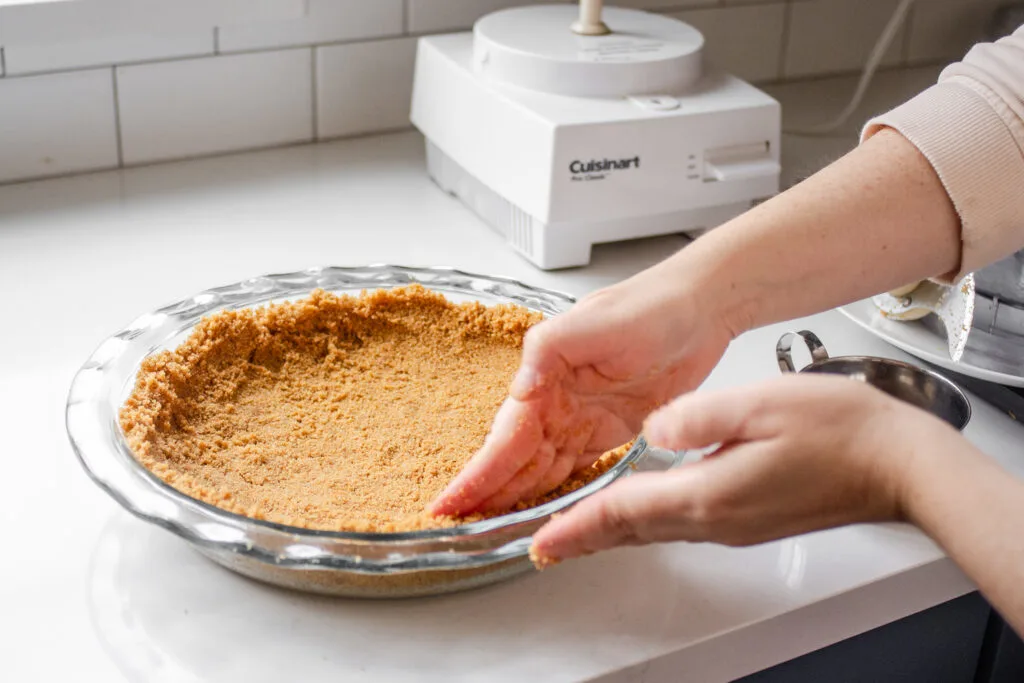
Now evenly distribute the crust in the pie pan and press it very firmly along the sides and into the bottom.

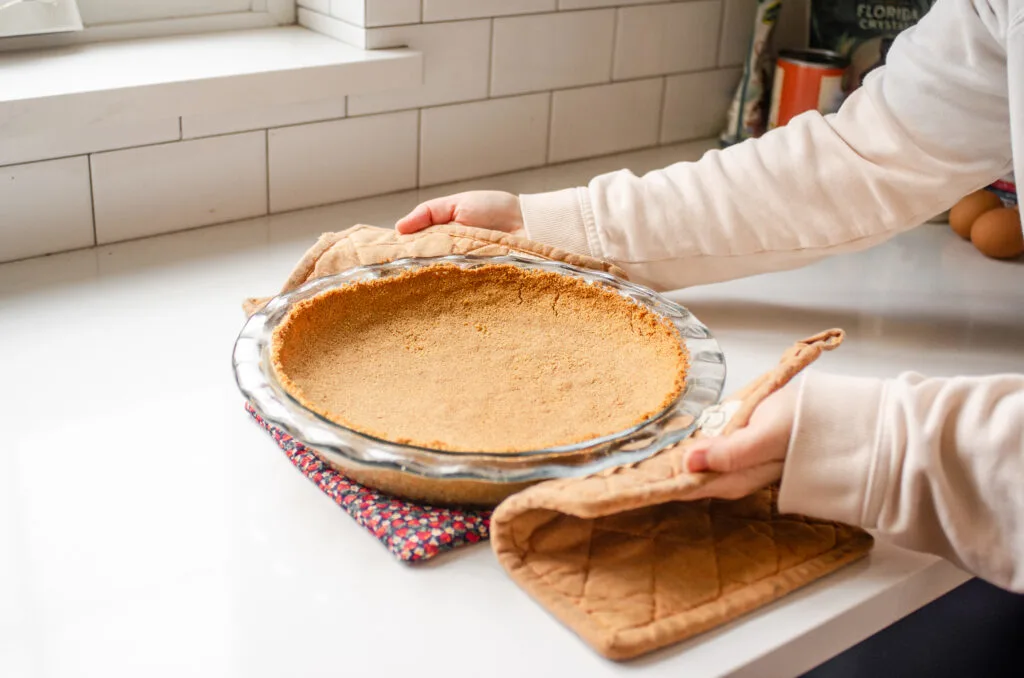
Bake the pie in the preheated oven for 10-12 minutes, or until the crust is set and just starting to brown.

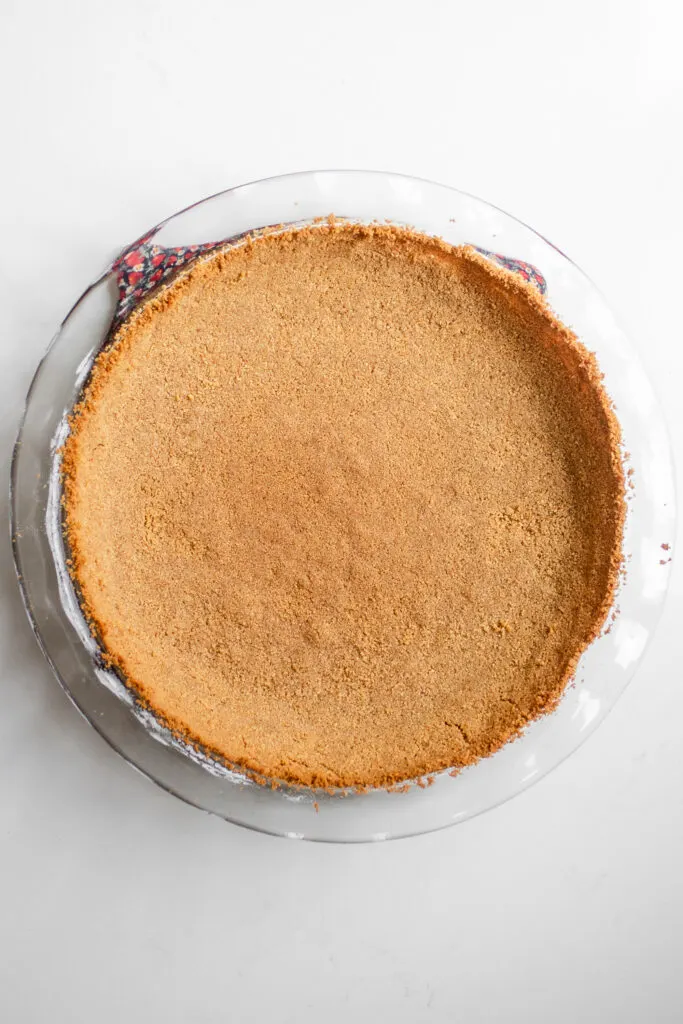
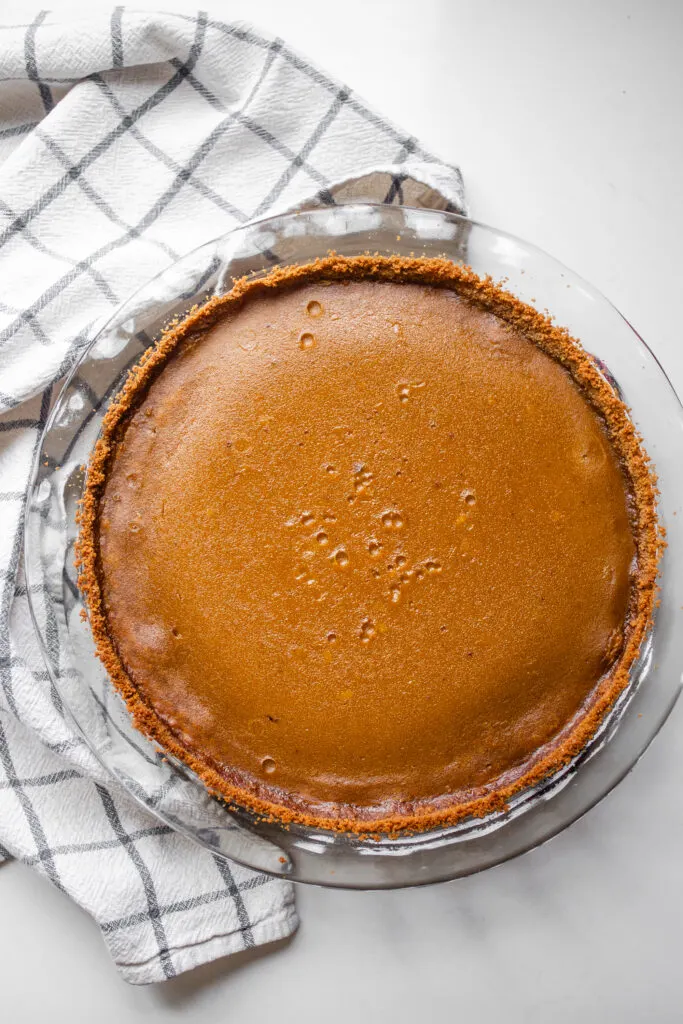
Ah, look how lovely! A scrumptious homemade pie crust without as much effort/headache!
Allow the crust to cool a bit while you make the custard.
Turn the oven temperature up to 425 degrees Fahrenheit.
Making the Custard:

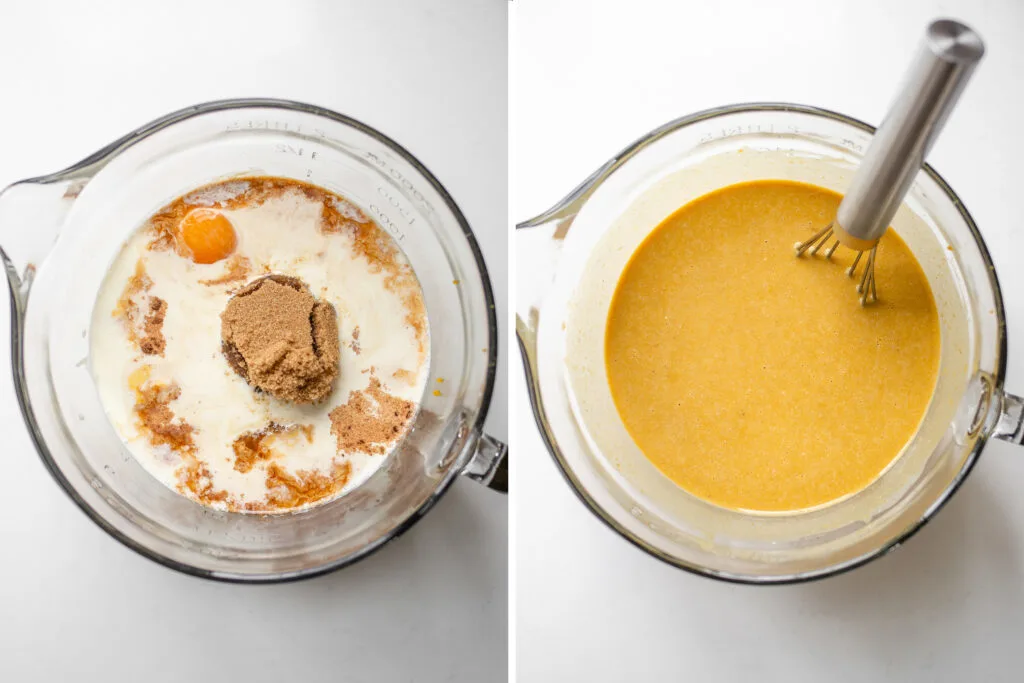
Place all of the custard ingredients in a large bowl or measuring cup.
Whisk until completely smooth.

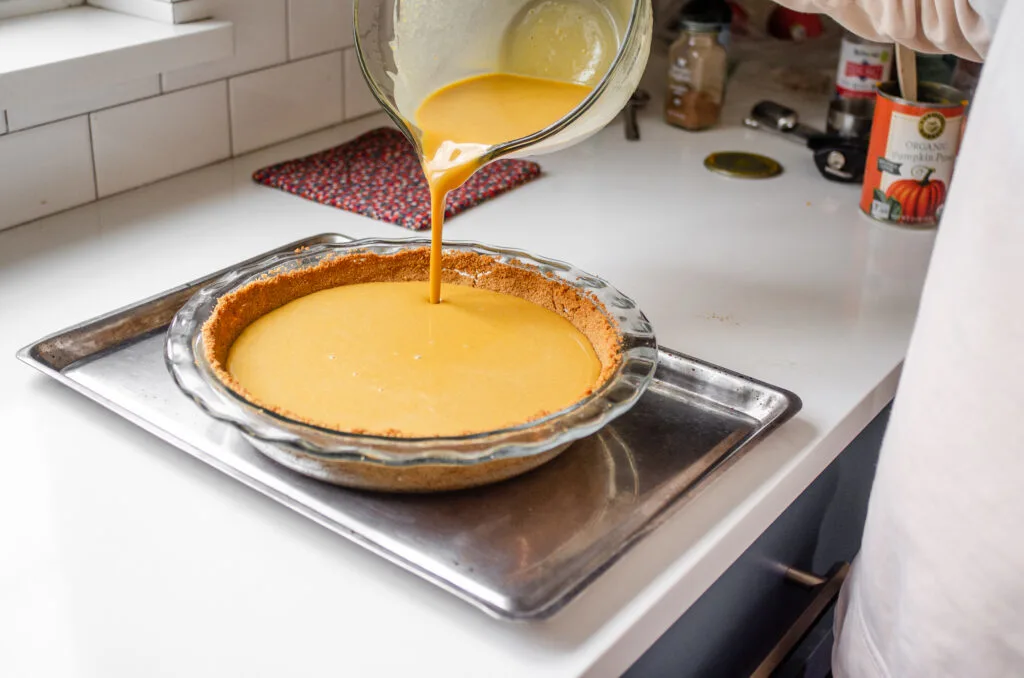
Place the pie pan on a rimmed baking sheet.
Pour the custard into the cooled crust.
You shouldn’t have any problems with overfilling the crust if you use a deep dish pie pan. But if you had to use a smaller pan, make sure to not over-fill the crust. Otherwise the pumpkin filling could spill over the sides of the pan and burn.
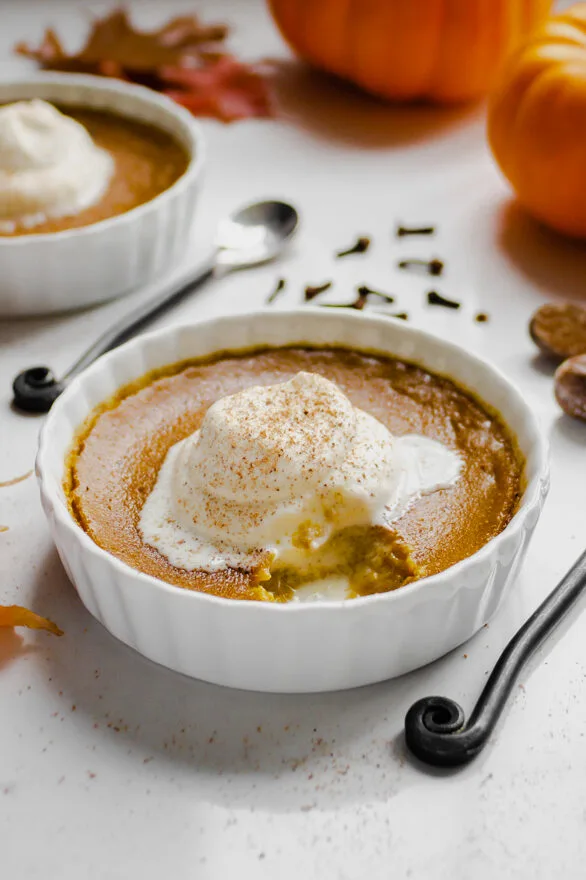
If you have too much custard, bake it like my Baked Pumpkin Custard!

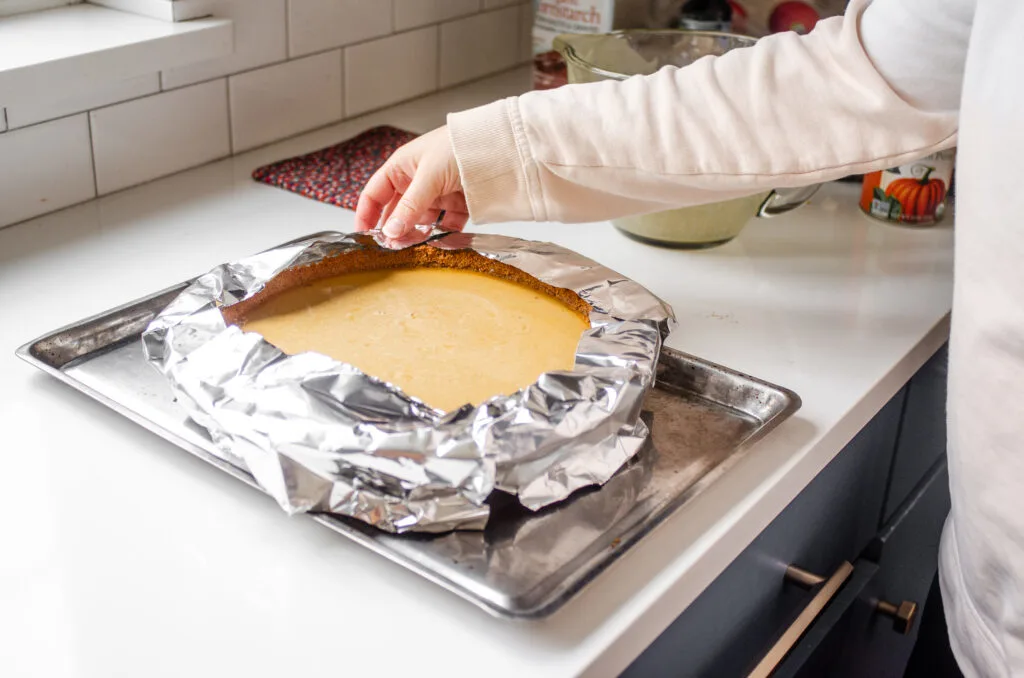
I highly recommend either using a pie crust shield or strips of aluminum foil to prevent the crust from burning. Graham cracker crusts tend to get really dark quickly in my experience.

Bake at 425 degrees Fahrenheit for 15 minutes. Then turn the oven down to 350 degrees Fahrenheit and continue to bake for 25-40 minutes.
Make sure to not over-bake!
How to Tell When a Pumpkin Pie is Done Baking:
Let’s go over a few ways you can determine if your pumpkin pie is finished cooking:
The Wiggle Test:
For this method, simply give the pie pan a wiggle. The edges of the filling should be set, but the middle should still be a bit wobbly or jiggly.
You don’t want it completely wet in the middle, but not completely firm either! If you bake until the center is fully set, your pie will be over baked.
The Knife Test:
Another way to test for doneness is to perform the knife test: Insert a knife in the center of the pie. If the knife comes out clean, your pie is done baking!
Now the knife test will leave a hole in the middle of the filling, but in the grand scheme of things it doesn’t really matter. You can always cleverly slice around it and none will be the wiser!
The Temperature Test:
The theoretically most accurate way to test for doneness is to use an instant-read thermometer or probe thermometer. You should take the pumpkin pie out of the oven when it registers an internal temperature of 175 degrees Fahrenheit (79.5 degrees Celsius) in the center.

Cooling and Chilling:
After the pie is perfectly baked, remove it to a wire rack to cool to room temperature.
Then cover it with either plastic wrap or parchment paper + foil and transfer to the refrigerator to chill for at least 2 hours before serving.
If you don’t mind (or even prefer) a softer pumpkin pie, you don’t have to chill before serving. But it will be much firmer and properly set if you chill first.
Serving:

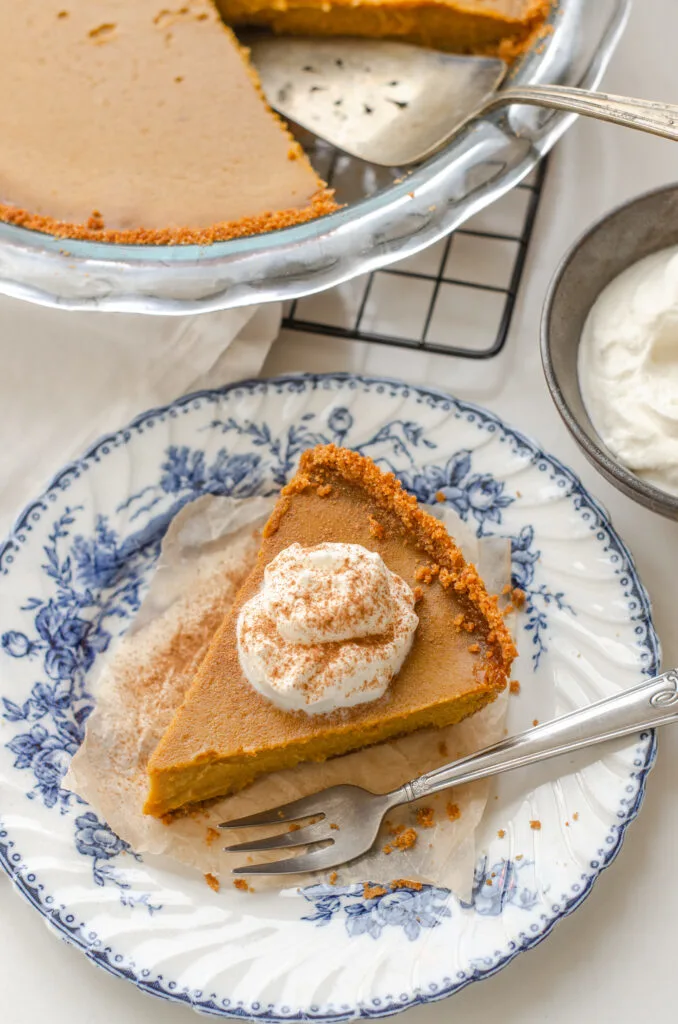
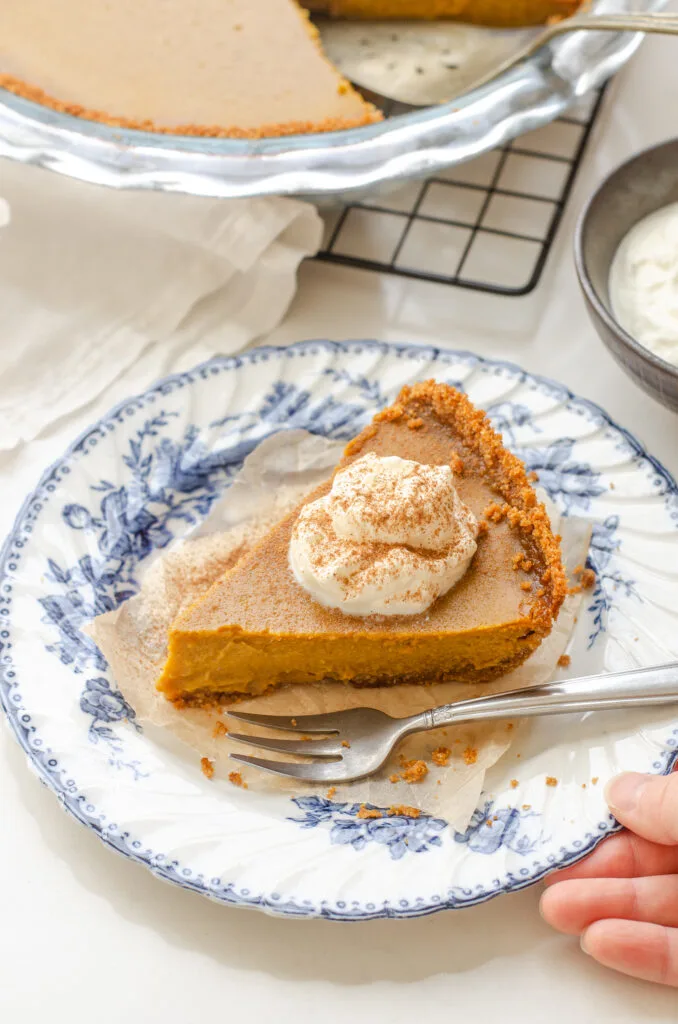
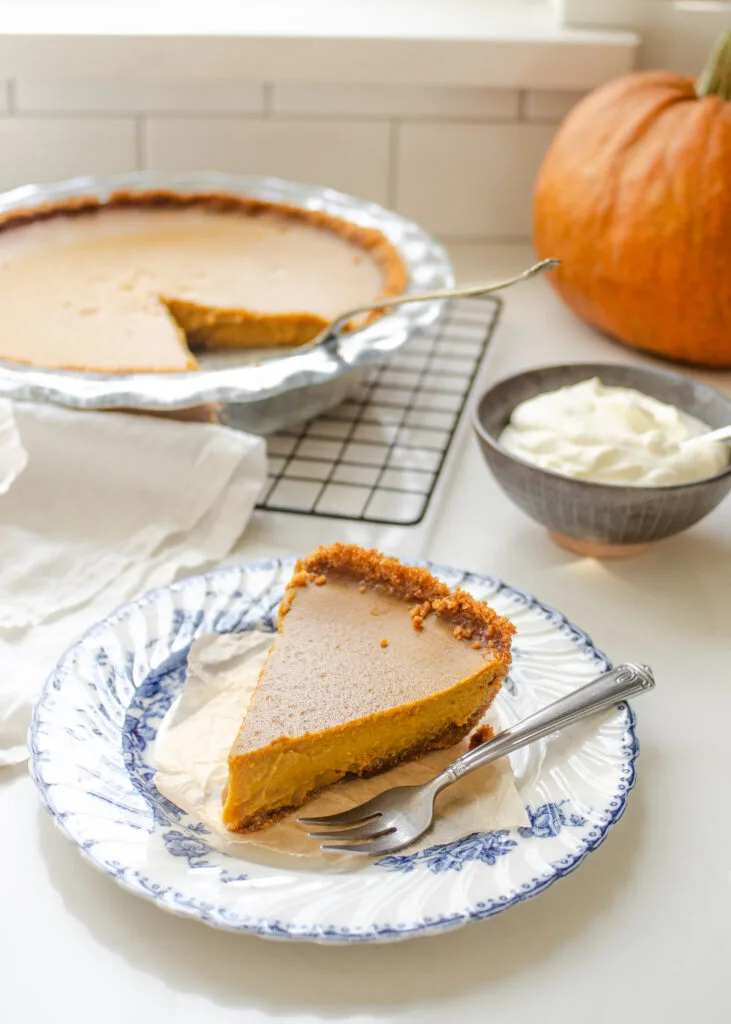
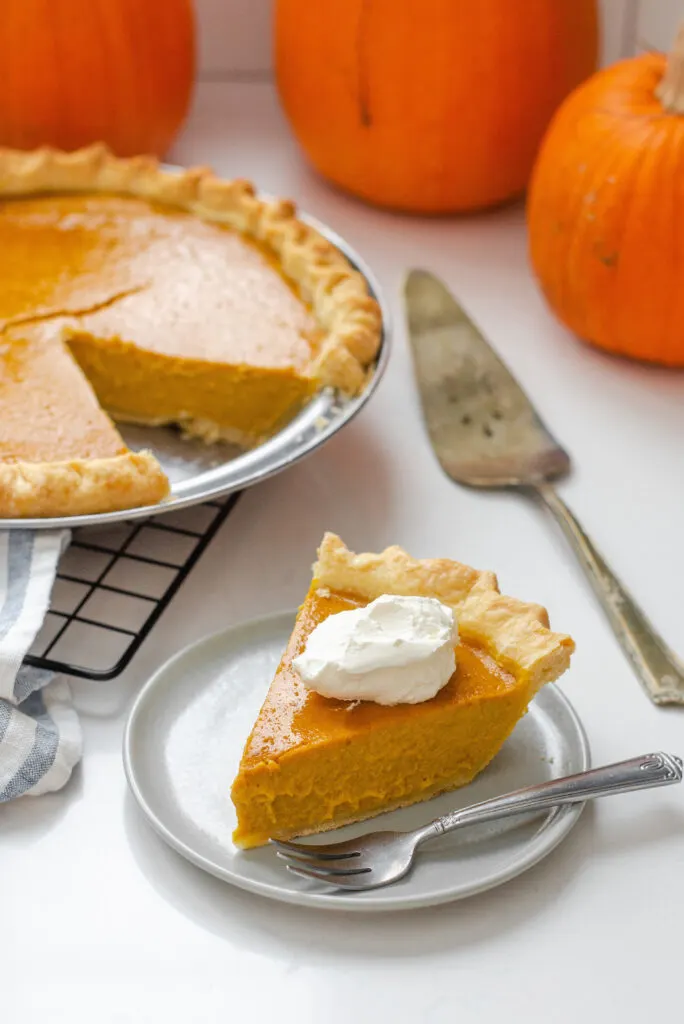
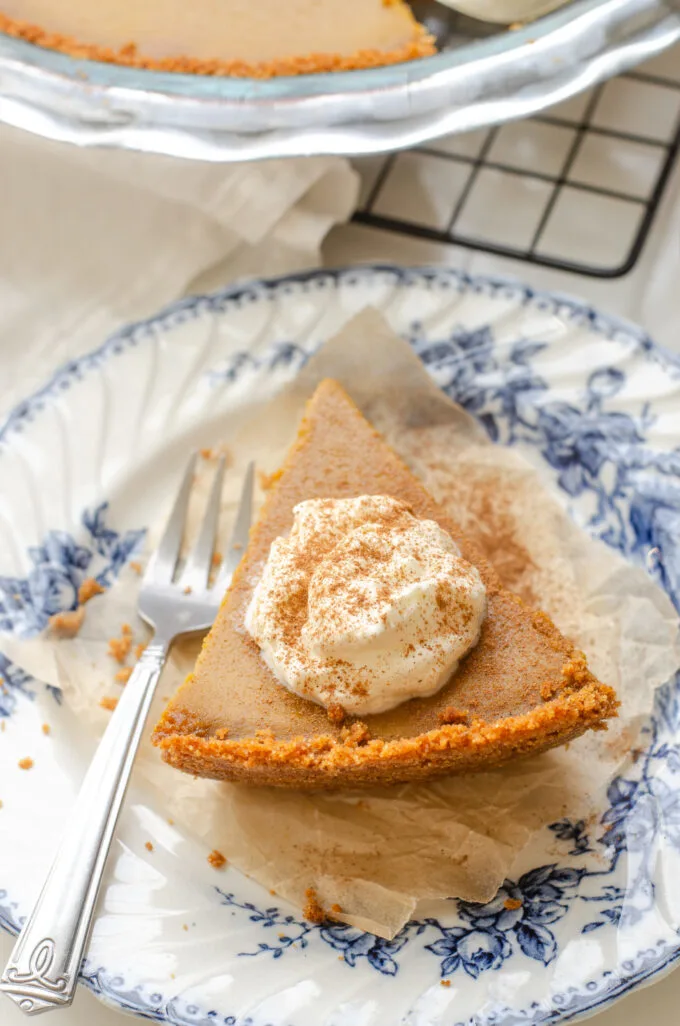
Of course you can serve this as-is. But it’s slightly sinful to serve a pumpkin pie without whipped cream in my opinion.
If you have extra heavy whipping cream from the pie, it’s simple to make your own homemade whipped cream. But canned whipped cream is even easier!
Another option would be a scoop of good quality vanilla ice cream.


Storing:
If you have any leftover pumpkin pie, make sure to store it in the refrigerator in an airtight container. It will keep for 3-4 days if properly stored.
Common Pumpkin Pie Mistakes:
- Using pumpkin pie filling instead of pumpkin puree: While pumpkin pie filling is made with pumpkin puree, it is NOT the same thing as plain canned pumpkin puree. It has other added ingredients, so if you use that in this recipe it will NOT turn out.
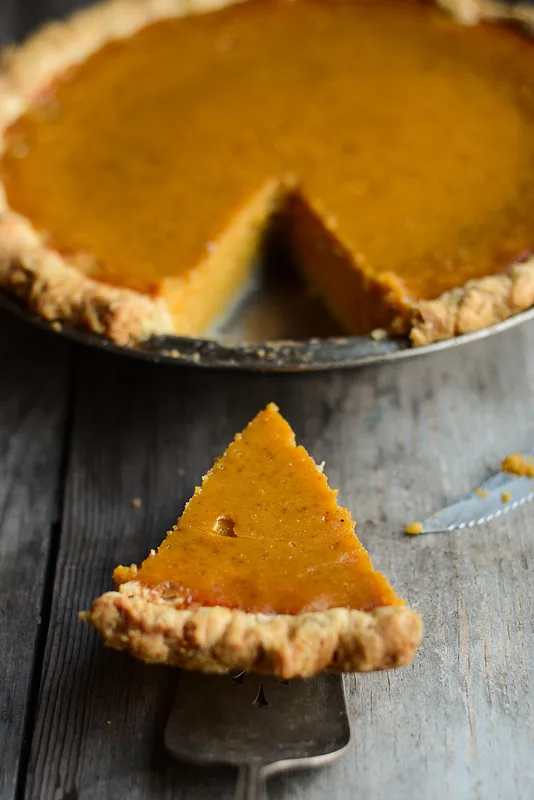
- Using Wet Pumpkin Puree: As mentioned above, different brands of pumpkin puree can vary wildly with their water content (see photos at the top of this post). If you open your can of pumpkin and it looks rather wet, you can reduce the amount of cream in the custard to compensate for the extra moisture.
- Over baking the pie: You don’t want to bake until the center is completely firm. It shouldn’t be wet, but you want it to be a bit wobbly still. See the section above about how to tell if a pumpkin pie is done baking.
- Using really old spices: To ensure a punchy, delicious pie flavor, you need to use pungent spices since this pie relies heavily on them. If your spices are years old, you might be disappointed in how your pie tastes. To avoid this, make sure to freeze your spices at the end of the season to keep them fresh for next year! Or only purchase small amounts at a time.
- Not putting the pie pan on a baking sheet: To ensure that you don’t have any filling drip onto the bottom of your oven (and create a burning mess), you need to place the pie pan on a rimmed baking sheet. This also makes it easier to transfer the pie to and from the oven.
- Not allowing the pie to chill before serving: The final mistake homemade pumpkin pie bakers tend to make is not popping their finished pie into the fridge to chill before slicing into it. The time in the fridge (at least 2 hours!) allows the pie to firm up and fully set. Now if you don’t mind a softer pie, you could chill for just an hour before serving, but it’s risky!


Frequently Asked Questions:
- Should you bake a graham cracker crust before filling? This is totally dependent on the individual recipe. For this particular recipe, you do want to bake the crust for around 10 minutes before pouring in the filling.
- Can I use a premade graham cracker crust? Yes, that’s totally fine! Just keep in mind that if your store-bought graham cracker crust isn’t a deep dish crust, you may need to bake some of the custard separately.
So that’s my easy pumpkin pie recipe! Make sure to check out my other pumpkin recipes below!
More Pumpkin Recipes


Recipe Card
Pumpkin Pie Recipe with Graham Cracker Crust
Learn how to bake a delicious and easy pumpkin pie with a graham cracker crust!
Ingredients
For the Crust:
- 14 graham cracker sheets (220 grams)
- 8 tablespoons salted butter, melted and cooled
- 3 tablespoons granulated sugar
- ⅛ teaspoon salt (optional)
For the Custard:
- 1 15-oz. can pure pumpkin puree (NOT pumpkin pie filling)
- 1 cup heavy whipping cream
- 3 large eggs
- 1 tablespoon pure vanilla extract
- 1 tablespoon cornstarch
- 2 teaspoons pumpkin pie spice
- ⅛ teaspoon salt
- ¾ cup packed brown sugar
Instructions
For the Crust:
- Preheat oven to 350° Fahrenheit (177° Celsius).
- Place the graham crackers, sugar, and salt in a food processor. Pulse until fine crumbs form. Pour the cooled butter over the crumbs and pulse until well combined. The crust should stick together a bit when pinched.
- Pour the crust into a deep dish pie pan. Evenly distribute the crumbs over the bottom and sides of the pan, and press firmly and evenly.
- Bake in the preheated oven for 10-12 minutes, or until the crust is set and beginning to brown. Set aside to cool for a bit while preparing the custard filling.
For the Custard:
- Turn the oven temperature up to 425° Fahrenheit (218° Celsius).
- Place all custard ingredients in a large mixing bowl or measuring cup. Whisk until well combined.
- Place the crust on a rimmed baking sheet. Pour the custard into the cooled crust. Place a pie crust shield or strips of aluminum foil around the crust.
- Bake at 425° F for 15 minutes, then lower the temperature to 350° Fahrenheit (177° Celsius) and continue to bake for 25-40 minutes, or until the edges are set but the middle is still a little wobbly. It should reach an internal temperature of 175° Fahrenheit (80° Celsius).
- Remove pie to a wire rack to cool. Once it reaches room temperature, cover well and transfer to the fridge. Chill for at least 2 hours before serving.
- Store any leftovers in an airtight container in the refrigerator for up to 3-4 days.
Recommended Products
As an Amazon Associate and member of other affiliate programs, I earn from qualifying purchases.


Nutrition Information:
Yield:
8Amount Per Serving: Calories: 423Total Fat: 22gSaturated Fat: 11.9gTrans Fat: 0.5gCholesterol: 121mgSodium: 336mgCarbohydrates: 53gFiber: 3gSugar: 34gProtein: 5g