
Sourdough Pull Apart Rolls
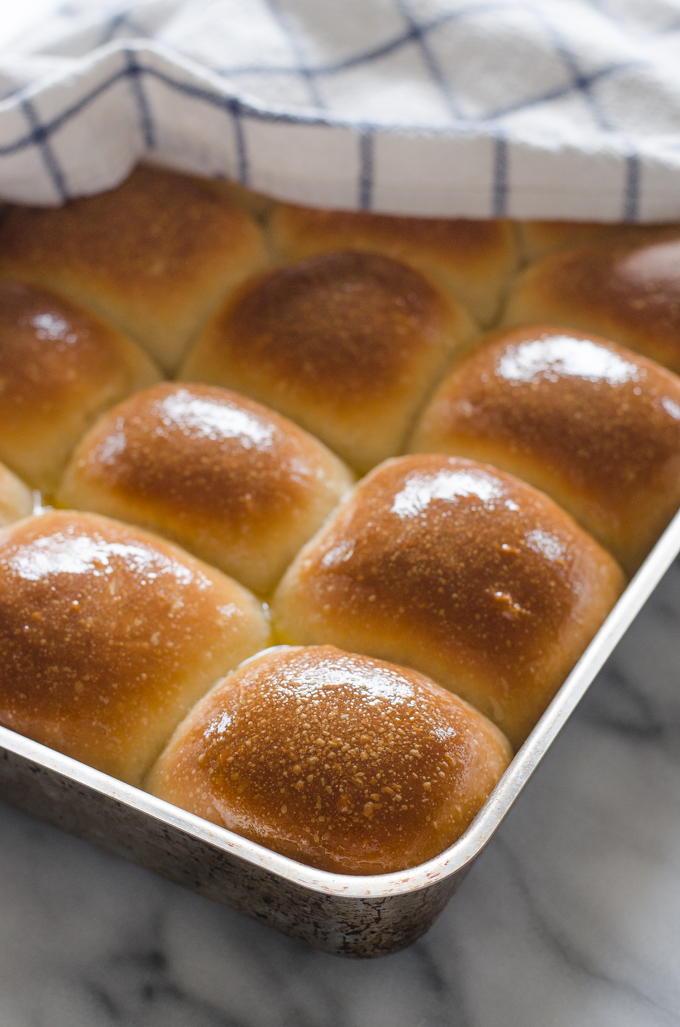
These sourdough pull apart rolls are soft and airy with a wonderful hint of tang.
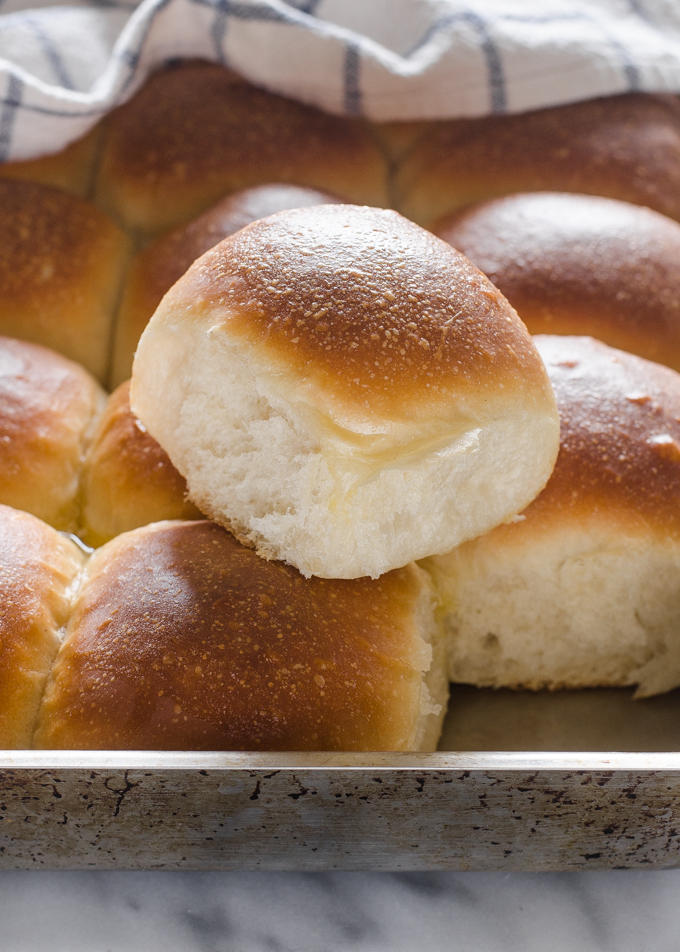

When I started baking with sourdough, I made a wonderful discovery: sourdough takes your favorite recipes to the next level. It enhances the flavors and textures of most baked goods. For example, sourdough pie crust is so flaky and delightfully tangy. Sourdough sandwich bread has a depth of flavor that just isn't there with regular yeast bread. Sourdough waffles are simply sublime.
The same is true for these sourdough pull apart rolls. They're super soft and fluffy, and that hint of tang just adds an extra something special. These are perfect for all of your holiday needs (Thanksgiving, Christmas, Easter, you name it!).
Okay, now let me show you how to make these rolls!
How to Make Sourdough Pull Apart Rolls
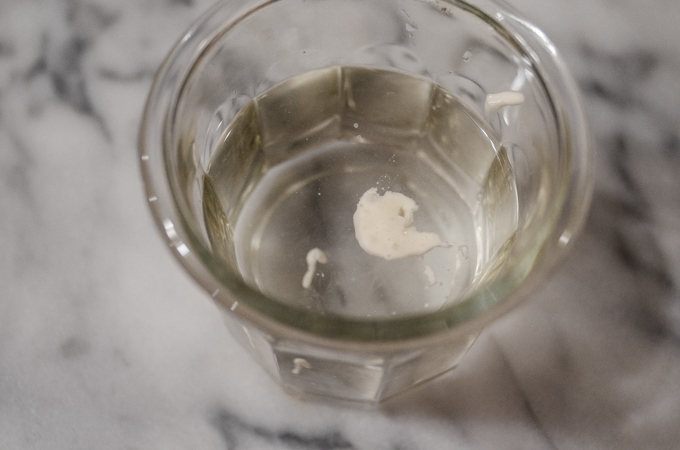
Firstly, you want to ensure that your sourdough starter is ready to go. About 8 hours before you plan on mixing together the dough for these rolls, feed your sourdough starter. I keep mine at 100% hydration, which means that I feed it with equal weights, not volumes, of flour and water. If you're new to sourdough baking, you can always purchase a starter online, or refer to my How to Make a Sourdough Starter From Scratch post.
You know when your starter is ready when it doubles in volume and passes the float test. Drop a small amount of your starter into a cup of water. So if it floats, you're good to go!
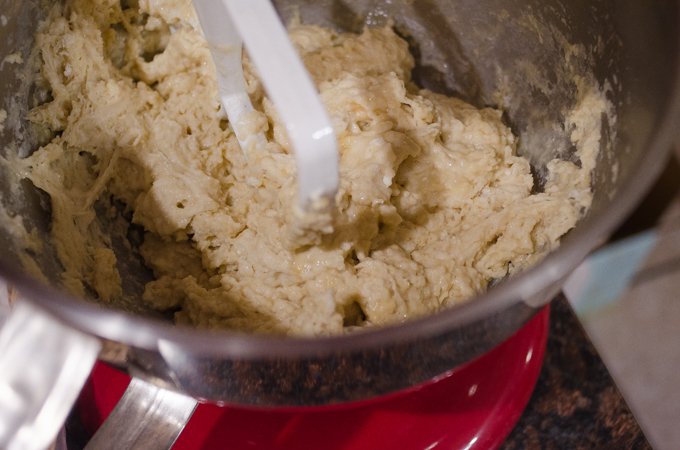
Now it's time to mix up the dough for these sourdough pull apart rolls!
Place all of the ingredients for the dough in the bowl of stand mixer fitted with a paddle attachment. Mix until a shaggy dough forms.
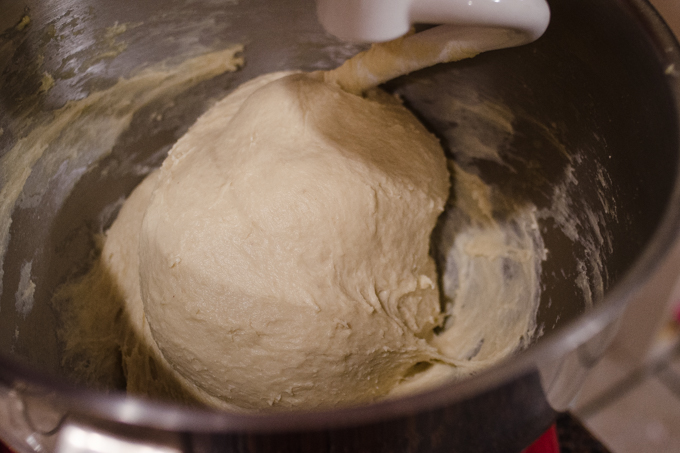
Switch to the dough hook and knead on medium-low speed until the dough is quite elastic, about 10-15 minutes.
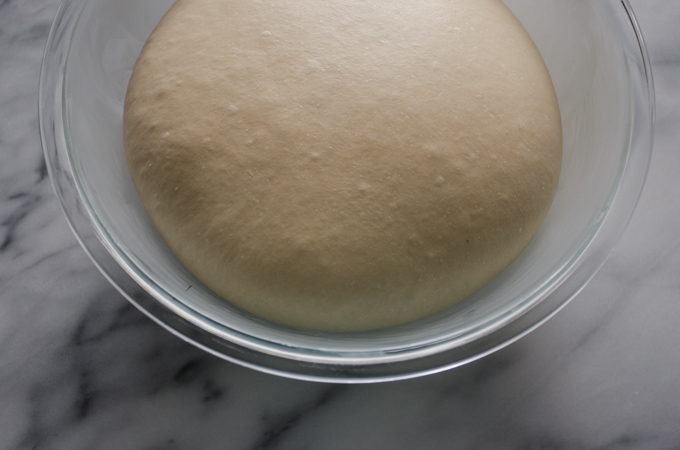
Transfer to a buttered bowl and allow to rise at room temperature for 8-12 hours. You want it to double in bulk. But how long this takes will vary depending on how active your starter is and how warm your kitchen is.
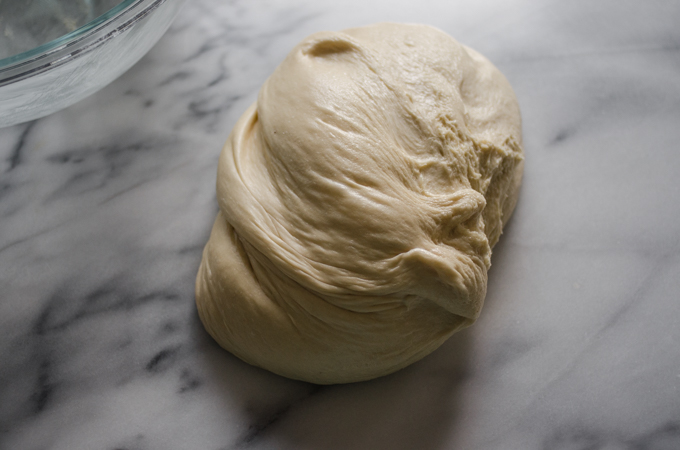
Plop the dough out onto a work surface.
Forming the Dough Into Rolls
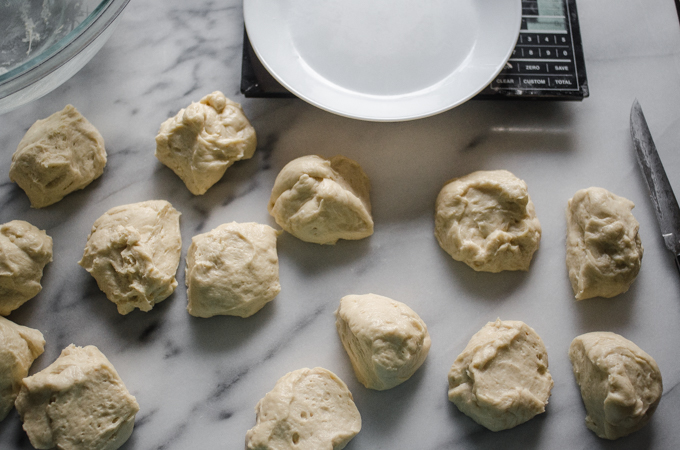
Divide into 16 equal pieces. I find it handy to weigh all of the dough first, divide that by 16, and portion out the pieces that way. For example, each of these pieces weighed about 64 grams.
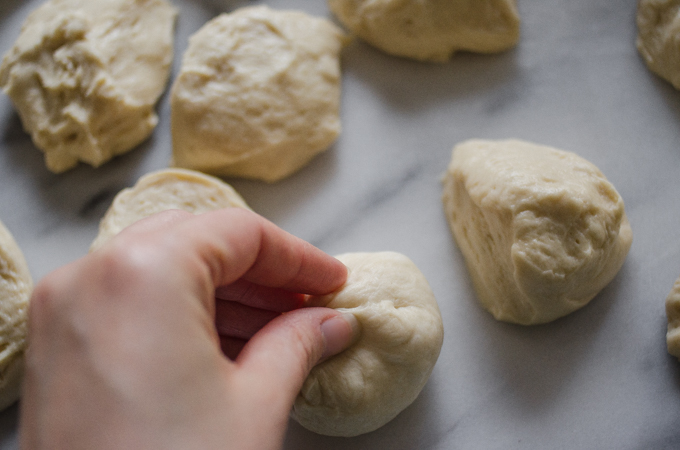
To shape these sourdough pull apart rolls, grab the corners of a piece of dough. Pull them towards the center.
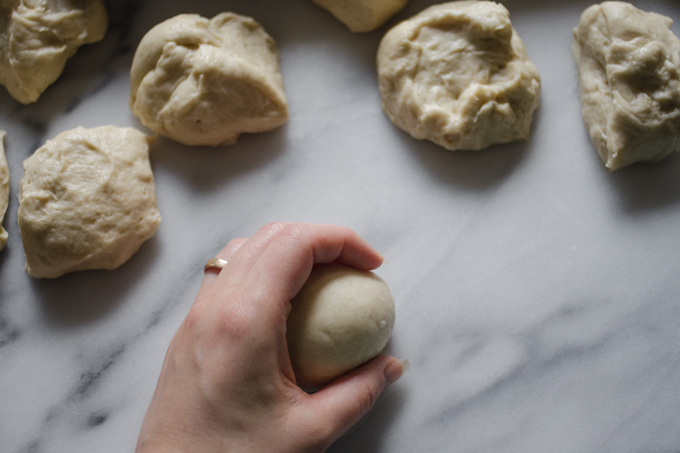
Flip the ball over so it's seam side down. Roll the dough on an ungreased work surface, creating surface tension.
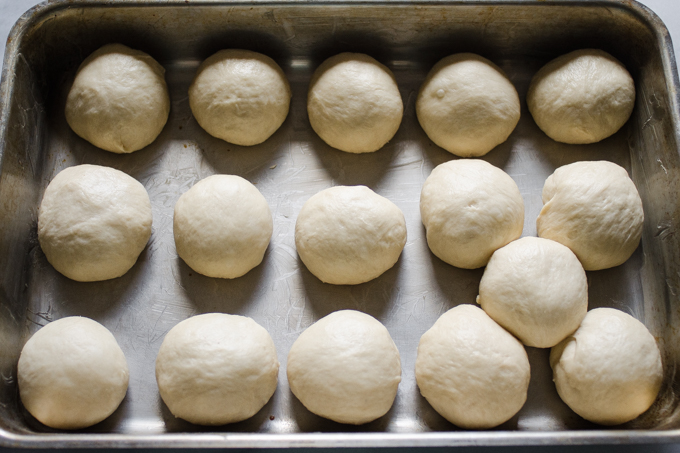
Next, place the formed balls into a buttered 13x9-inch baking dish. As you can see, I decided to squish one of the balls in between 4 others. If you want them to fit in the pan perfectly, you can form them into 15 instead of 16 rolls. Then you can arrange them in the pan with 3 buns going the short way and 5 buns going the long way.
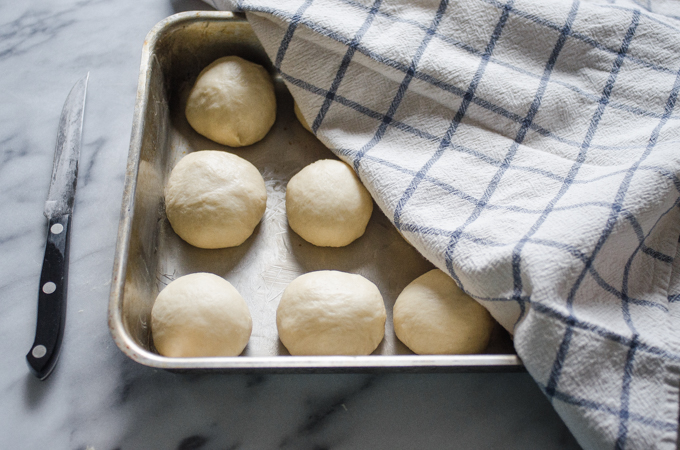
After that, cover them with a tea towel and let rise for 6-8 hours.
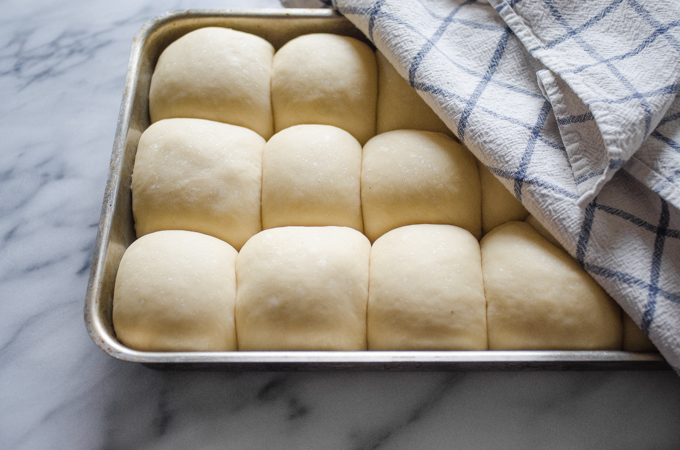
You want the buns to be quite puffy and fill the pan.
Baking/Serving Sourdough Pull Apart Rolls
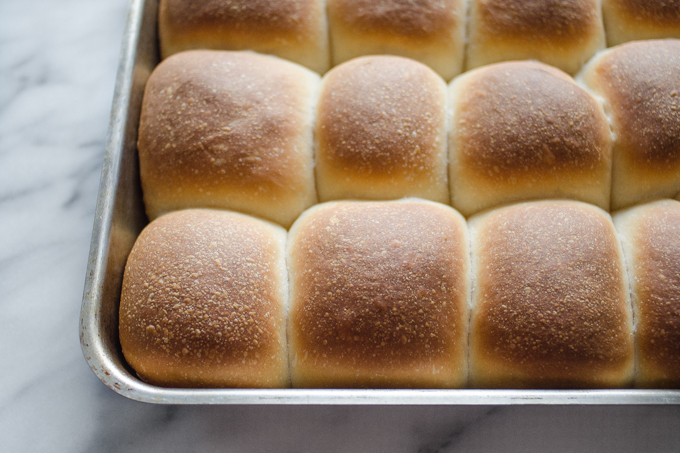
Bake in a preheated 375° F oven for 20-25 minutes, or until deep golden brown. One challenge with sourdough is ensuring that it gets baked enough. I like to insert an instant-read thermometer into the center of one of the buns. It should register 200° F.
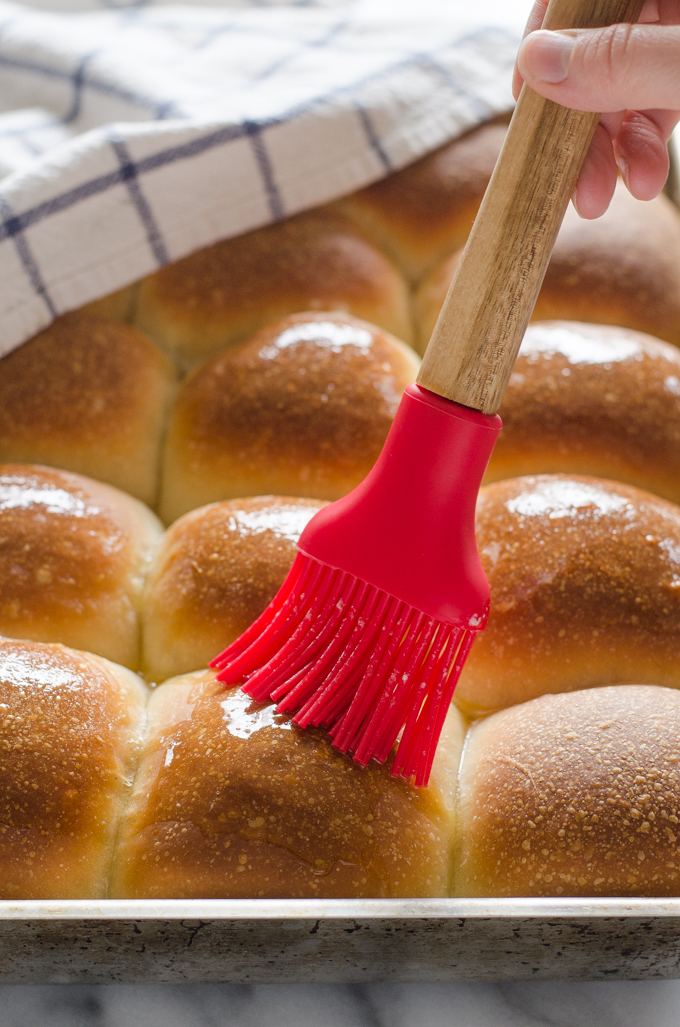
After that, remove the sourdough pull apart rolls from the oven and brush the tops with melted butter.
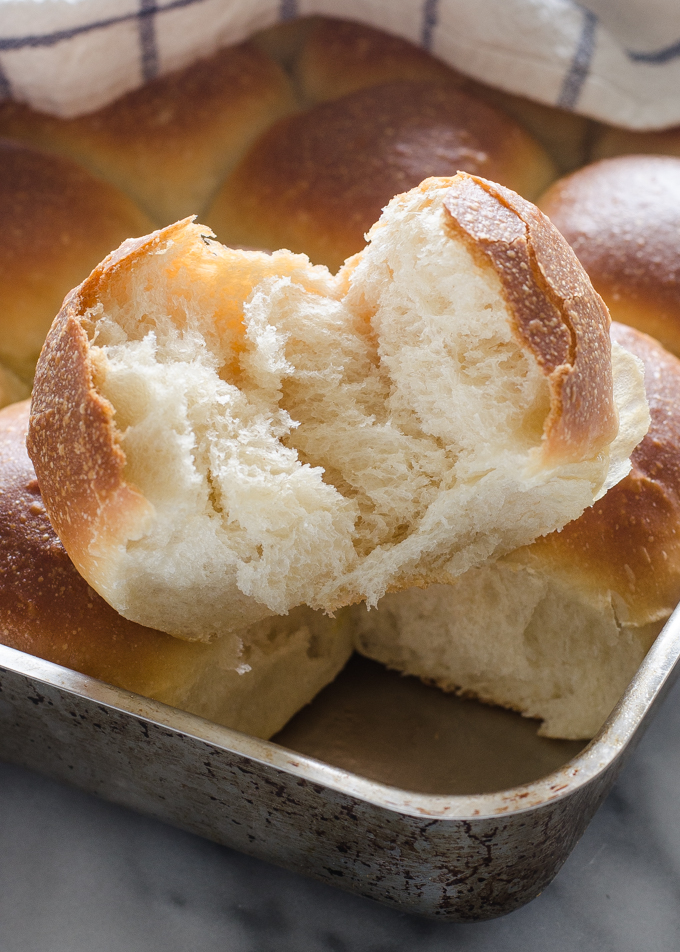
Serve warm with MORE butter spread on the inside.
It's so fluffy I'm going to diiiiieee! Sorry, it had to be said.
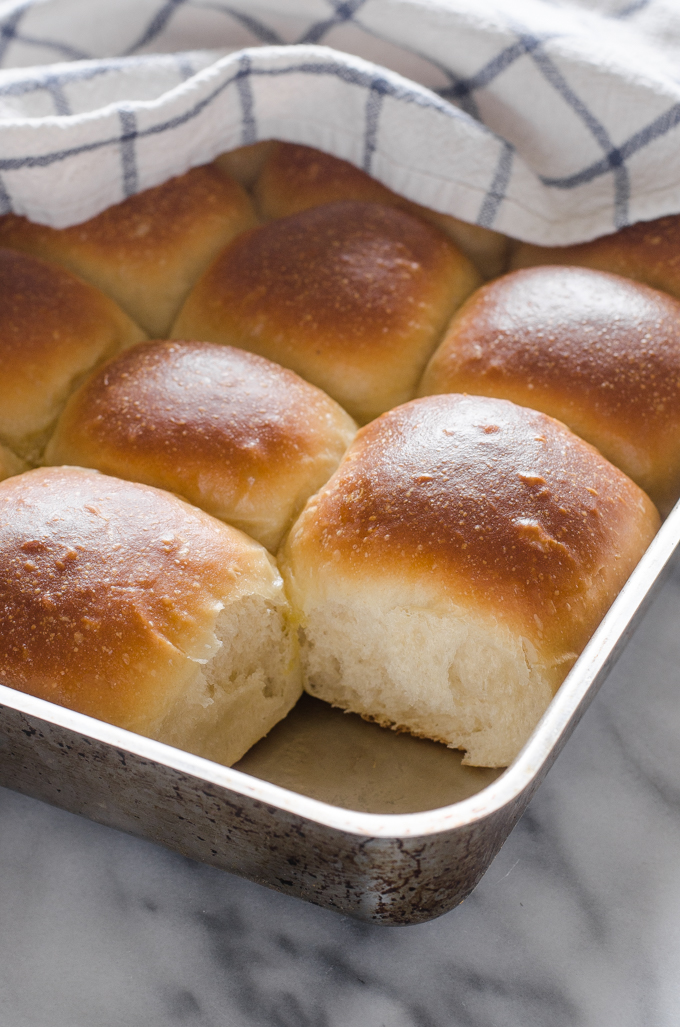
Since these sourdough pull apart rolls are naturally leavened, they take quite a bit longer to rise than rolls made with commercial yeast. Plan to start making them around 24 hours before you want to serve them.
Here's a couple of sample baking schedules:
If you want to serve these rolls at noon (this works best in a cool kitchen):
- 2 nights before you plan on serving the rolls, feed your sourdough starter right before you go to bed.
- The next morning at around 10:00, mix together the dough. Let rise 12 hours.
- That evening, before going to bed, form the dough into rolls. Let rise overnight.
- The next morning, bake the rolls once they rise to fill the pan.
If you want to serve these rolls in the evening (this could also work for serving at noon if your kitchen is really warm):
- The afternoon before you want to serve the rolls, feed your sourdough starter.
- That evening, just before bed, mix together the dough. Let rise overnight until doubled.
- The next morning, form the dough into rolls. Let rise 6-8 hours.
- Bake once the rolls fill the pan.
NOTE: If you're squeamish about letting dough sit out at room temperature because contains milk and eggs, you can always let the dough rise in the refrigerator instead. You'll need to add several hours to the rise time if you choose that method.
Here's a Step-by-Step Video for You:
P.S. I have joined up with a bunch of blogger friends for a Friendsgiving Virtual Potluck!
My friend Julie from The Little Kitchen invited me to her virtual Friendsgiving Potluck, and of course I wanted to join in the fun! Be sure to check the recipes below out for wonderful Friendsgiving and Thanksgiving recipe and craft ideas - you might find a new favorite!
Appetizers
Baked Brie with Honey & Walnuts from Kelley of Mountain Mama Cooks
Bacon Ranch Cheese Ball Bites from Nicole of I am a Honey Bee
Reindeer Bacon Cheddar Cheese Ball from Julie of Julie Blanner
Salads
Sauteed Kale and Brussels Sprout Salad with Cranberries and Walnuts from Shashi of Savory Spin
Creamy Brussels Sprouts Salad from Faith of An Edible Mosaic
Main Dishes
Savory Vegetable Crisp from Bree of Baked Bree
Rosemary Lamb Steaks from Danyelle of The Cubicle Chick
Turkey Pot Pie from Kelly of Eat Picks
Side Dishes
Fried Brussels Sprouts from Erin of The Almond Eater
Cheesy Horseradish Mashed Potato Casserole from Renee of Kudos Kitchen by Renee
Cranberry Cream Cheese Dip from April of April Golightly
Sauteed Garlic-Butter Mushrooms from Linda of Simply Healthyish Recipes
Easy Cheesy Hash Brown Casserole Recipe from Mel of Adventures of Mel
Cornbread Stuffing with Chorizo from Isabel of Isabel Eats
Bacon Brussels Sprouts from Kara of Kara J. Miller
Crockpot Sweet Potato Casserole from Jennifer of Show Me the Yummy
Amazing Gluten Free Thanksgiving Stuffing from Sommer of A Spicy Perspective
Pumpkin Caramelized Onion Gratin from Denise of Chez Us
Crockpot Mac & Cheese from Leanette Fernandez of Funtastic Life
Cheesy Brussels Sprouts au Gratin from Rachel Gurk of Rachel Cooks
Drinks
Spiced Pumpkin Margarita from Sharon of Cupcakes and Cutlery
Breads
Sourdough Pull Apart Rolls from Erica of Buttered Side Up
How to Make Homemade Butterhorn Rolls from Mel of Flour on My Fingers
Sweet Dinner Rolls from Jocelyn of Grandbaby Cakes
Parker House Rolls from Irvin of Eat the Love
Desserts
Sugar Pie from Julie of The Little Kitchen
Oatmeal Apple Crisp from Julie of Peanut Butter Fingers
Pumpkin Pie Milkshake from Eden of Sugar and Charm
Strudel Pastry from Justine of The Typical Mom
Tahini Hawaij Pumpkin Pie from Amy of What Jew Wanna Eat
Turkey Cookies from Meaghan of The Decorated Cookie
Mini Apple Pie Bites from Lynsey of MoscatoMom
Kabocha squash pie from Hilah of hilahcooking
Pecan Pie Cupcakes from Courtney of Pizzazzerie
Coconut Cream Pie from Schnelle of Brooklyn Active Mama
Chocolate chip cheesecake from Jeannette of Hispana Global
Chocolate Pecan Pie from Kate of I Heart Eating
Mini Pumpkin Cheesecakes from Chelsea of Someday I'll Learn
Cinnamon Apple Crisp from Erica of The Crumby Kitchen
Turkey Donut Race Cars For Thanksgiving Treats from Theresa of Chewable Structures
Crafts and Centerpieces
Cinnamon Stick Holiday Candle Place Setting from Alli of Made with HAPPY
Metallic Pumpkin Luminaries from Amy of As The Bunny Hops
Easy centerpiece that will stun + party favor from Noelle of Oh Happy Play
Sourdough Pull Apart Rolls
Pull apart rolls get an upgrade with sourdough starter!
Ingredients
- ¾ cup whole milk, warm (105°F)
- 1 cup active sourdough starter (220 grams) - see note
- 3 ½ cups organic all-purpose flour (465 grams)
- ¼ cup grass-fed butter, melted
- ¼ cup raw honey
- 1 large egg
- 1 ½ teaspoon unrefined sea salt
- 1 tablespoon grass-fed butter, melted (for brushing tops of buns)
Instructions
-
Place all dough ingredients in the bowl of stand mixer fitted with the paddle attachment. Mix until a rough dough forms. Switch to the dough hook and knead on medium-low speed until the dough is quite elastic, about 10-15 minutes. Resist the urge to add more flour - you want the dough to be very soft.
-
Transfer the dough to a large, buttered bowl. Cover and allow to rise at room temperature for 8-12 hours, or until doubled.
-
Gently deflate the dough and divide it into 16 equal pieces. Grab the corners of one of the pieces and pull it towards the middle. Roll the ball, seam side down, on your work surface to create surface tension. Place in a buttered 13x9-inch baking dish. Repeat with the remaining dough.
-
Cover the pan and allow to rise at room temperature for 6-8 hours, or until the rolls are quite puffy and fill the pan.
-
30 minutes before you plan on baking the rolls, preheat your oven to 375° F. Bake the rolls for 20-25 minutes, or until they're deep golden brown and register 200° F when an instant read thermometer is inserted into the center of a roll.
-
Remove from oven and brush the tops of the rolls with the melted butter. Serve warm with grass-fed butter.
Recipe Notes
An active sourdough starter means that it has been fed 8-12 hours beforehand and is bubbly and passes the float test.



These are amazing! I have a fairly new sourdough starter but this recipe worked great. You can taste the sourdough but it isn’t too overpowering and they are super soft-almost like a Hawaiian roll texture. Thank you for the recipe... will be trying again!
So glad you enjoyed them, Margot! Yes, I love how soft they are. 🙂
These are absolutely amazing. I love them, this is my second time making them and there even better than the first batch
So glad you liked them, Nathan! ✨
Just made them and they came out great. My only issue is the dough was sticky and it was hard to shape the individual rolls without the dough sticking to my hands. I ended up dusting the dough with flour to help do that. Are there any other hints to make shaping easier?
So happy you enjoyed them! If you're finding the dough a bit sticky for working with, you can either flour your hands (like you did), wet them with water, or grease them. It can be annoying to work with such a soft dough, but it does help the final rolls to be soft as well!
I tried your recipe and these were perfect, light fluffy, golden, balls of perfection. The only change I made was using sugar instead of honey because I was out of honey. They were delicious. I will definitely make them again. Thank you for sharing!
I'm so glad you liked them, Lurlie! Thanks for letting us know that it works with sugar instead of honey.
Yes, I’m very curious. I ventured into the sourdough world because I am trying to be low FODMAP. Honey is it not though. I’d like to use sugar instead. But I know it’s not an even measure.
We make these often, and majority of the time replace the honey 1:1 with white sugar. Works like a charm. 🙂
I made them with sugar and the look is the same, but my bread was SO SOUR!!! Like they may become croutons I don’t know what I did wrong.
It could be the summer weather. I find that my sourdough is more sour when it's warm out. Also, how mature was your starter when you used it? If you let it just double and pass the float test, the final bake should be less sour. Did you use whole grain flour? That also results in a more sour final product.
These look great I'm looking forward to trying them! Can these be frozen and baked later?
I haven't done a lot of experimenting with freezing sourdough - I'll have to remedy that!
What can we replace instead of egg -thanks
In an earlier comment, I linked to someone on Instagram who used a flax egg as a replacement. Hope that helps!
These came out exactly as in the pics. Excellent!
That makes me so happy that you enjoyed them, Agatha!
I have an active starter, and have been using it for other bread. For some reason these will not rise for me. I’m not sure why 🙁 I have tried twice now.
So sorry they didn't work out for you, Niki! There are several factors that can affect sourdough. Here are a few questions for troubleshooting:
*Do you keep your starter at 100% hydration?
*Was your milk 105 degrees or below when you added it to the starter?
*How warm is your kitchen?
*Did you use organic all-purpose flour?
Sometimes milk or other dairy products can slow down the rise of your starter. You could try using water instead of milk.
Hope that helps!
The same thing happened for me! The taste was amazing, but I made bread cookies instead of rolls... I am going to try a shorter 2nd proof, because I think they were over-proved, as they were really fluffy and puffed up after the first rise.
Hey Madeline,
Yes, the warmth of your kitchen can really affect rising time! In the summer it could take 2 hours for the second rise instead of 6-8!
Wish me luck as I'm going to make these rolls WITHOUT salt since I have a restricted diet
Good luck, Erika! I think that since sourdough has more flavor it can get away with a little less salt, so hopefully it's okay without salt entirely!
Really struggling to find your ingredient list? Excited to try out the recipe, but that is stopping me for now. Some bloggers do a button at the top of the page that lets you jump straight to the ingredients.
Sorry about that! That's weird the ingredients aren't displaying! Here they are in case you need them:
3/4 cup whole milk, warm (105°F)
1 cup active sourdough starter (220 grams) - see note
3 1/2 cups organic all-purpose flour (465 grams)
1/4 cup grass-fed butter, melted
1/4 cup raw honey
1 large egg
1 1/2 tsp unrefined sea salt
1 tbsp grass-fed butter, melted (for brushing tops of buns)
There is no Jump to Recipe Link. It's somehow sandwiched between an unrelated list of recipes and ads and the Comments portion. It's worth it if and when you find the recipe!
I’m new t bread making so I have a question. My house is always pretty cool so i put my dough in a blow under the microwave light. It had a light crust on the top when I went to make the rolls and it barely doubled. I’m guessing it’s because of the light but hoping for some help. I covered it with a light linen towel let it sit for 10 hours.
Hey Nicole,
It's possible that your dough rose and then fell. Sometimes it only takes 6 hours for sourdough to rise for me if my kitchen is quite warm. Or the dough could have needed longer to rise - sourdough can also take up to 12-14 hours to double if your kitchen is really cool.
I experience a dry top to the dough sometimes as well. You could try using a damp tea towel, or placing plastic wrap (you could grease it first if you have avocado oil spray on hand) directly onto the dough. Hope that helps!
I made these for Easter following your excellent directions and they turned out perfectly the first time! Your pictures are helpful. Thanks!
I'm so happy you enjoyed them, Paul! And I'm glad that you found the pictures helpful!
Trying this recipe now, waiting for the first rise. Can I put a filling inside the bun? Thinking of either cheese or chocolate.
I haven't personally tried filling these buns, but I think it should be fine to fill them. You would want to make certain that the buns get cooked all the way through, of course. An instant read thermometer is really handy for that.
They worked! Bread is great and soft, it rose within 4hours in my kitchen. Can you give any suggestions if I want to make the dough taste sweeter though?
So glad they worked for you! You could try increasing the honey, though that may affect the wetness of the dough. Or you could add 2-4 tablespoons of sugar in addition to the honey.
This recipe did not work for me at all. My dough rose, but definitely not as high as yours. The texture was completely different too. You sure there’s no instant yeast in this as well that gets mixed in with the milk? I was really hoping that would will work.
So sorry they didn't work for you, Becky! Nope, there's no instant yeast required. Here are a few troubleshooting ideas for you:
*Is your starter strong and active? Was it fed 8-12 hours previously and passed the float test?
*Is your starter kept at 100% hydration?
*Was your milk at 105 degrees F or lower when you added it to the dough mixture?
*Were you able to knead the dough until it was nice and elastic?
*Is your kitchen really warm or really cool? If it's warm it can make the dough rise too quickly. It's crazy how much a few degrees can change how long it takes for the dough to rise!
*Did you use organic unbleached all-purpose flour? The bleach in flour can affect the starter and final dough.
Let me know if you have any questions!
I fed my starter within the time and it’s 100% hydration. I live in Hawaii, so it’s pretty warm. It didn’t seem like it rose very much. It was just weird. Not like any dough I’ve made before.
Hi Becky,
Hmmm...here are a couple more troubleshooting ideas I had:
*How long have you had this starter?
*Have you used this starter to make bread that doesn't use any yeast, baking soda, etc. to help with rising?
*Did you use all of the same ingredients that I have listed, or did you make any substitutions? You could email me photos for troubleshooting ([email protected]), or you can DM me on Instagram (@butteredsideupblog).
Can you use store brought honey I have no where to buy raw honey?
Hi Erica,
I'm new to sourdough baking and I'm wondering if I can refrigerate after bulk rise and shaping? I would like to refrigerate overnight. How would I proceed after removing from refrigerator? Should I then proof at room temperature for several hours then bake?
Thanks and looking forward to trying these rolls.
Kim
Hey Kim,
Yes, that should totally work! I haven't tried it personally, but you may be able to go from fridge to oven - the oven spring on sourdough bread can be quite dramatic! Or if it seems like they haven't risen much, you could let them sit at room temp for an hour or so before baking.
Hi, very new to doing starters. Your recipe seemed very easy to follow, just wonder if the dough was supposed to be like a paste, not like your typical dough ball? Its supposed to be rising now so fingers crossed I did it correctly. Its all a trial and error at this point for me. Anyway, bout the dough, paste like at first ir dough ball? Thanks for the recipe!!!
Hi, Diana! The dough should be quite elastic, but it will be pretty sticky as well. You don't want to add too much flour since that will make the dough less soft. The dough should clean the sides of the stand mixer, but not the bottom. If the dough doesn't stick together and isn't elastic, it means that the gluten wasn't developed enough. You should be able to form it into a ball with wet or greased fingers. Hope that helps!
Yes it helps! Thank you for responding!
As a very new baker, this description was incredibly helpful! Thank you!
I should add, 10 hours later my dough did rise but the dough is super sticky and wet. How do I combat this? I cant roll a single ball. Do I add flour? I ruined my dough. Its 1030 at night and I'm beginning to realize that this was way too easy to be true. Haha.
Hey Diana,
Yes, it sounds like your dough was a bit too sticky. Bread baking can be more of an art than a science. The humidity of your house can affect how much flour you need. So one day you may need 3 1/2 cups to get the right consistency, but another day you might need 4 cups!
If you find that the dough is too sticky to work with, you can try greasing your fingers or using wet hands. But getting the dough the right consistency when you're kneading it really helps!
Hey Diana,
It sounds to me that you have the tell tale signs of dough that has been over-proofed. Over proofed dough will be extremely sticky and impossible to shape and work with.
Looking forward to trying this recipe! I am hoping you can help me troubleshoot a few things before I begin. First, my sourdough starter is fed on volumes, not weight. Should I modify the amount of stater I use? Second, I do not have a stand mixer. Can I knead the dough by hand? Thank you!
Hey Madison,
I recommend that you use a 100% hydration starter for this recipe. You could feed it at 100% hydration, and then go back to your regular feeding schedule. Usually you need a higher volume of flour than water since water weighs more. So to achieve a 100% hydration starter using volumes, use 3 tablespoons of water for every 1/4 cup of water, or 9 tablespoons of water for every 3/4 cup of flour. It's not exact, but it's pretty close! You can knead it by hand, but keep in mind that it's quite a sticky dough. If it's just not workable by hand, you can add more flour. But the final result won't be quite as soft and fluffy!