Learn how to make the perfect Dutch oven sourdough bread. With my step-by-step recipe, you’ll be baking delicious sourdough artisan bread in no time!

There’s something almost magical about pulling a loaf of artisan sourdough bread from the oven. No matter how many loaves I bake, it never gets old.
But when you’re first getting started with sourdough baking, it can be intimidating and frustrating trying to figure out how to achieve a really good loaf.

Today I’m going to teach you how to pull off an amazing sourdough artisan loaf, even if you’re still pretty new to the world of sourdough. I’ll go over the 4 most important factors to sourdough success, and then walk you through the process with step-by-step photos.
Okay, let’s dive in!

The 4 Most Important Factors:
When it comes to sourdough, there are so many factors that affect the final loaf. However, if you dial in these 4, you’ll have a really good chance at baking an amazing artisan-style loaf.
- Starter Health: This is probably the most important factor of them all. If you have a starter that’s in poor health, you’ll have a hard time coaxing great bread from it. I’ll discuss signs of a healthy starter more in the sourdough starter section below.
- Gluten Development: In order for your loaf to maintain its structure and have great oven spring, you need to adequately develop the gluten. There are many ways to do this, but just follow the method outlined in this recipe and you’ll be good to go. You can learn other methods later on!
- Good Flour: If you use poor quality flour, you may find it difficult to properly develop the gluten in the dough, and you’ll be left with a sticky mess. My recipe calls for about half bread flour, half all-purpose flour, so as long as your bread flour has least 12% protein content, you should be good to go!
- Proper Bulk Fermentation: It can take months or even years to learn how to perfectly ferment sourdough. But you can get really close even if you’re new to sourdough if you follow the method outlined in this post!
Video Tutorial:
Here’s a video overview of the process for my fellow visual learners! The full written tutorial and printable recipe are below.
Ingredient Notes:

Note: Some links are affiliate. All opinions are my own, of course! If you click a link and make a purchase, I will earn a small commission. This has zero impact on the price you pay, and it helps Buttered Side Up out! Thank you!
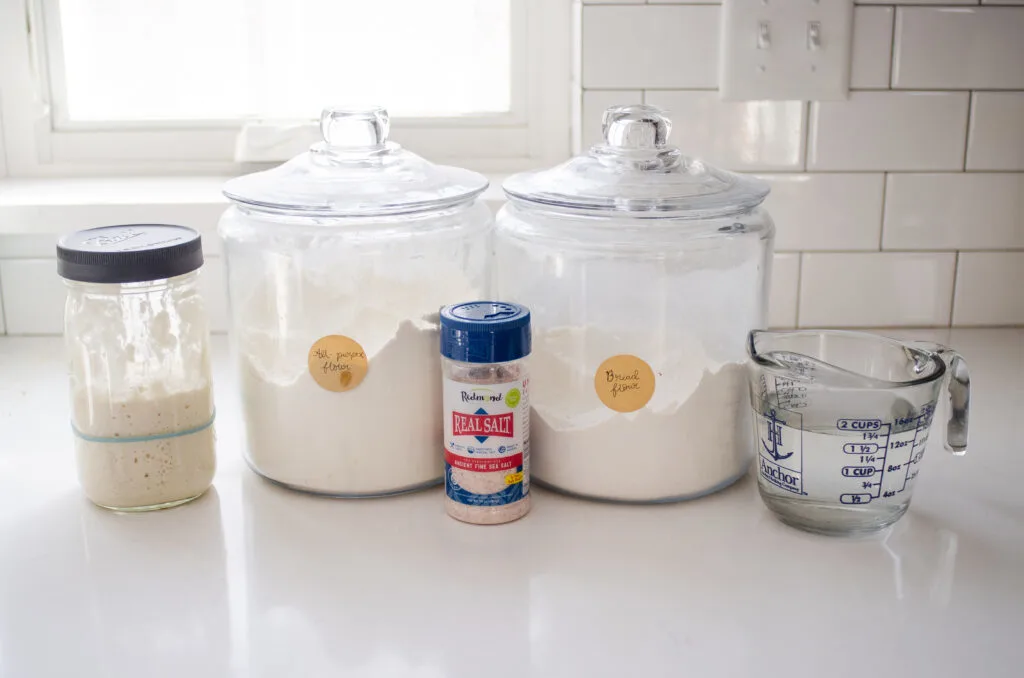
Let’s go over the simple ingredients you’ll need in a little more detail:
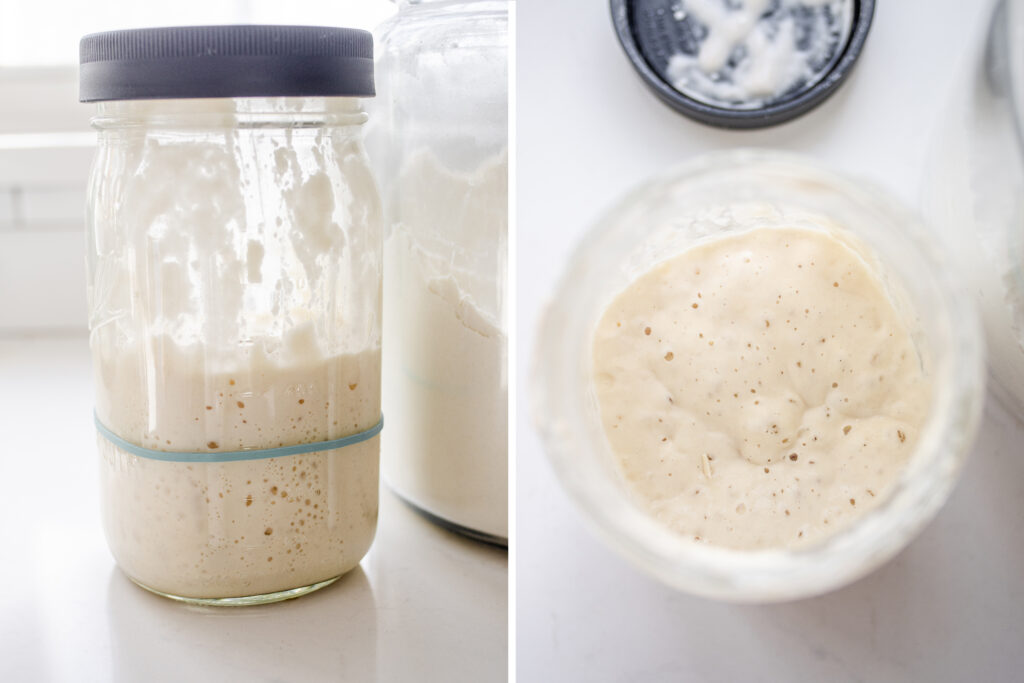
- Sourdough Starter: You want an active starter that has been fed 4-12 hours previously, has at least doubled in volume, and is active and bubbly and still at or close to peak.
- All-Purpose Flour: You’ll be using about half all-purpose flour for this recipe. This helps to keep the cost down since bread flour typically costs more. After (and only after) you’re comfortable with this recipe, you can experiment with replacing some of the all-purpose flour with whole wheat flour.
- Bread Flour: But to ensure your dough has enough strength, you’ll be using almost half bread flour. Make sure your bread flour has at least 12% protein content. I use King Arthur Flour organic bread flour.
- Water: It’s best to use filtered water, or at least non-chlorinated water. You’ll want it at room temperature. You can use warmer water to speed up fermentation, but you don’t want to go over 105 F (40 C) or you will risk killing the yeast in the starter. However, I recommend room temperature water or a little warmer for this recipe.
- Salt: I use unrefined sea salt, so you may want to reduce the amount a bit if you use table salt.
A Word About Your Starter:

Using an active, healthy starter is super critical in this recipe since it doesn’t use any commercial yeast.
Your starter should be at least 2 weeks old if you made it from scratch, preferably 1 month old. It should be doubling consistently, be nice and bubbly, and not smell overly acidic.
If you store your starter in the refrigerator when not in use, you’ll want to feed it peak to peak 2-3 times before using it in this recipe.
Peak to peak feeding is simply feeding your starter soon after it doubles or reaches peak fermentation. This prevents your starter from getting too acidic and weak.
Quick tip: you can mark the height of your starter with a rubber band!
And if you don’t have a starter yet, make sure to check out my Homemade Sourdough Starter recipe!
Important note: I feed my starter at 100% hydration, which means I feed it equal weights, not volumes, of flour and water. If you keep your starter at a different hydration percentage, feed it at 100% for this recipe.
Equipment:

Before we truly begin, let’s go over some helpful/essential equipment.
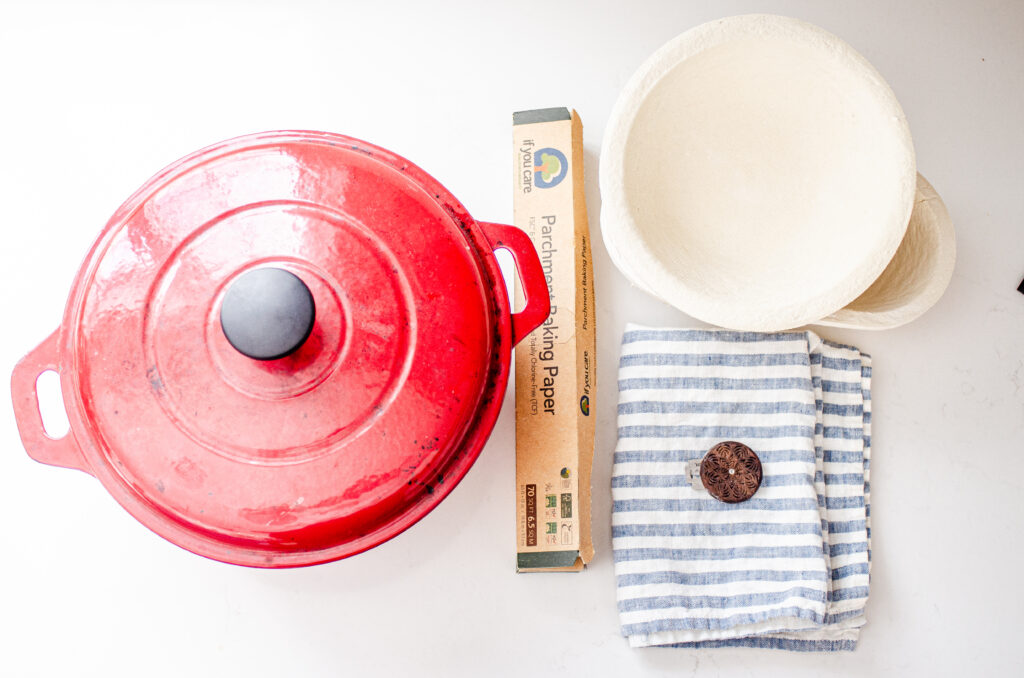
- Dutch Oven: Hands down, a Dutch oven is the best way I’ve found for a home cook to achieve a lovely bake. It’s possible to get great results with an open bake, but the Dutch oven is SO much easier! You don’t have to deal with pouring water into your oven to create steam since the Dutch oven captures/traps all the steam you need! If you’re planning on doing a lot of sourdough artisan bread baking, I highly recommend getting a Dutch oven. Mine is a 6.6 quart Tramontina that my mom bought me years ago (no longer available). I have also used my Lodge cast iron Dutch oven.
- Parchment Paper: This is what you’ll use to transfer your dough to the hot Dutch oven. I use unbleached parchment paper. You can also buy reusable silicone mats.
- Banneton Baskets: For this recipe, I like to use either the Bulka 500g oval banneton or small round banneton. The oval basket is about 10 inches long, and the round basket is 8.4″ in diameter. This is a little small for this size of loaf, but it still works! You *can* use a regular bowl for the second rise, but I find that it doesn’t let the dough breathe properly, and it’s more likely that the dough will stick to the tea towel. Speaking of which…
- Tea Towel: You don’t have to line your banneton baskets with a cloth, but I like to anyway to ensure the dough doesn’t stick. I’ve had loaves stick to a proofing basket and it is NOT fun. I like these linen tea towels from Magic Linen as they are OEKO-TEX certified.
- Bread Lame: While you can simply use a very sharp knife to score your dough, a lame makes it SO much easier. I use a UFO lame by Wire Monkey.
- Kitchen Scale: While it’s totally possible to make sourdough bread with cup measures, it’s a lot less messy and more accurate to use a kitchen scale. If you’re going to be baking a lot of sourdough bread, I highly recommend getting one.
- Oven Gloves: Working with a hot Dutch oven comes with a risk of burns, so I highly recommend using oven gloves or oven mitts whenever you’re transferring the loaf to and from the pan.
Step 1: Fermentolyse
What is a fermentolyse, you might ask? It’s simply the process of mixing the water, starter, and flour together and letting it sit to allow the water to start to absorb the flour and the starter to begin the fermentation process.
Many sourdough recipes call for an autolyse, where you mix only the flour and water together first. However, I absolutely despise trying to mix starter into dough, so I compromise and do a fermentolyse instead.
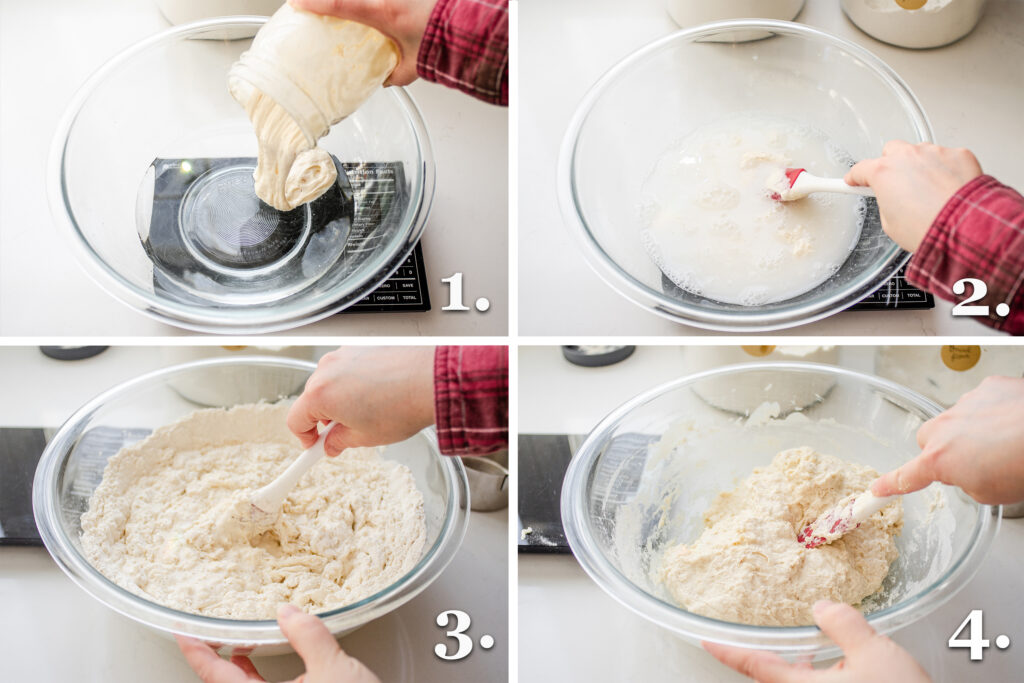
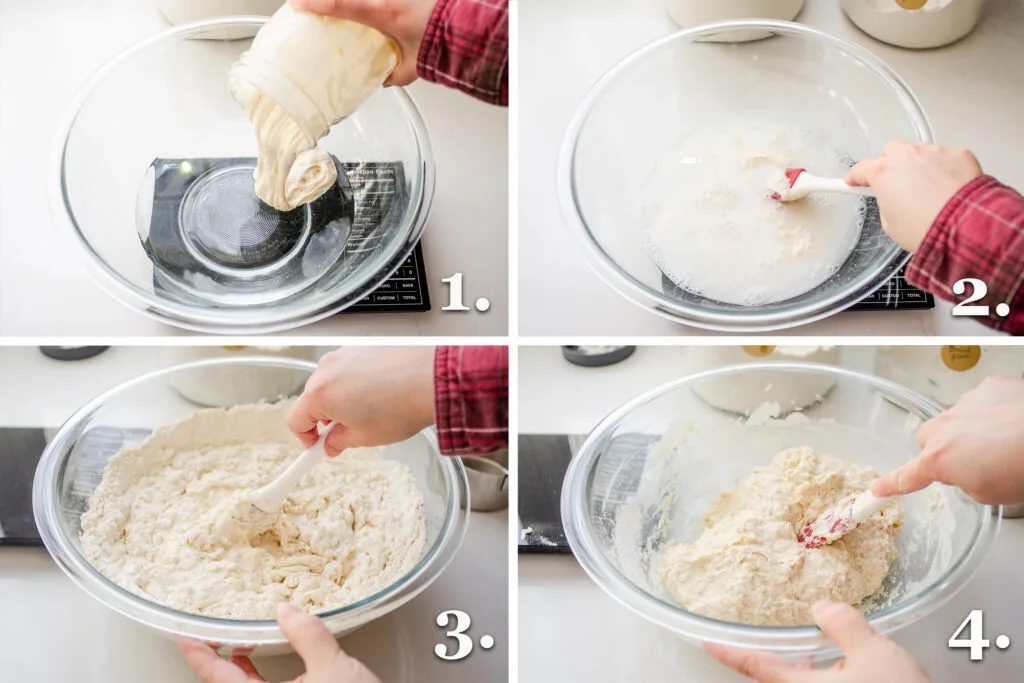
Mix together the water, sourdough starter, and flour in a large bowl until a shaggy dough forms. I like to use a spatula or dough whisk here. I’m sure a wooden spoon would also work, but it can be more difficult to clean.
Quick tip: I highly recommend weighing your water into your mixing bowl, adding the starter, and giving it a good mix. It’s so much easier to get the starter evenly distributed if you mix it with the water first.

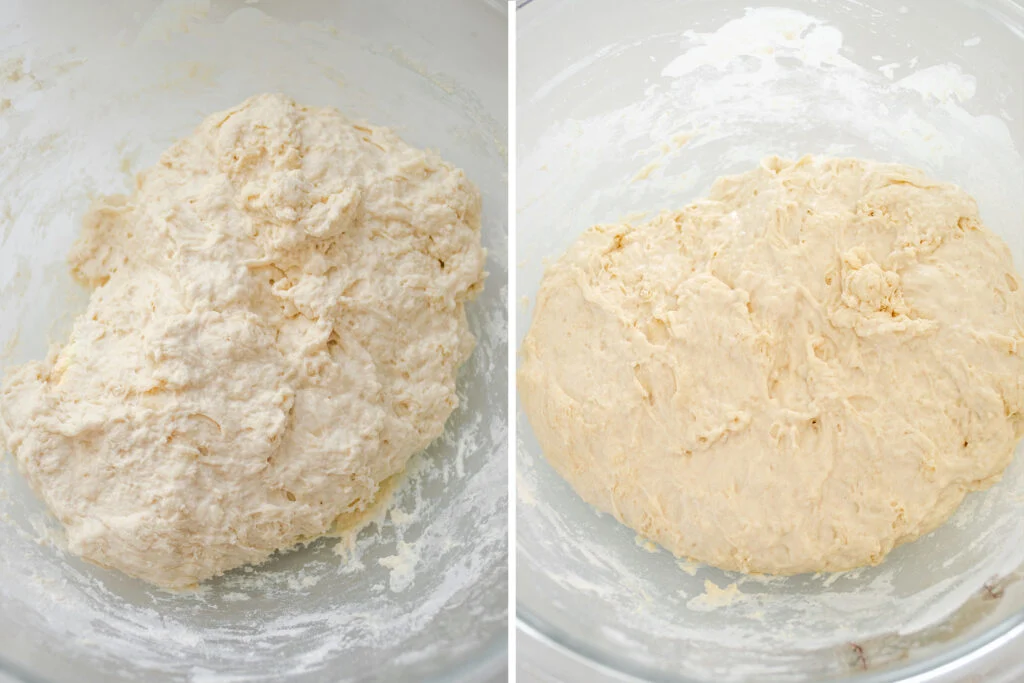
Cover the dough with a damp tea towel or plastic wrap (or a lid if your bowl comes with one) and allow it to rest for 30 minutes.
As you can see, the dough will soften and relax even after just half an hour.
Step 2: Adding the Salt
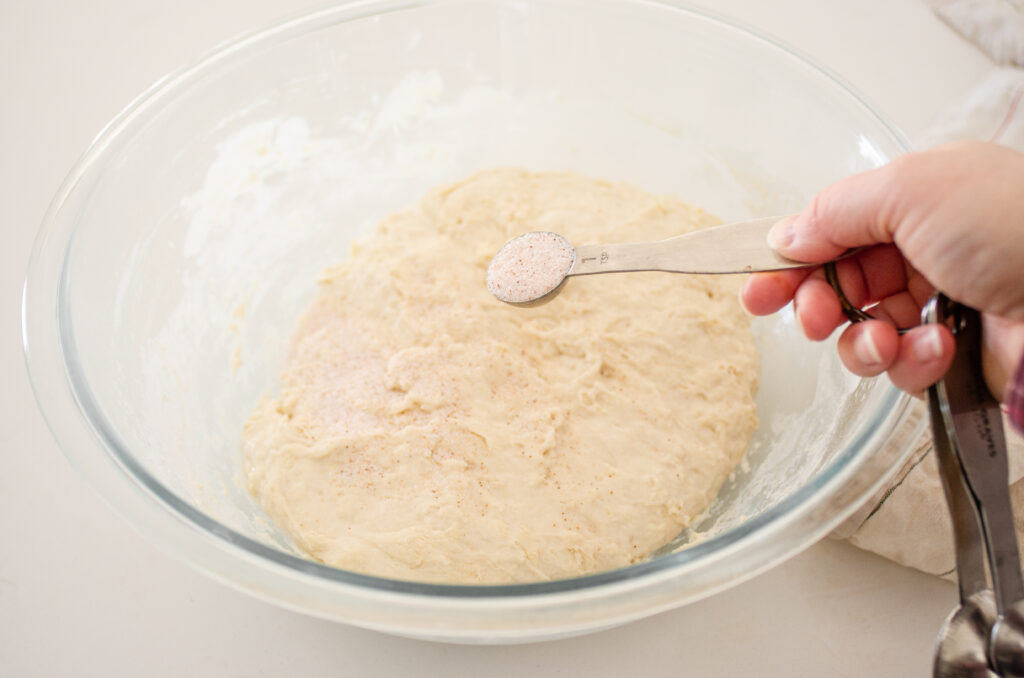
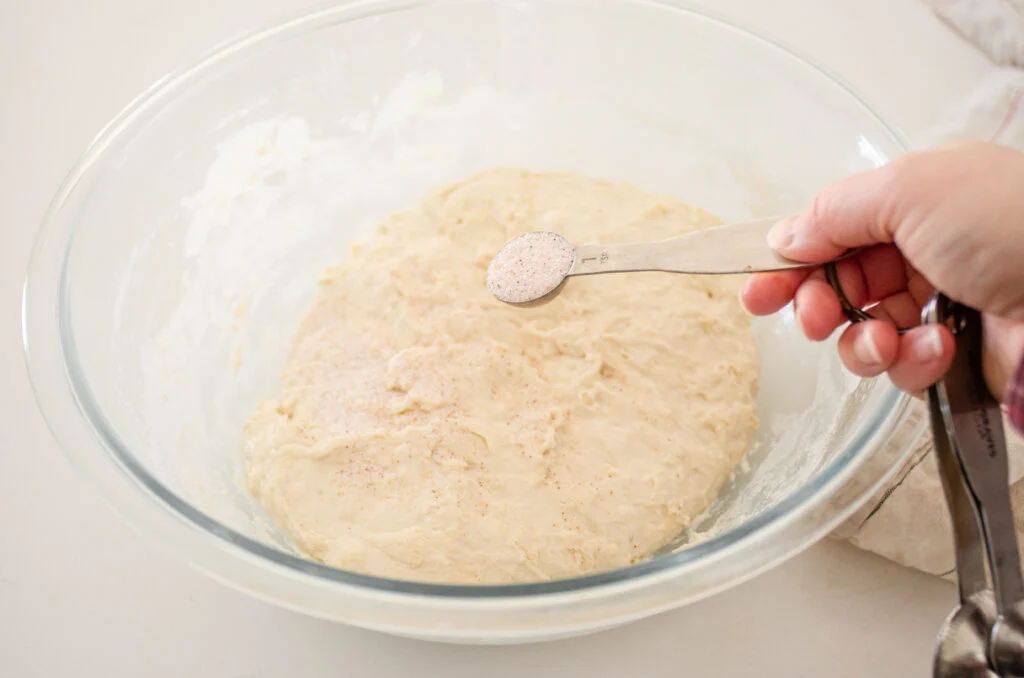
After the fermentolyse is complete, it’s time to add the salt. Sprinkle it over the top of the dough.
The reason you don’t add the salt in the first step is because salt can slow down the fermentation process. So adding it later gives the dough a bit of a fermentation head start.
However, some sourdough bakers go ahead and mix the salt in the first step. It’s not something that will drastically change your loaf. But I don’t mind mixing it in later, so I go ahead and wait to add it.
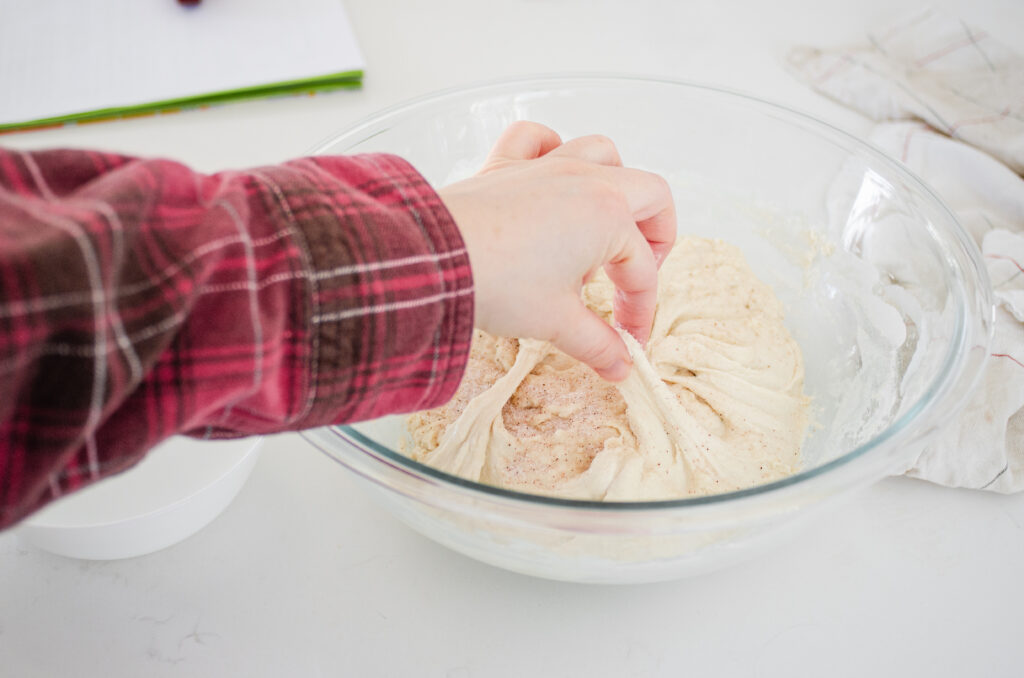

Now grab small portions of the dough and pinch and pull them every-which-way to start to incorporate the salt. Do you see now why some bakers prefer to add it at the beginning before the fermentolyse?
Step 3: Stretch and Fold Sequences
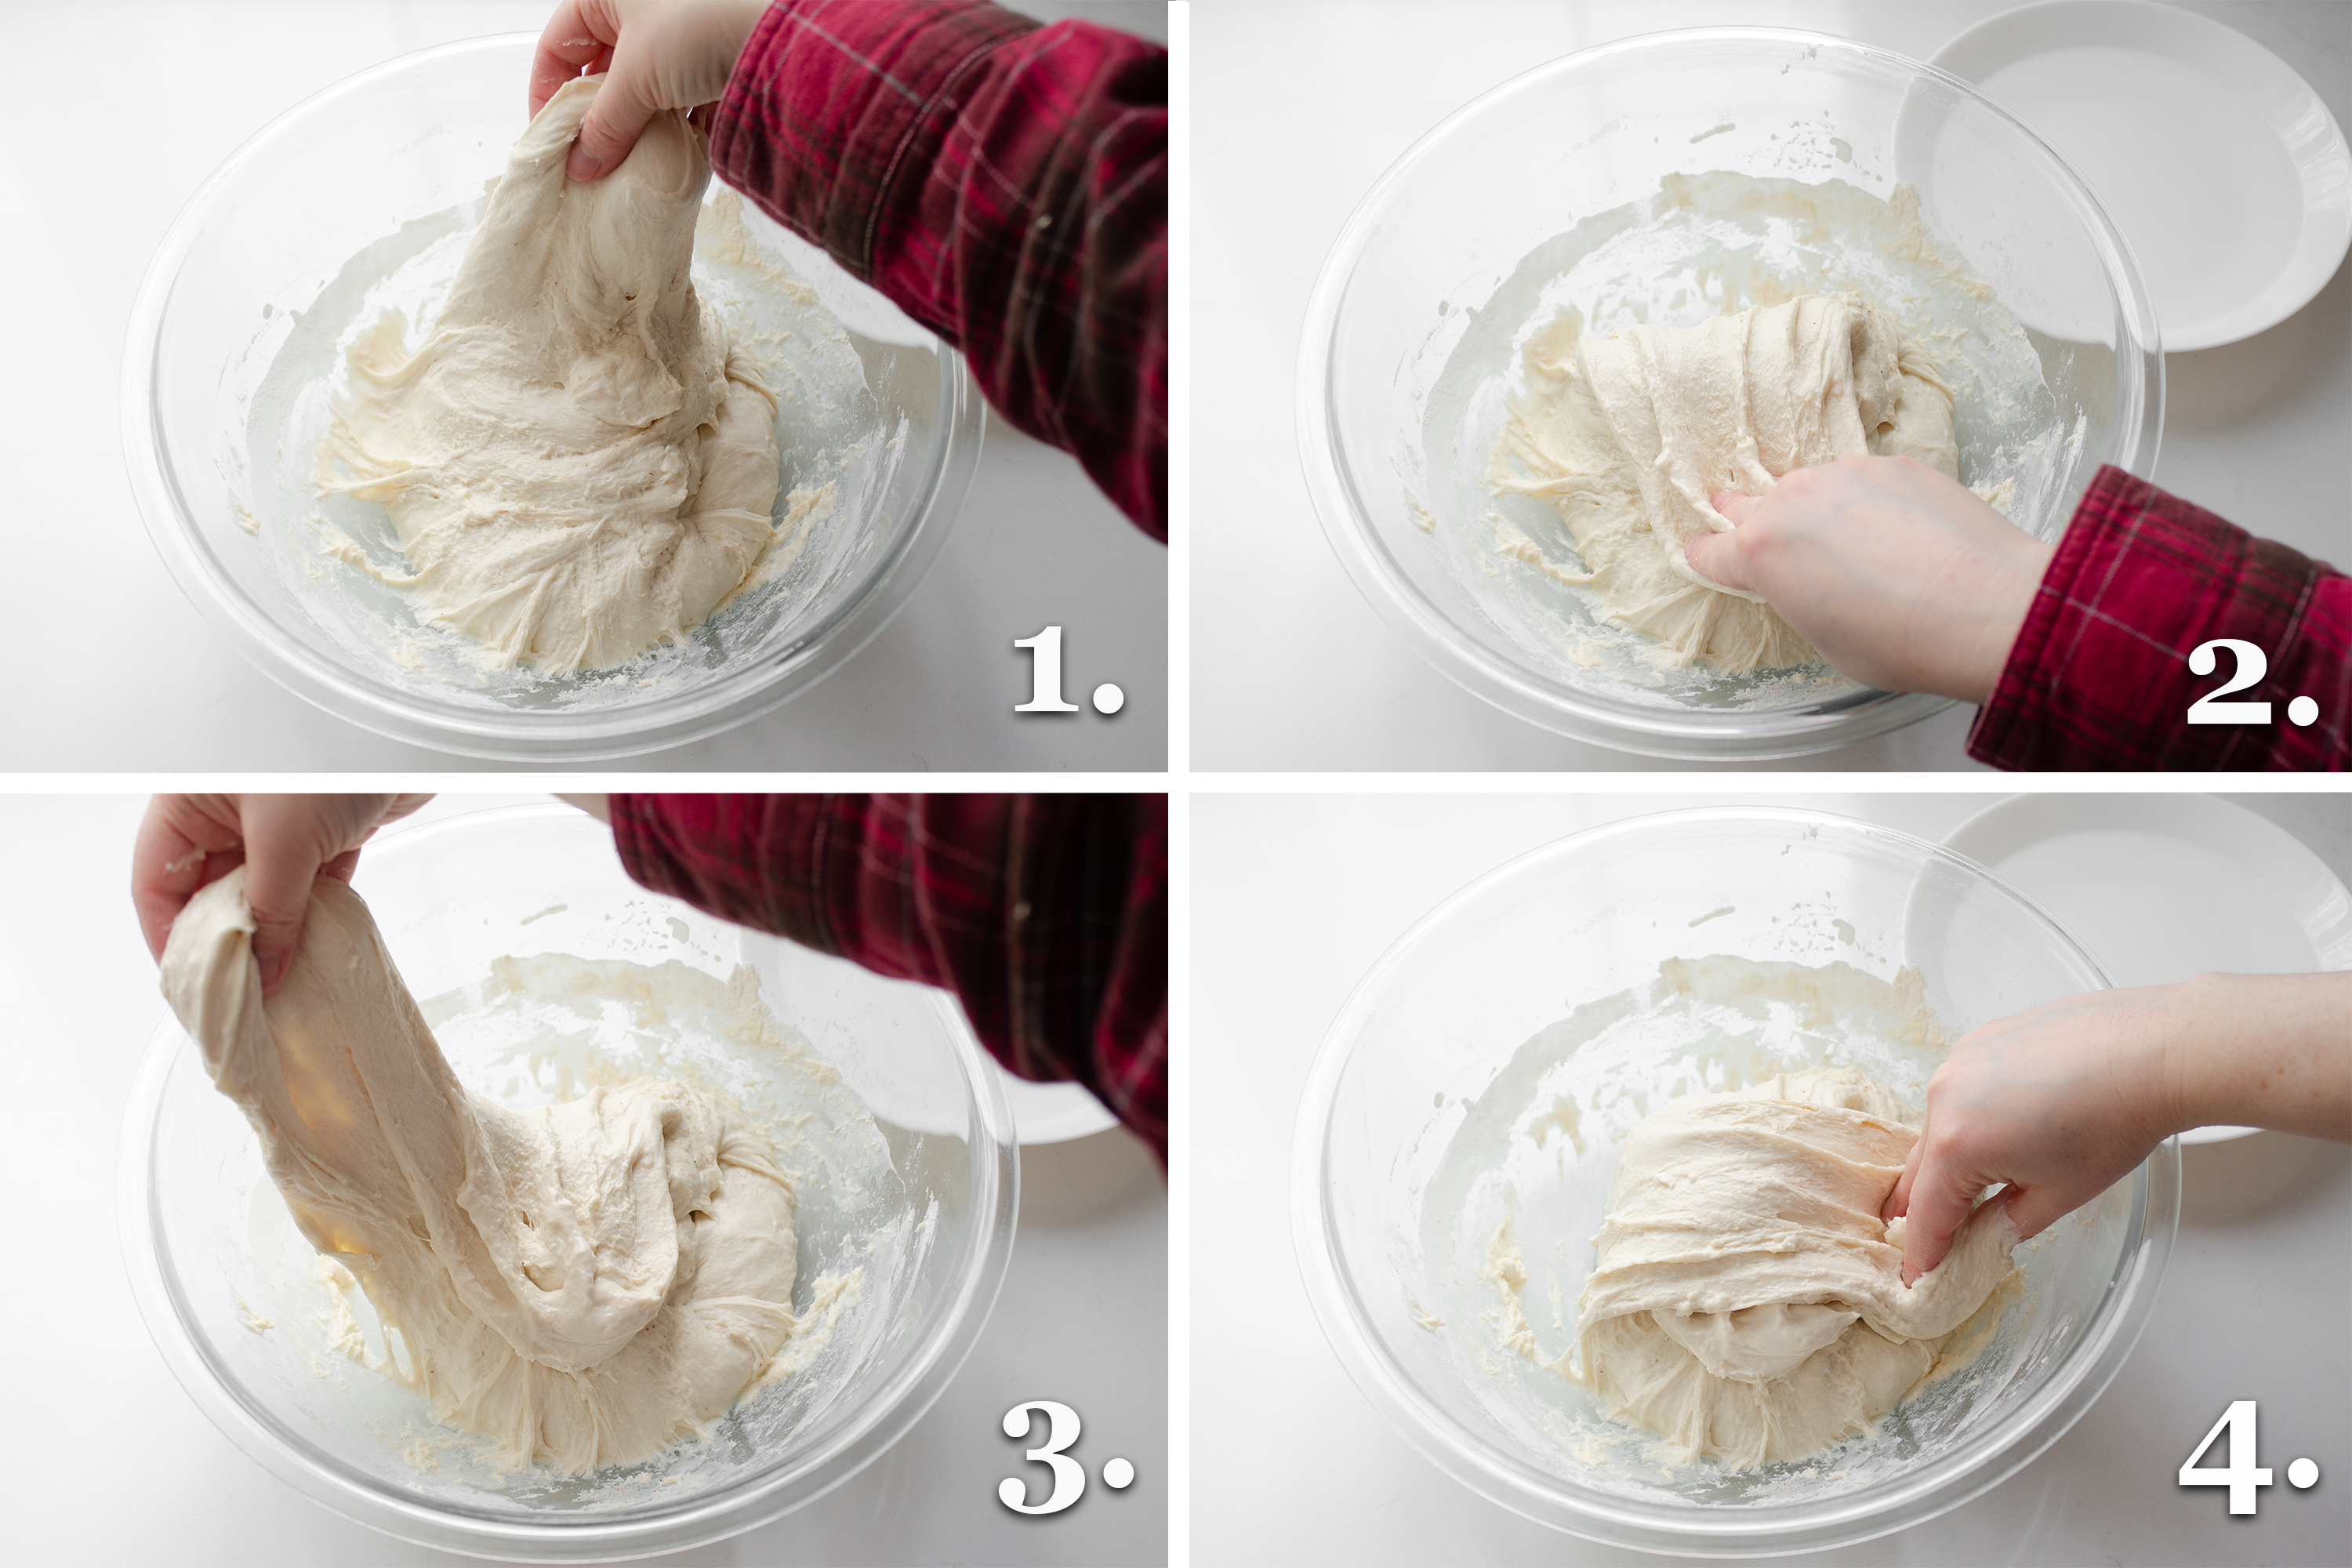

Now it’s time to perform a series of stretches and folds, which will help to develop the gluten in the dough.
I like to have a bowl of water ready to wet my hands so they don’t stick to the dough.
Grab one edge of the dough, pull it up as far as you can without it breaking, and fold it over to the other side of the dough.
Repeat with the other 3 “corners” of the dough. Watch the video tutorial if you can’t quite picture how to do this properly.
You’ve just performed the first set of 4 stretch and folds!
Allow the dough to rest for 15-45 minutes, and repeat the 4 sets of stretch and folds.
You’ll be performing a total of 6 stretch and fold sequences, with 15-45 minutes of rest between each sequence. You can wait just 15 minutes between the first 3 sequences, but you’ll want to let the dough rest and relax longer as the gluten develops more. You’ll be able to tell if the dough needs a longer rest between stretch and folds if it won’t stretch out very easily.
This whole process will take around 2-3 hours.

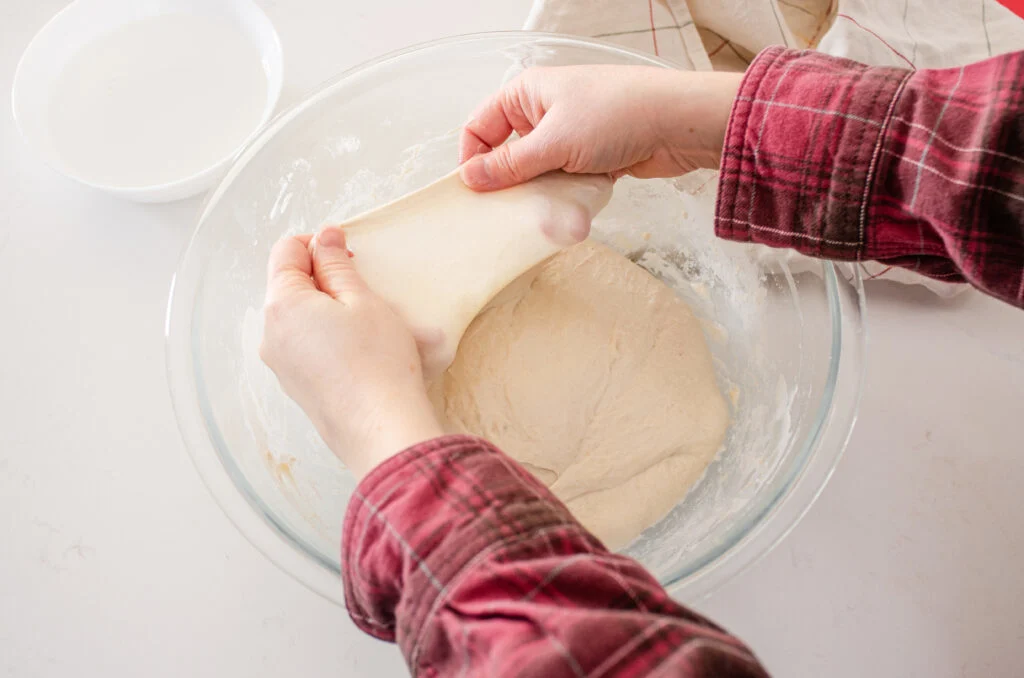
The goal is to develop a dough that is nice and stretchy.
If your dough achieves a really stretchy consistency after just 4-5 stretch and fold sequences, you can leave off the last sequence. And if your dough still isn’t coming together, you can add an extra stretch and fold sequence.
Step 4: Bulk Fermentation
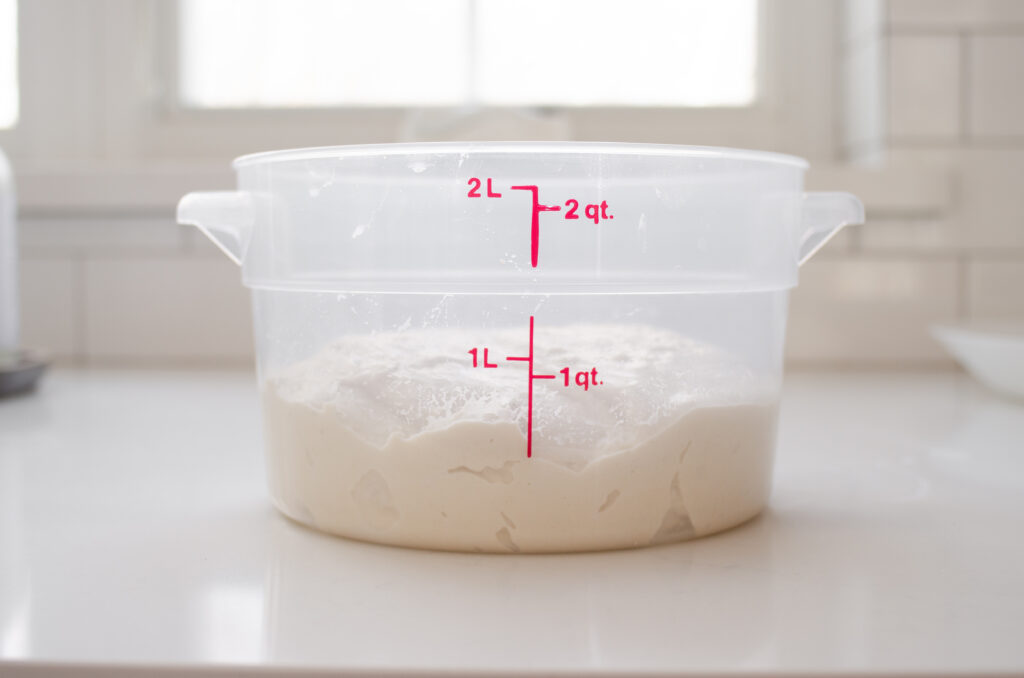

The dough has already been fermenting during the stretch and fold process, but now it’s time to complete the bulk fermentation.
Place the dough in a proofing container. I highly recommend using a container with straight sides so you can easily see how much the dough has risen. This Cambro dough container is really handy, but I’ve also used a glass Pyrex container.
If you use a container with slanted sides, it’s going to be more difficult to tell how much the dough has risen.
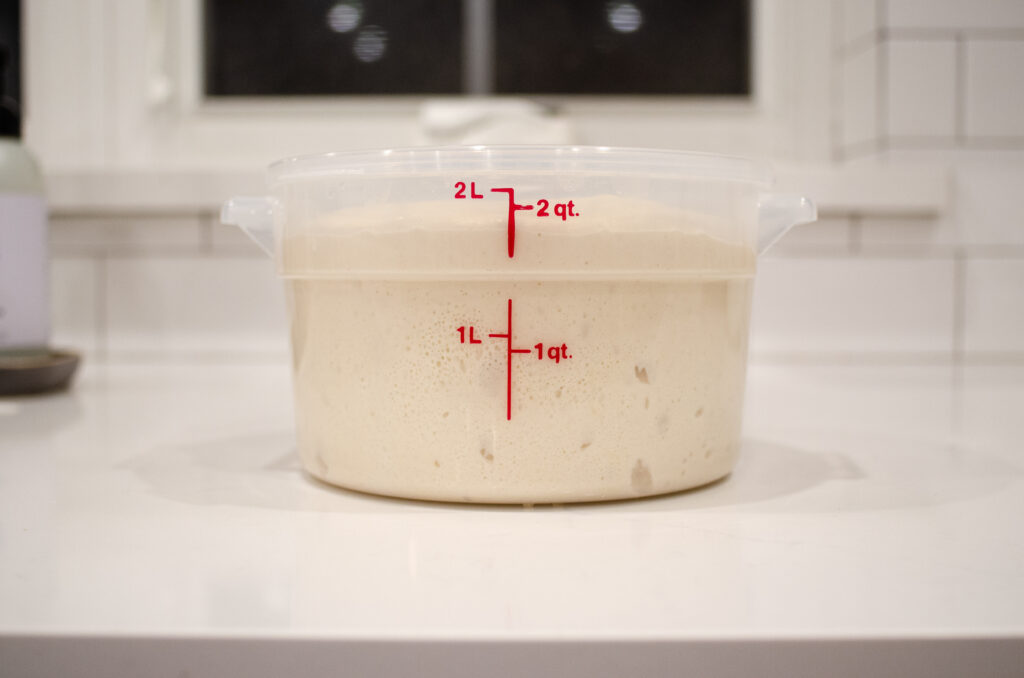
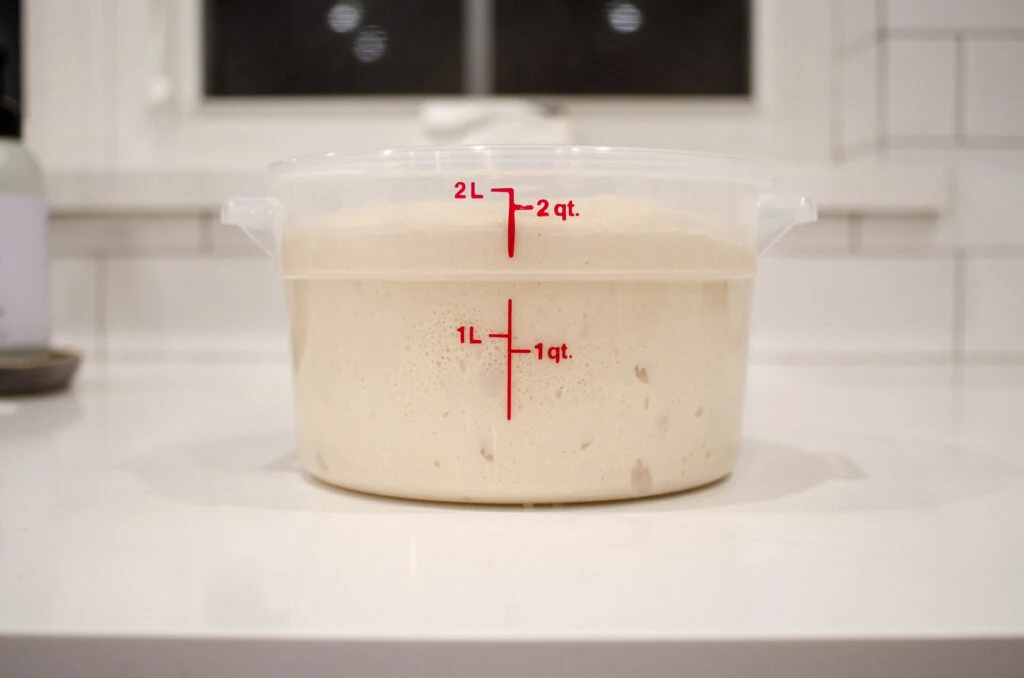
Let the dough rise at room temperature (a warm place in your kitchen is great!) until it has doubled or nearly doubled in volume. I like to proof my dough at around 75° Fahrenheit (24° Celsius).
This is a crucial step when it comes to the quality of the final loaf. An under fermented loaf will result in an inferior texture. Over fermenting the dough will also result in a less-than-ideal texture.
There are other, more complex and more precise methods of determining the perfect fermentation, but this one is really simple, and it will get you most of the way there.
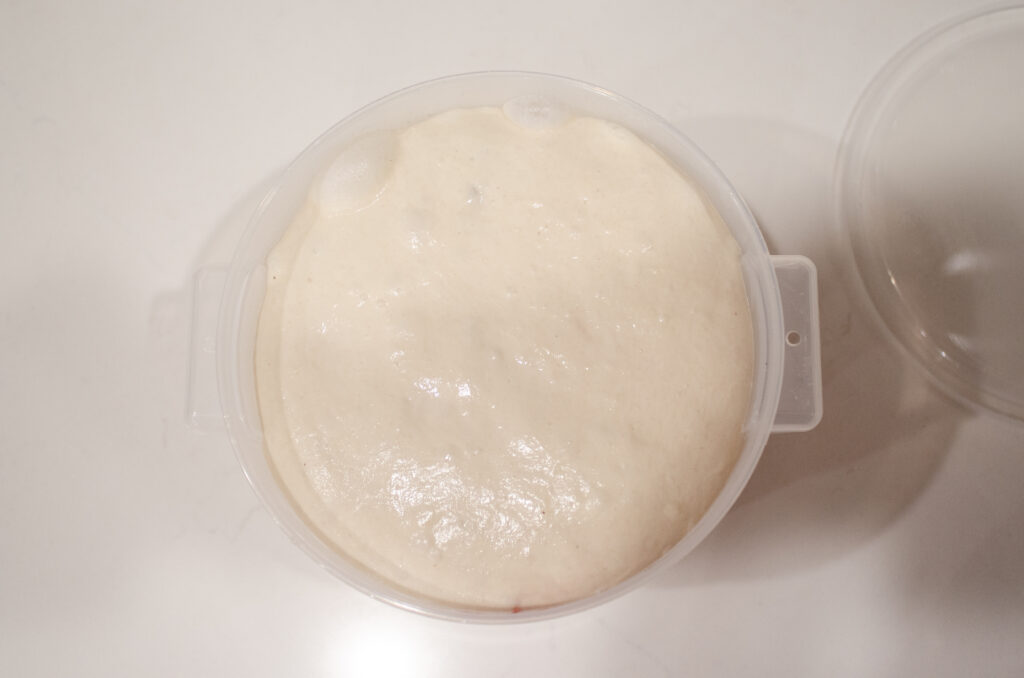
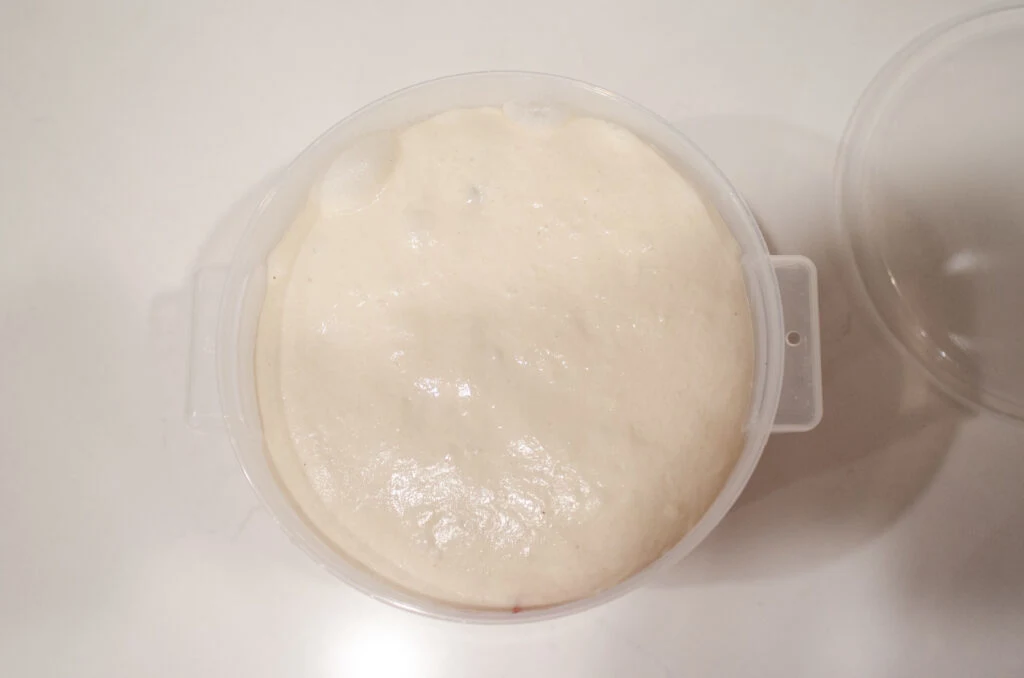
You can also perform the poke test (the dough should spring back slowly and not quite fully fill back in when poked), or give the proofing container a little shake. The dough should be jiggly and have some large air bubbles.
These tests are more to confirm that the fermentation is complete, not sole indicators of completion.
By the way, if you have a really warm kitchen, you may want to only allow the dough to rise 80% of the way to doubled before moving on the next step. However, I find that a 100% or nearly 100% rise works well in a chilly, winter kitchen.
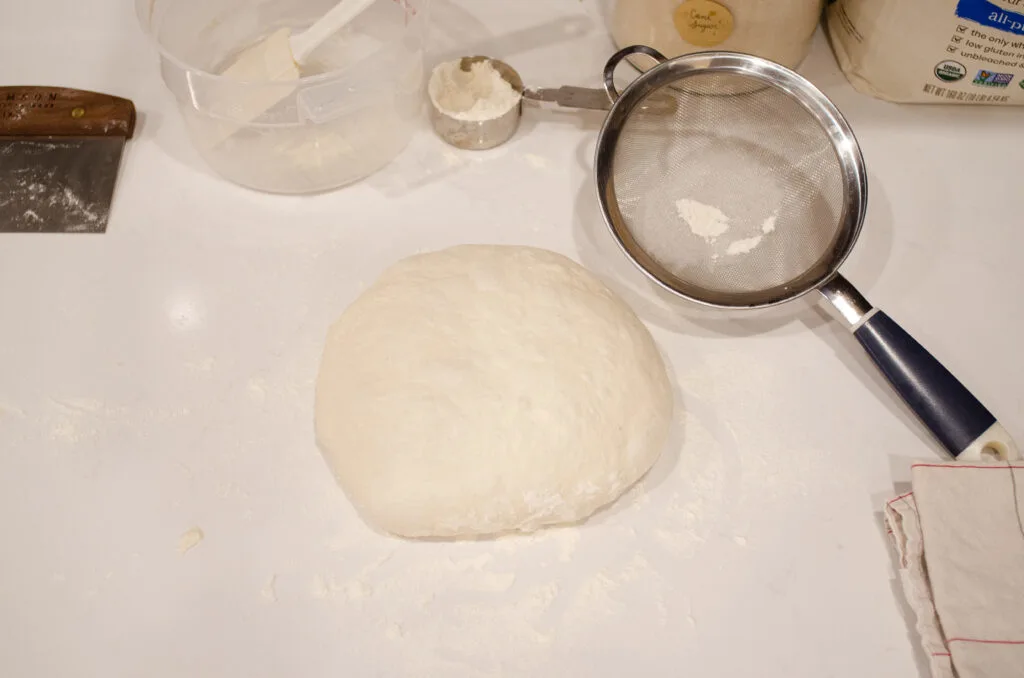
Step 5: Shaping the Dough

After the bulk fermentation is complete, it’s time to shape the dough!
You’re going to start with a pre-shape and bench rest.
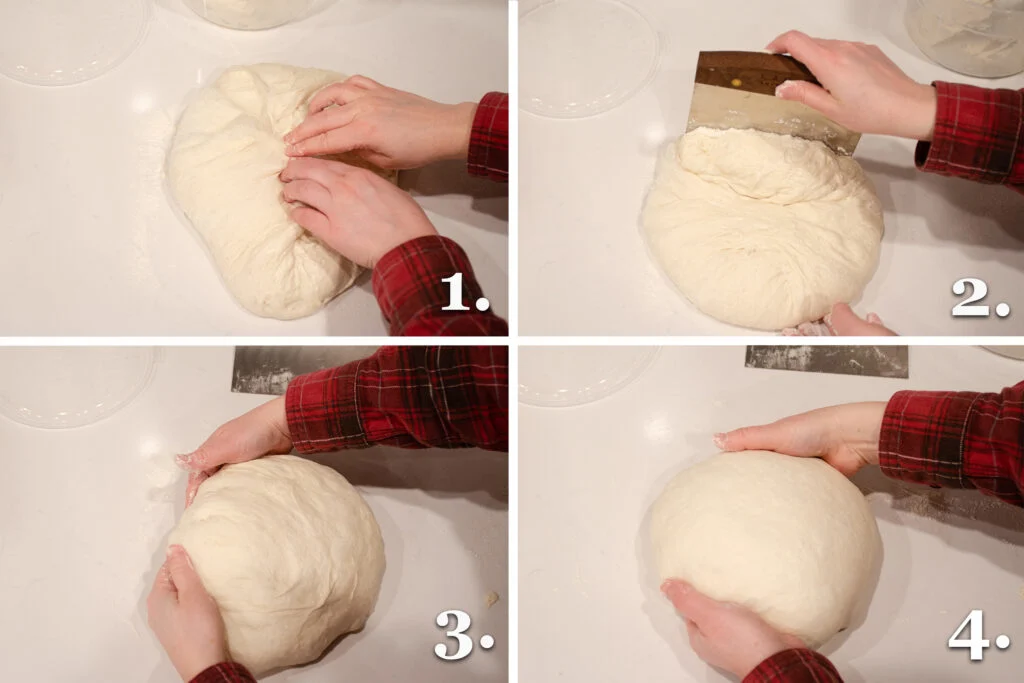
For the Pre Shape:
- Lightly flour your work surface and gently dump the dough out onto it. Gently grab the corners of the dough and pull them towards the center, starting to create a ball.
- Flip the dough over so the smooth side is on top.
- Cup your hands under the dough, and gently roll it over your work surface, tucking the dough under itself and creating surface tension.
- Continue rolling the dough over the work surface until a smooth ball forms.
You can gently pop any large bubbles that appear on the dough.

Bench Rest:
Lightly dust the dough with flour and cover with a tea towel.
Allow to rest for 30 minutes.

Final Shape:
After the bench rest, it’s time to perform the final shape.
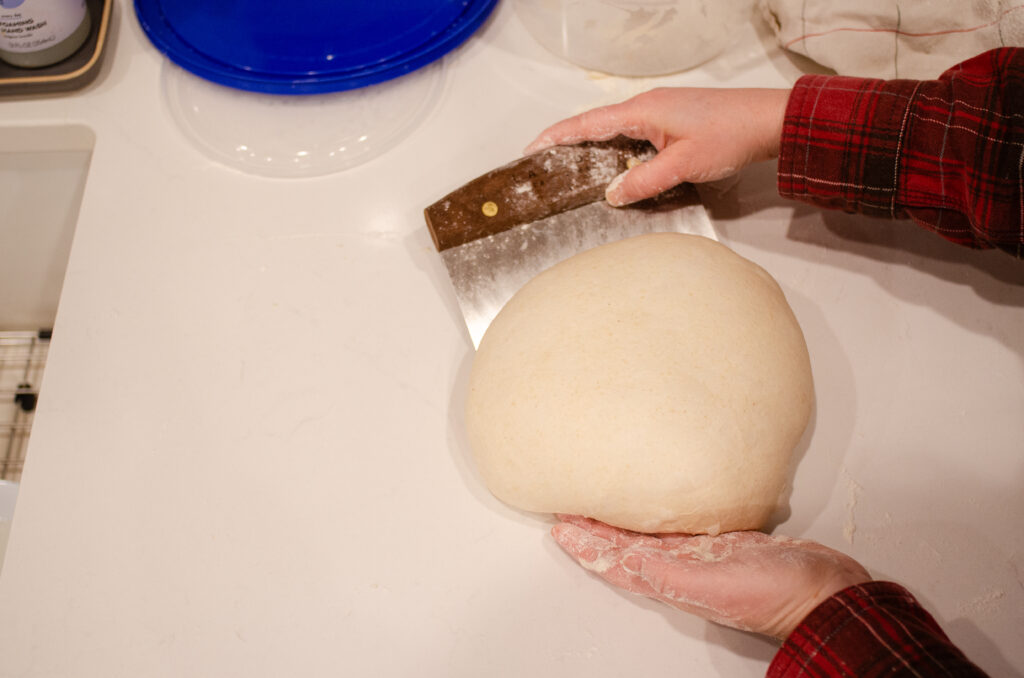
If you’re shaping a boule (a round loaf), you can simply repeat the process of rolling the dough across the surface while tucking it under itself. You should end up with a smooth, taught ball.
You can do this with just your hands, or use a bench scraper to help.

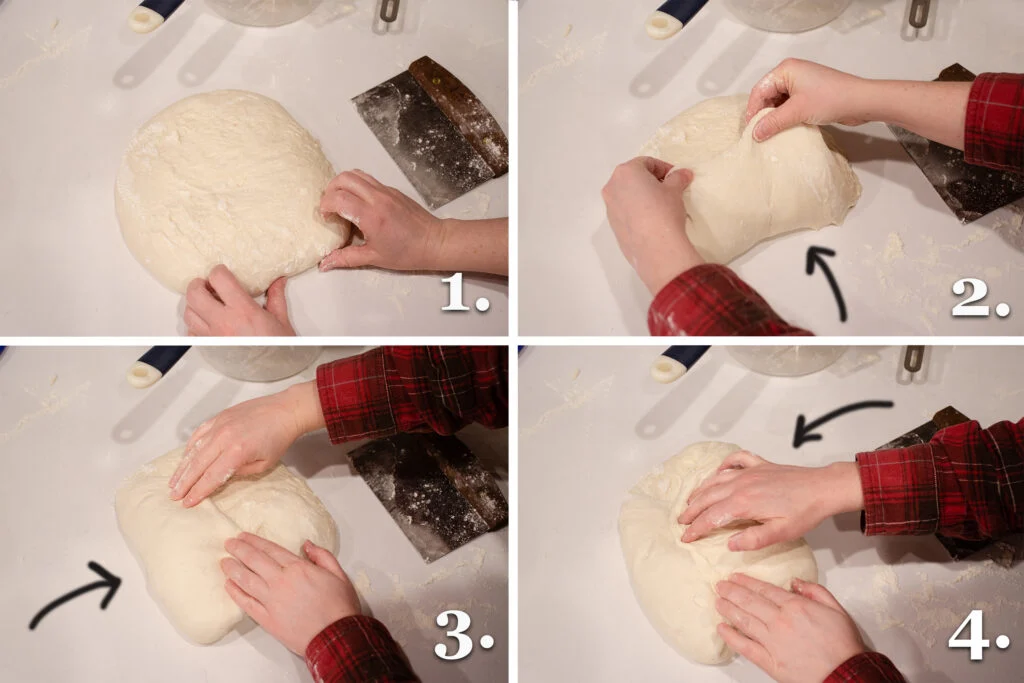
How to Shape a Sourdough Batard
The process for shaping a batard (oval loaf) is a little different.
- After the bench rest, flip the dough over so the smooth side is down.
- Next, grab the bottom edge and pull it to the center.
- Grab the left edge and pull it to the middle.
- Finally, grab the right side and pull it toward the center.


Starting from the top edge, gently roll the dough like you’re shaping a traditional loaf of bread, gently pushing down with your thumbs to seal.
Pinch the seam and ends to seal.

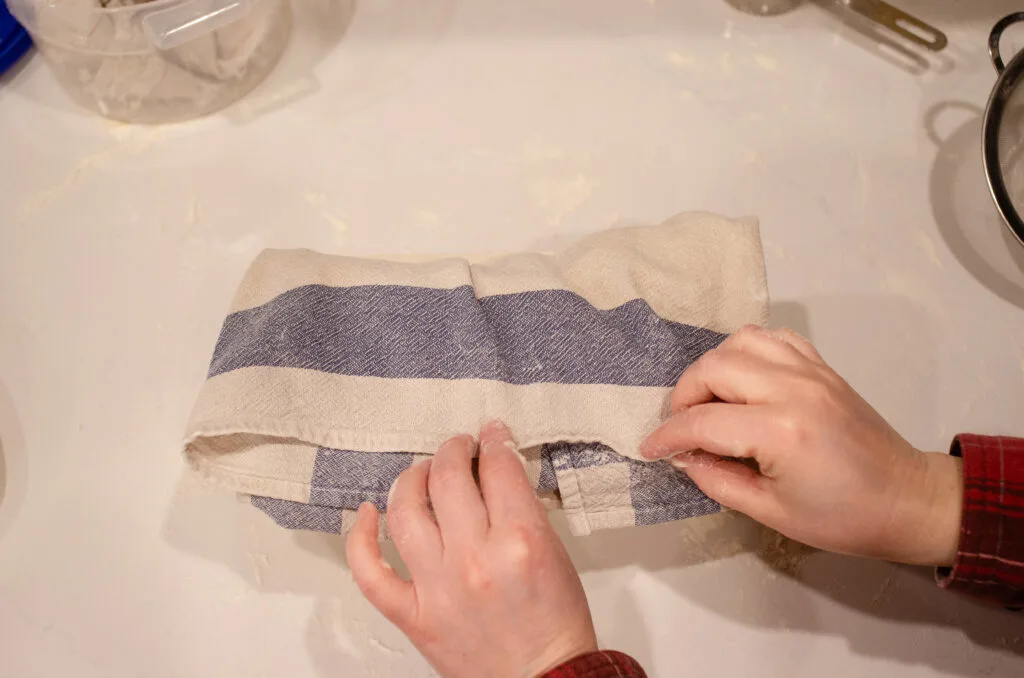
Whether you’re forming a boule or a batard, generously dust a tea towel with flour. You can use either all-purpose flour or rice flour. Place the tea towel inside of the banneton basket.
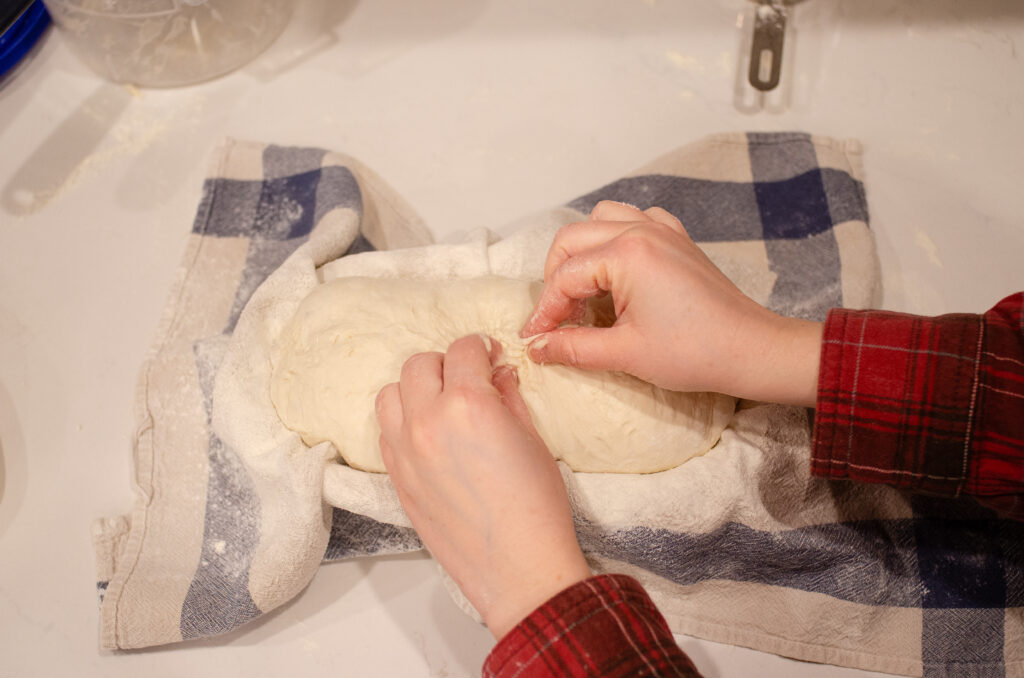
Place the shaped dough upside down in the prepared proofing basket. “Stitch” the dough closed to create even more surface tension and further shape it.
Dust the underside of the dough with flour.
Step 6: Cold Ferment

Fold the tea towel over the top of the dough. If your proofing basket already has a built in liner, you can use a reusable “shower cap” type cover or a clean plastic bag to cover your dough.
Transfer to the refrigerator to cold ferment for 12-20 hours.
Step 7: Baking

The next day or after the cold ferment, it’s time to bake your artisan sourdough bread!
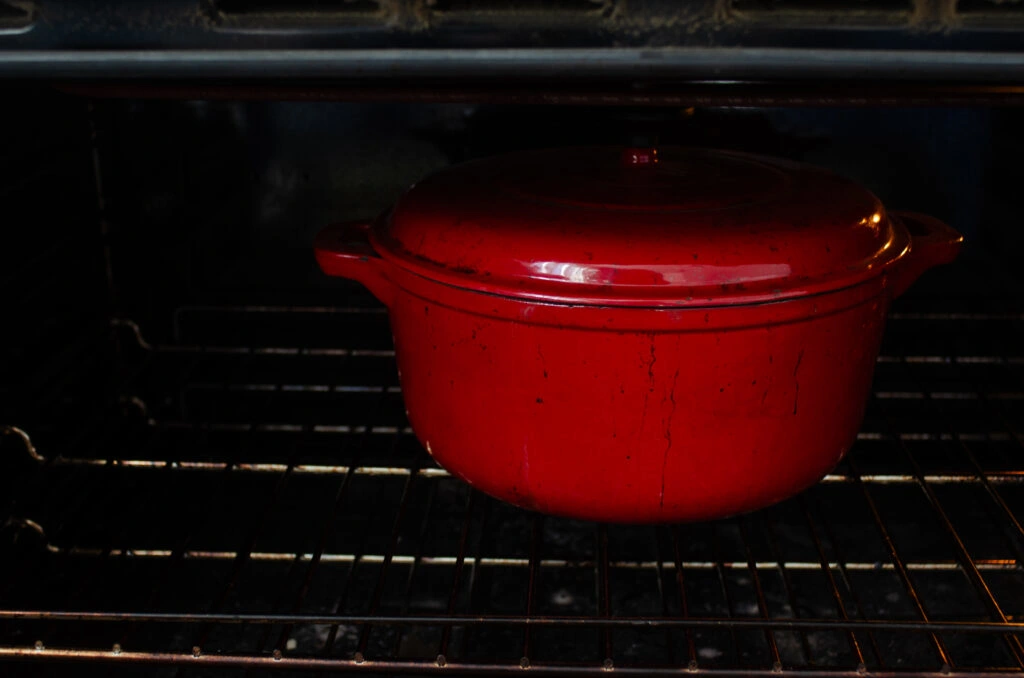
Half an hour before you’re ready to bake, preheat your oven to 500° F (260° C) and place an oven safe Dutch oven in the oven to preheat. Make sure the lid of your Dutch oven is oven proof to 500°!

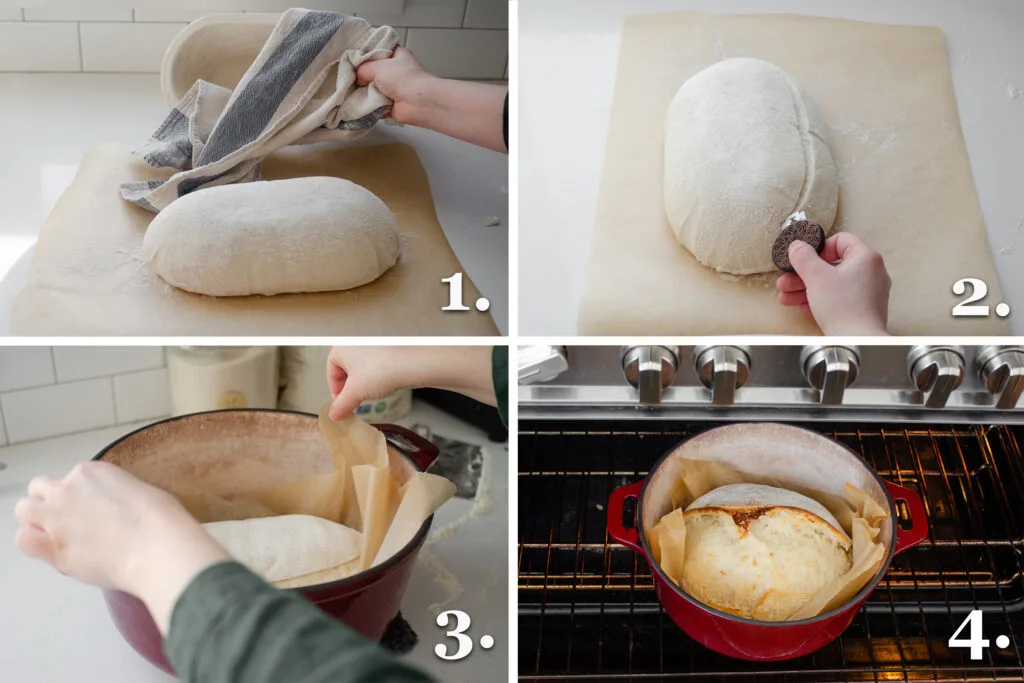
After the oven and Dutch oven have preheated for at least 30 minutes, gently invert the loaf onto a sheet of parchment paper.
Score the loaf with a razor blade, sharp knife, or bread lame.
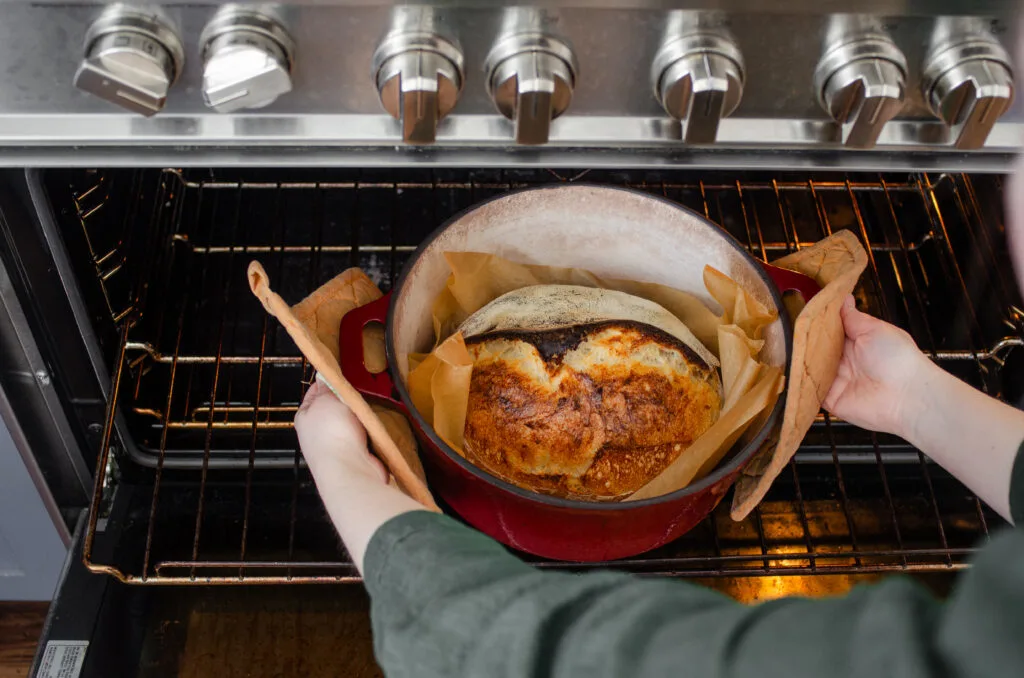
Carefully transfer the loaf, along with the piece parchment paper, to the preheated Dutch oven. I highly recommend using oven gloves or oven mitts to prevent burns!
Turn the oven down to 450° F (232 C) and bake the loaf, covered, for 30 minutes.
Remove the lid of the Dutch oven and bake for an additional 20 minutes, or until the bread is deep golden brown and reaches an internal temperature of 205° F (96 C).
The amazing thing about sourdough Dutch oven bread is the flavor the crust develops while it bakes. Heavenly!

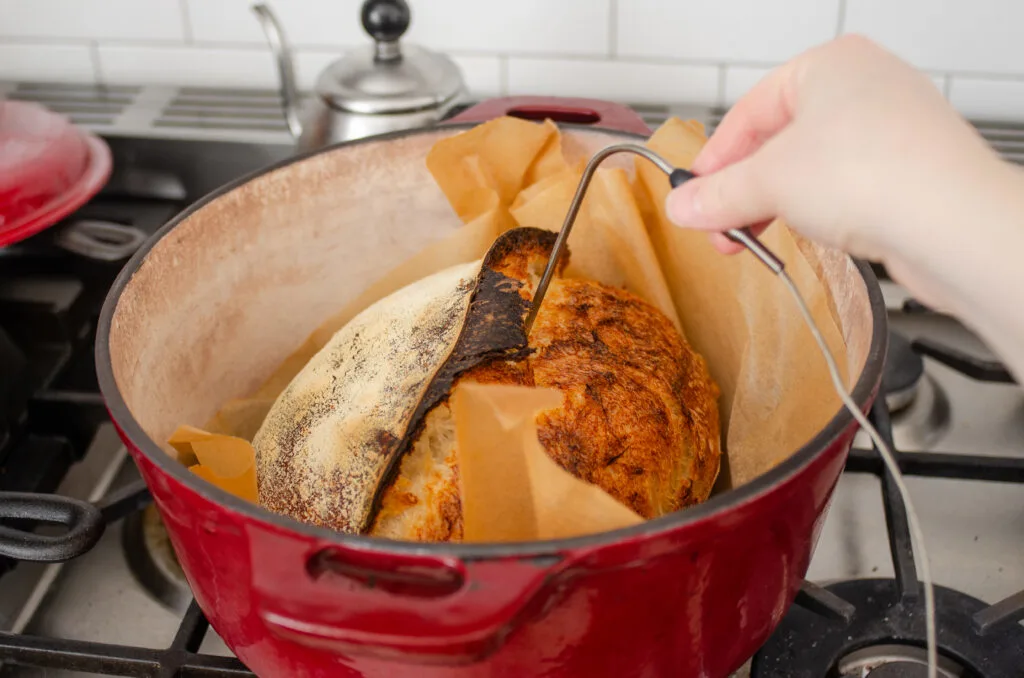
My bread is always perfectly baked after 30 minutes covered, 20 minutes uncovered, but everyone’s oven is a little different!
To ensure your bread is done baking, you can use a thermometer to test for doneness.
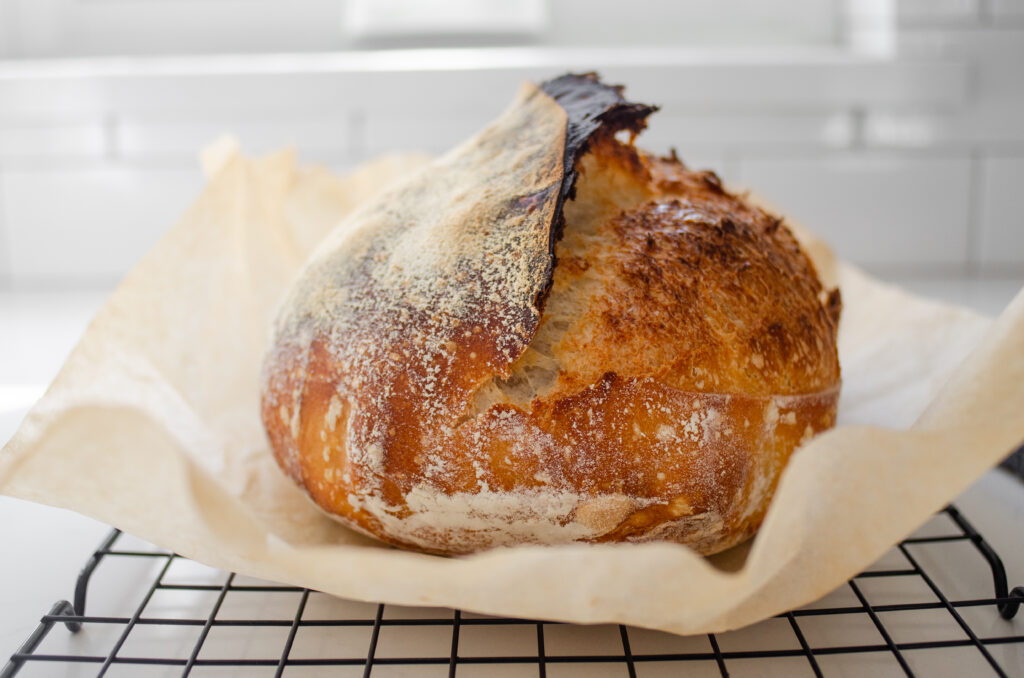

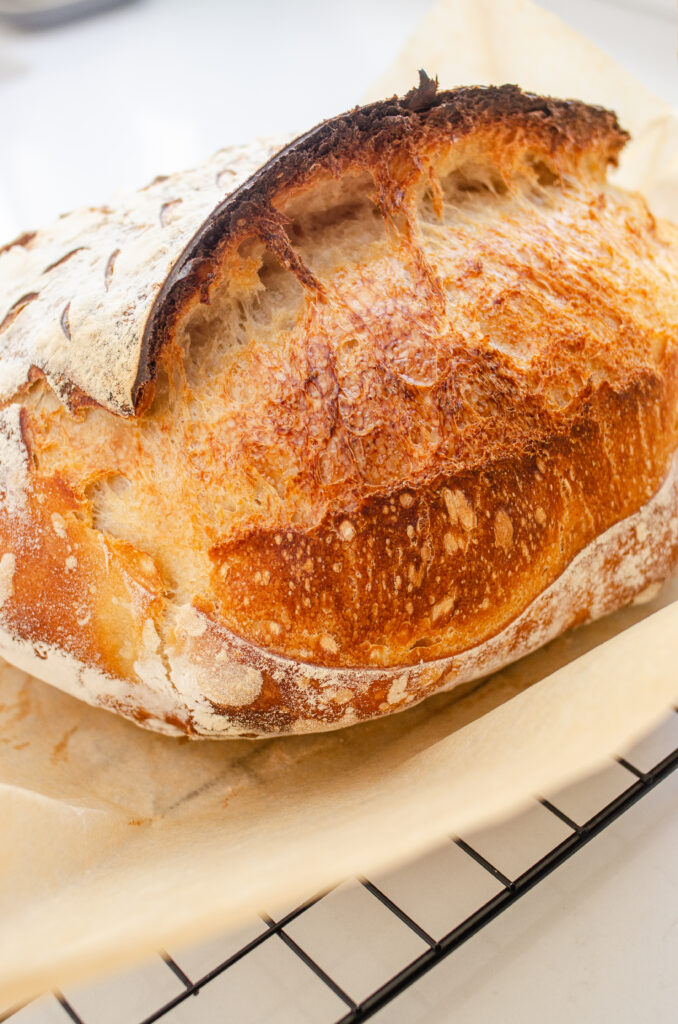
Transfer the loaf to a wire rack to cool for at least 1 hour before slicing.
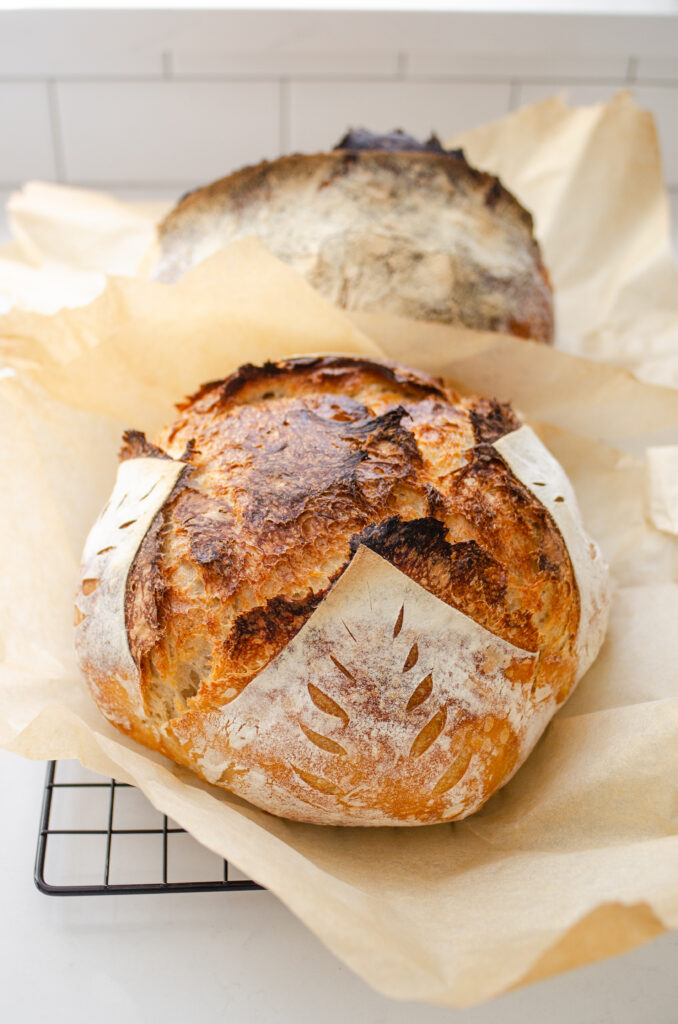
Look at that crispy crust!
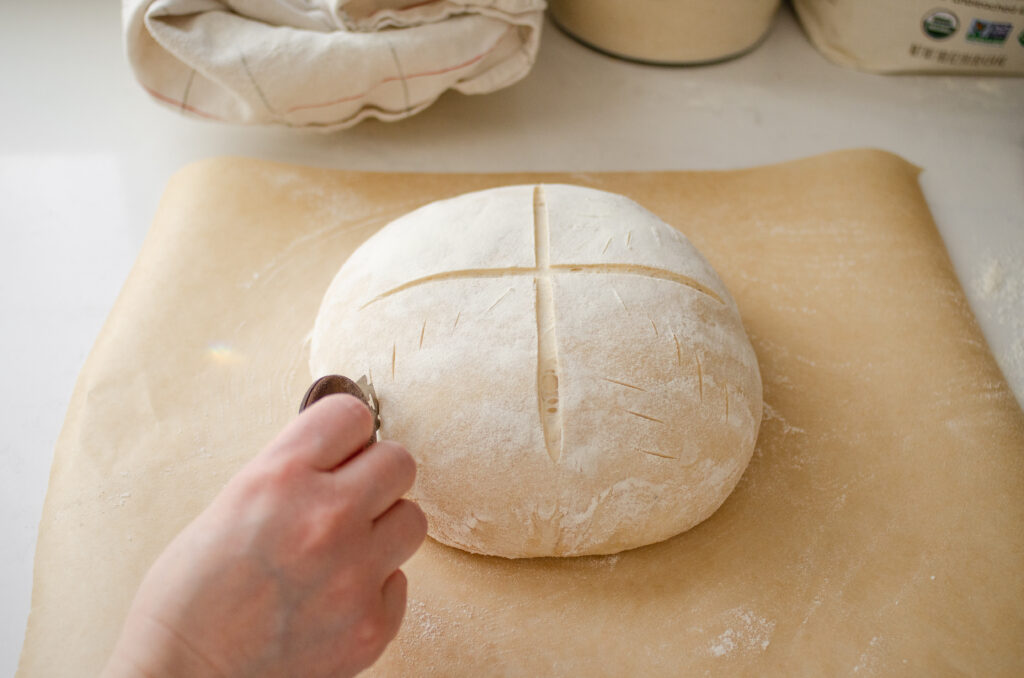
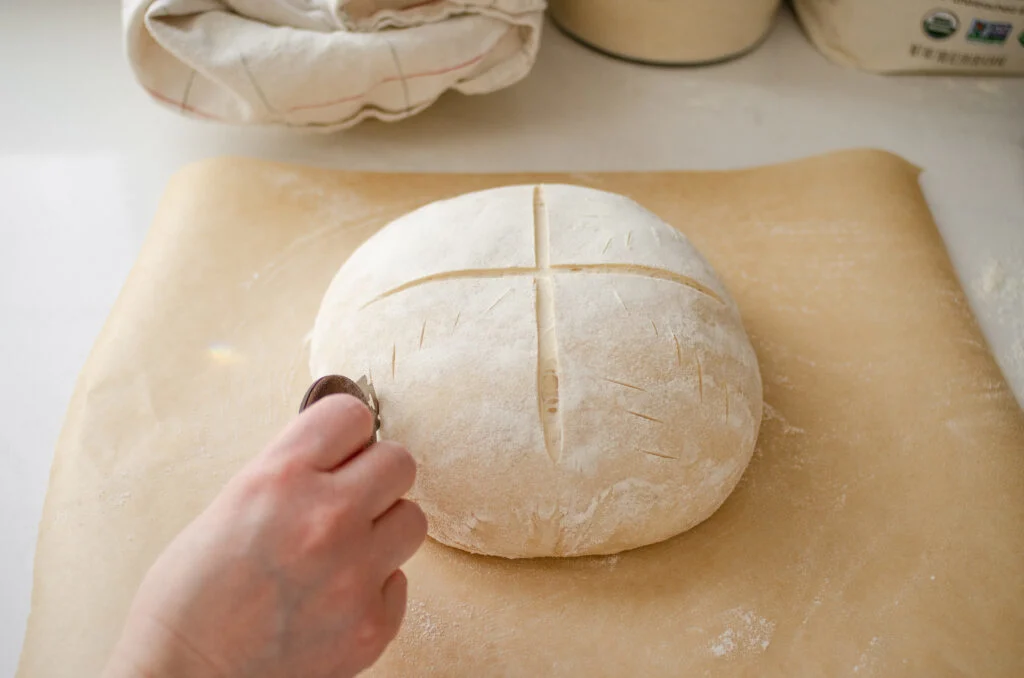
By the way, if you’re scoring a boule, an X pattern works a bit better than just one along one edge.
I’ll have to do an entire post with scoring inspiration sometime!
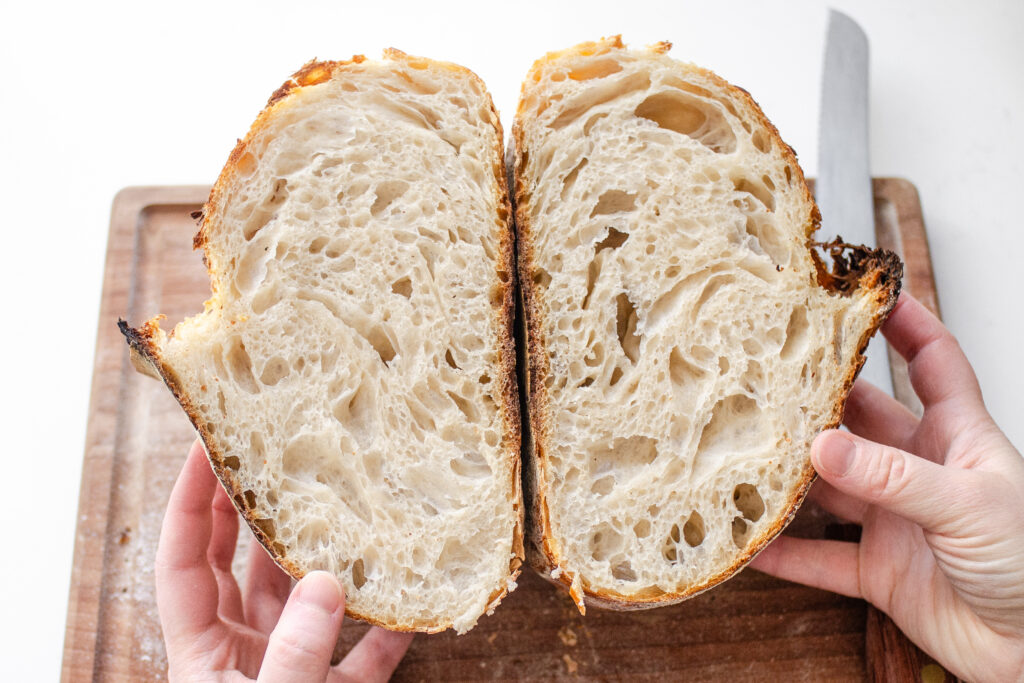
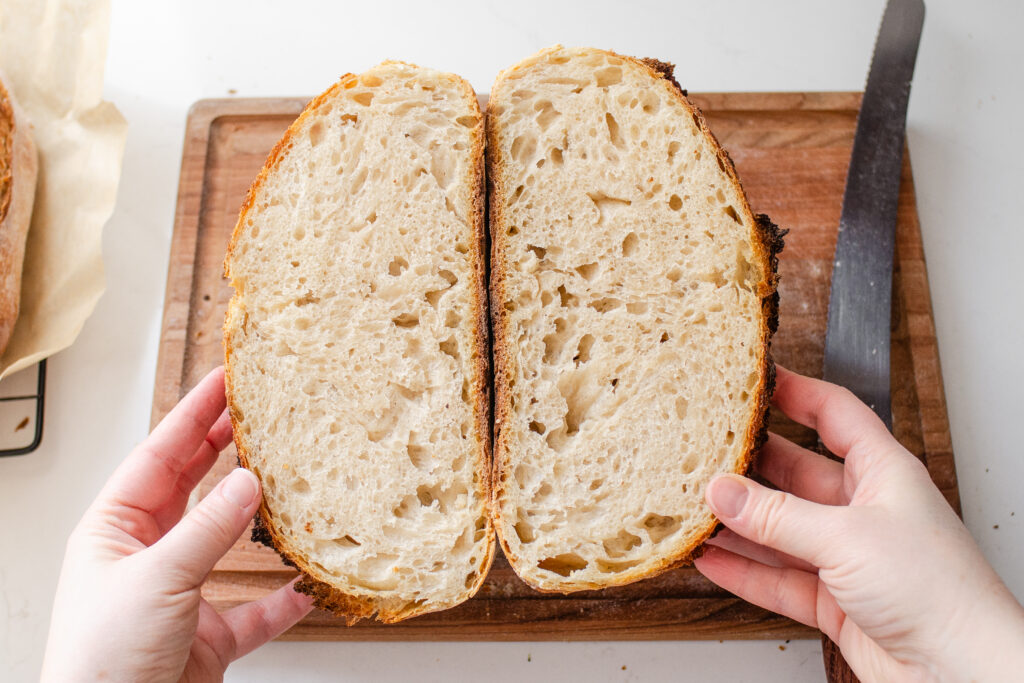
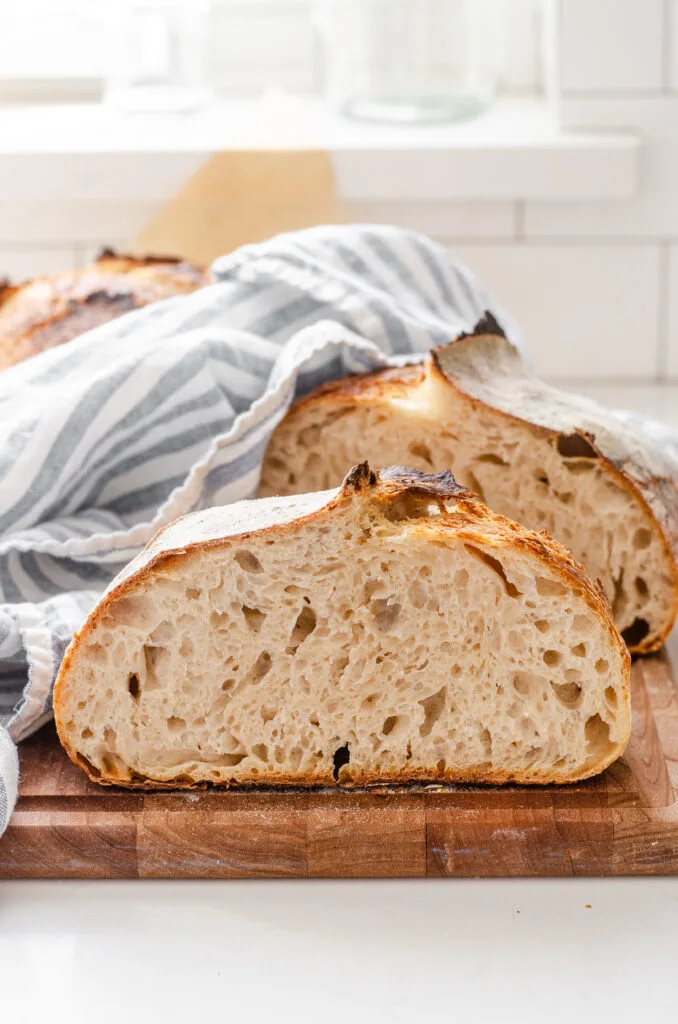
Example Crumb Shots

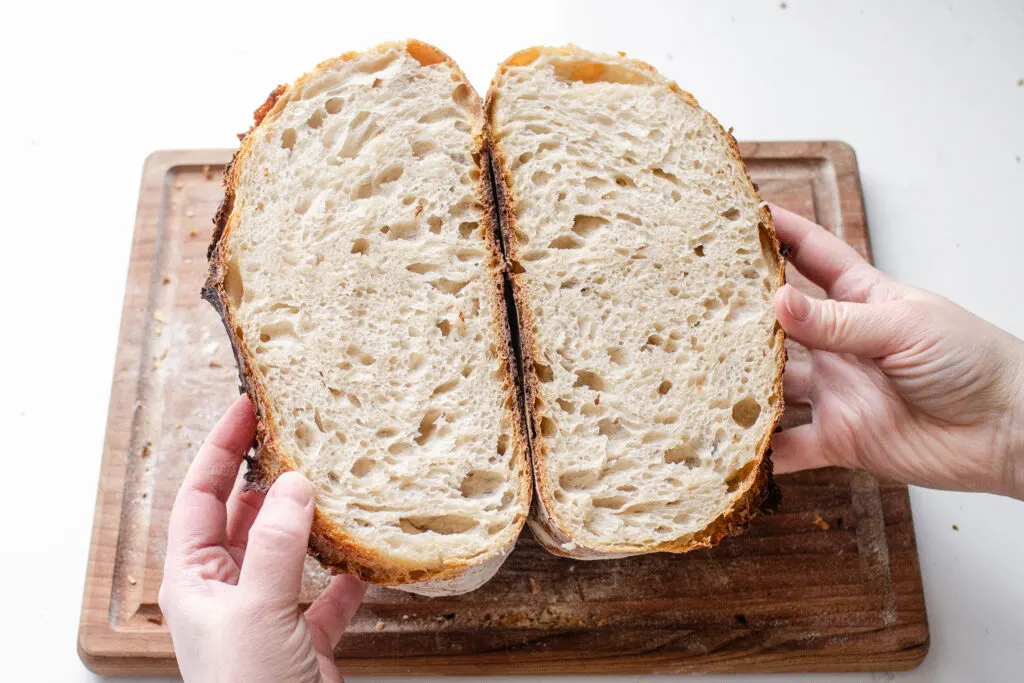
Here’s what the crumb structure of the round loaf looked like. I used 100 grams of hard white wheat flour for this one. 75% hydration.

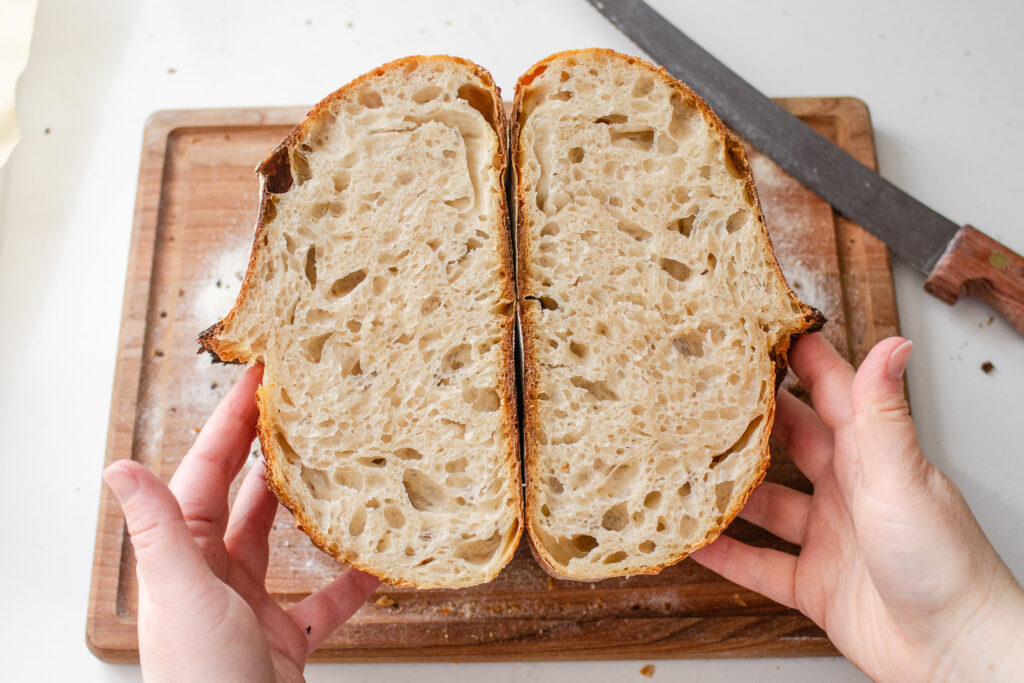
Here’s what the crumb structure of the batard looked like. This one was all white flour, 75% hydration, and it was slightly under fermented, but close!

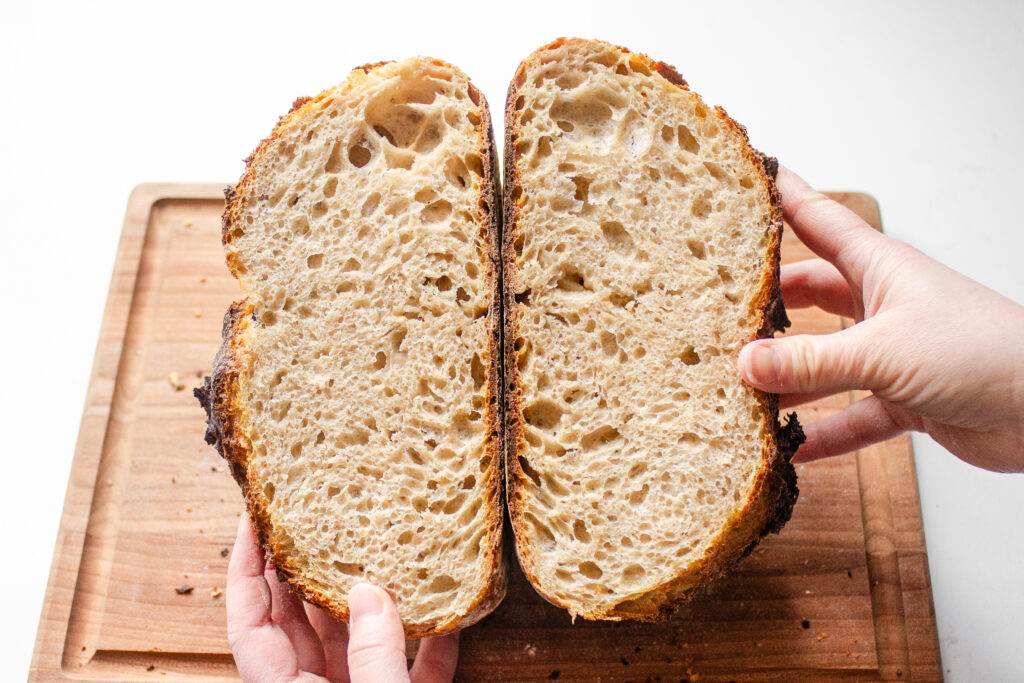
Here’s another all white flour batard, 75% hydration. I pushed the bulk fermentation longer, and the results were a better fermentation. Both loaves were delicious BTW.
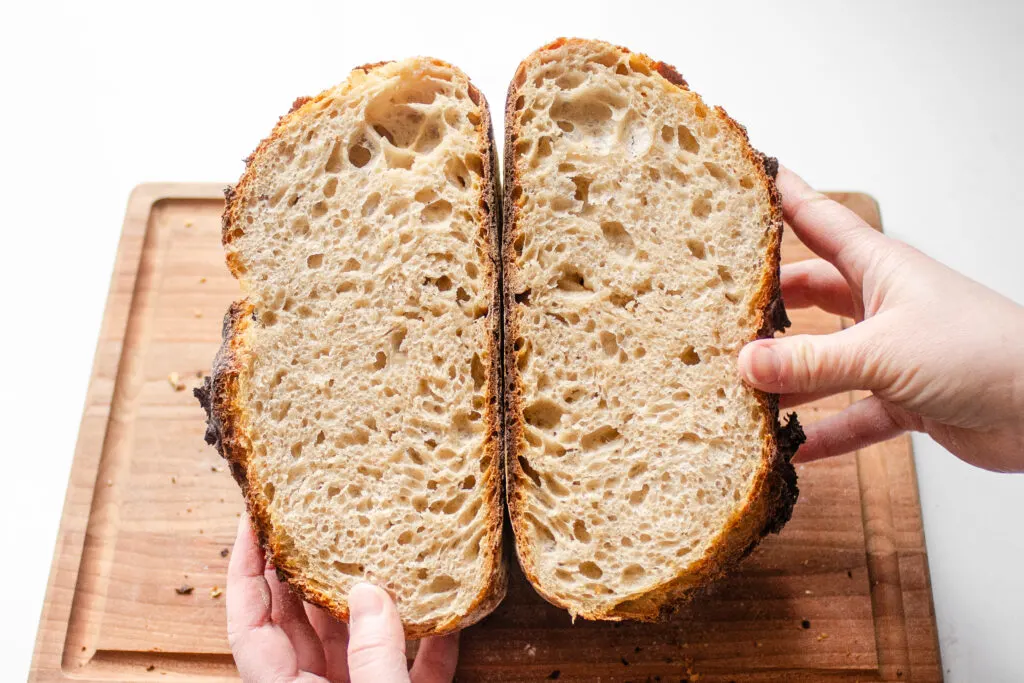
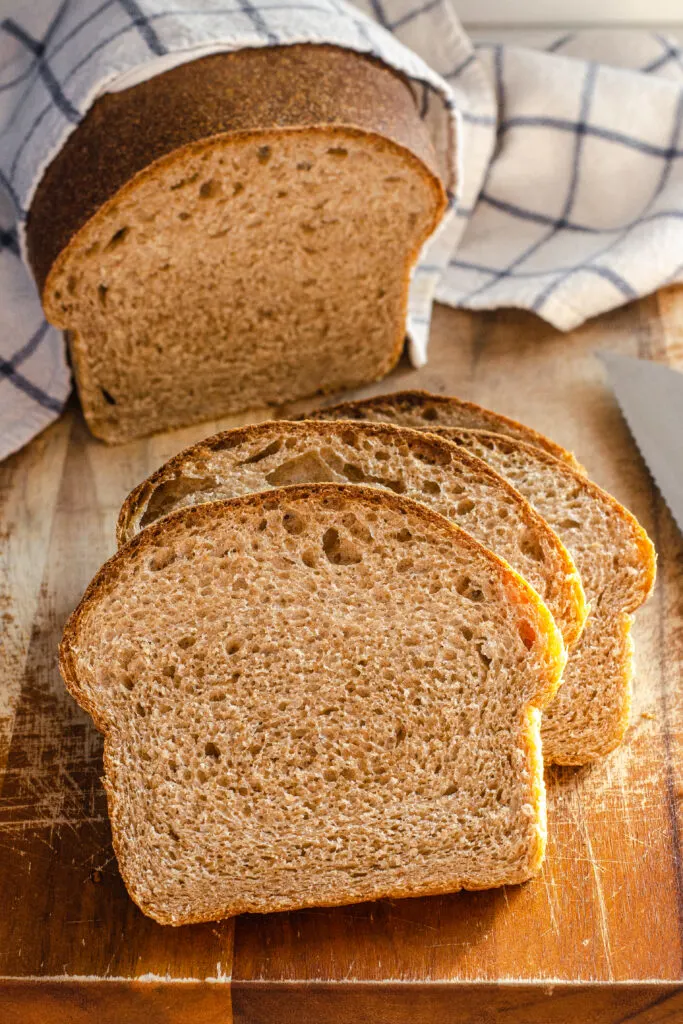
And here’s a loaf that was shaped into a boule and made with 50% hard white whole wheat flour and 50% bread flour. 75% hydration. I think this one was my favorite when it came to flavor.

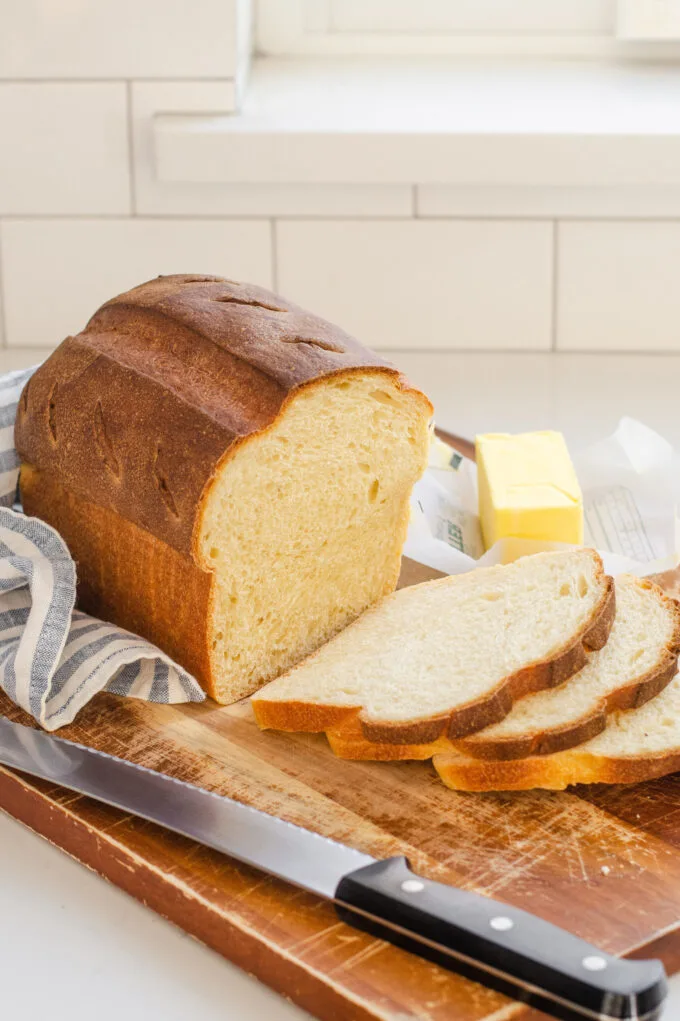
Finally, here’s an all white flour boule at 60% hydration. The crumb isn’t as open, but the dough was much easier to work with.
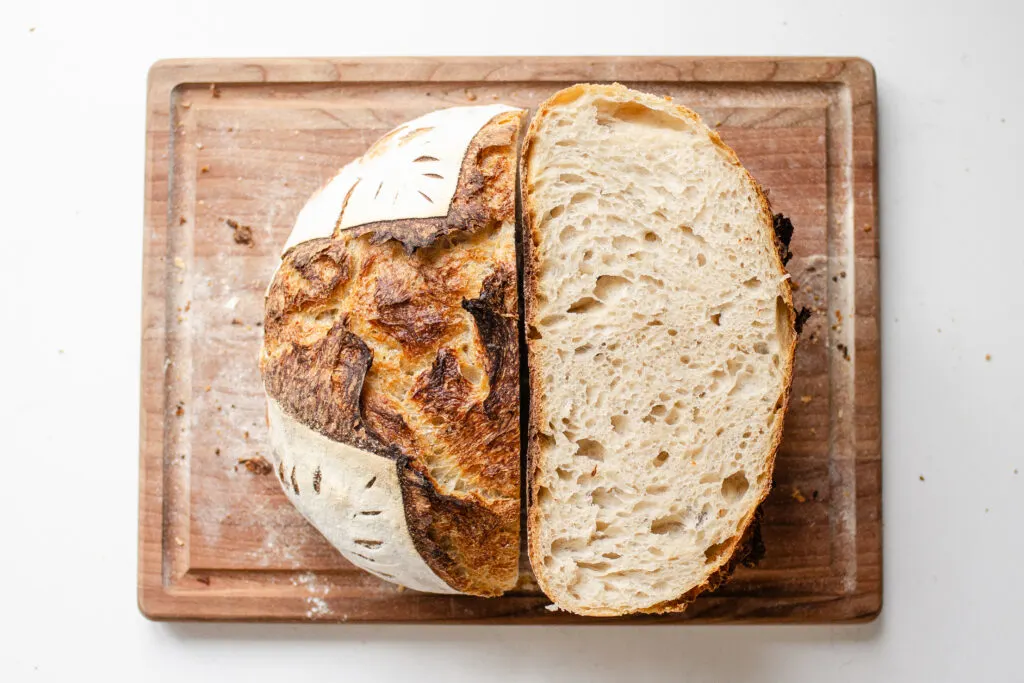
The Best Way to Slice Sourdough Bread
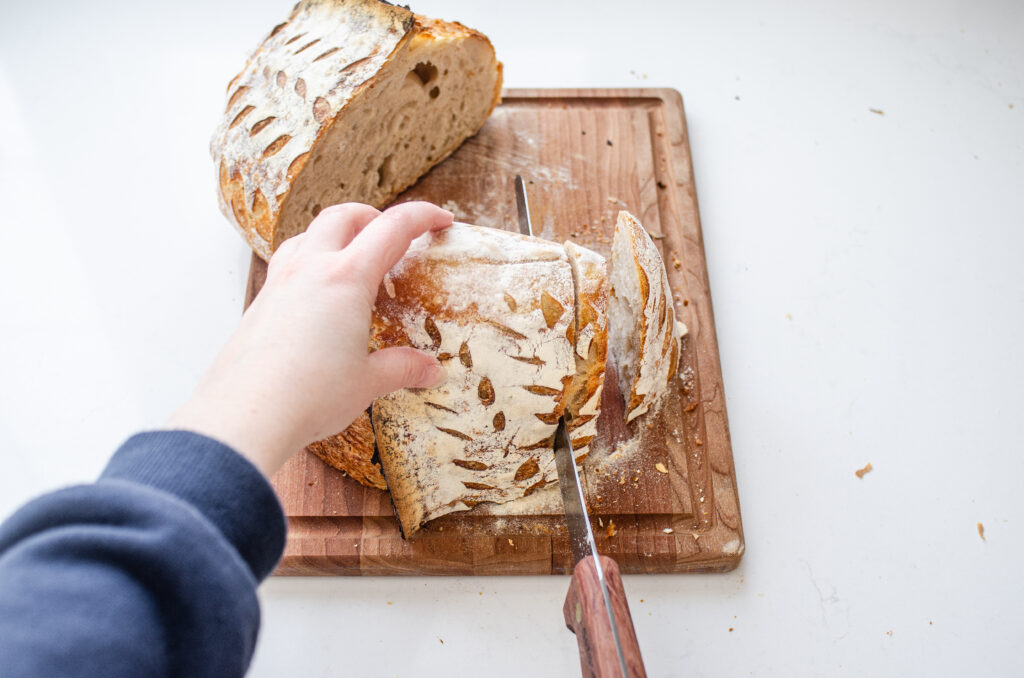

In my opinion, the best way to slice a sourdough boule or any sourdough artisan bread is to first cut it in half, then flip it so it’s sitting cut side down. Then slice from the bottom down to the cut edge.
This cuts down on smashing your loaf!
You can see a video demonstration on my Instagram page.
Storing

I like to store my sourdough bread in a plastic zipper top baggie at room temperature. It will last for around 5 days.
For longer term storage, you can store it in the freezer. It should keep for at least 6-8 weeks.

Frequently Asked Questions:
- Is sourdough bread better in a Dutch oven? I personally think that it’s much easier to achieve an excellently baked loaf of sourdough bread if you use a Dutch oven vs an open bake. That’s not to say that an open bake is automatically worse, it’s just more difficult to get amazing results.
- How long do I bake sourdough bread in a Dutch oven? It really depends on the size of loaf you’re baking, how hot your oven is, etc. For this recipe I preheat my oven to 500F, lower to 450F, and bake 30 minute with the lid on, 20 minutes with the lid off. So 50 minutes total.
- Do you preheat a Dutch oven with the lid on or off for sourdough bread? I preheat mine with the lid on.
- Do you have to use parchment paper in Dutch oven for sourdough? While it isn’t required, it does make it so much easier to transfer the dough to the HOT Dutch oven. You could technically use a floured pizza peel transfer the dough, but that would be more finicky. Or if you bake the loaf starting in a cold Dutch oven, you could simply turn the dough out directly into the Dutch oven. You’ll want to bake for longer if you start with a non-preheated Dutch oven though.
So that’s how to make an amazing wild yeast loaf in a Dutch oven. Make sure to check out my other homemade sourdough bread recipes below!
More Sourdough Bread Recipes:


Recipe Card
Dutch Oven Sourdough Bread


Learn how to consistently bake delicious loaves of artisan sourdough bread using a Dutch oven to create steam!
Ingredients
- 300-375 grams room temperature water (see note)
- 100 grams active 100% hydration sourdough starter (see note)
- 300 grams all-purpose flour
- 200 grams bread flour (12% protein or higher)
- 2 teaspoon salt (see note)
Instructions
Fermentolyse:
- Place the water and starter in a large mixing bowl. Mix to combine. Add the all-purpose flour and bread flour and mix until well combined. The dough will still be shaggy at this point, but it should be evenly hydrated without patches of dry flour.
- Cover and allow to rest for 30 minutes.
Add Salt:
- Sprinkle the salt over the dough. Using wet hands, pinch the salt into the dough to start to incorporate it. It doesn't have to be completely mixed in at this point.
Stretch and Fold Sequences:
- Perform the first set of stretch and fold sequences by grabbing one edge of the dough with wet hands, pulling and stretching it up, and folding it over to the opposite side of the dough. Turn the bowl a quarter turn and repeat until the dough feels too "strong" to continue stretching and folding.
- Cover and let rest for 15-40 minutes.
- Repeat the steps for stretch and fold, rest, for a total of 6 stretch and fold sequences. Wait 15 minutes between the first 3 sets of stretch and folds, and 30-40 minutes between the last 3 sets.
Bulk Fermentation:
- Immediately after the last stretch and fold sequence, place the dough in a 2 quart or larger straight sided container. Note the height of the dough in the container.
- Cover and place in a warm spot in your kitchen (around 75° Fahrenheit or 24° Celsius) and allow to rise until the dough reaches 80%-100% doubled. If your kitchen is really warm, you'll want it to only reach about 80%, but if your kitchen is chilly you can push it to 100% doubled. This can take anywhere from 4-12 hours, with 6-8 hours being typical (see note).
Pre Shape:
- Lightly flour a spot on your work surface. Carefully turn the dough out onto the work surface, smooth side down. With floured or wet hands, grab the edges of the dough and bring them into the middle to start forming a ball.
- Flip the dough over, seam side down. Using flour hands or a bench scraper, roll the dough along the work surface, tucking the dough under itself to create a smooth surface.
- Set aside on a floured part of your work surface, cover with a tea towel, and allow to rest for 30 minutes.
Final Shape:
- Generously flour a clean lint free tea towel and line a banneton basket with it. Set aside.
- If forming a boule, simply repeat the step of rolling the dough along the work surface to create a nice, taught, smooth ball. Gently pop any large bubbles that come to the surface.
- Carefully pick up the smooth ball of dough and invert it into the prepared banneton basket. "Stitch" the seam to further shape the dough and create more surface tension. Fold the tea towel over the dough to cover. You can also use plastic bag or "shower cap" food safe cover.
Cold Fermentation:
- Place the banneton basket in the refrigerator for 12 hours.
Scoring and Baking:
- 30 minutes before you plan on baking the sourdough bread, place an empty oven safe Dutch oven (make sure the lid is oven safe as well!) into your oven and set it to preheat at 500 degrees F (260 C).
- When the Dutch oven has preheated for at least 30 minutes, place a piece of parchment paper onto your work surface.
- Carefully invert the loaf of sourdough bread onto the parchment paper. Remove any excess flour and score as desired.
- Using oven gloves or oven mitts, carefully transfer the loaf, parchment paper and all, to the preheated Dutch oven.
- Turn the oven temperature down to 450 F (232 C). Bake the loaf with the lid on for 30 minutes. Remove the lid and bake uncovered for an additional 18-20 minutes, or until the loaf is deep golden brown and reaches an internal temperature of 205 F (96 C).
- Using oven gloves or oven mitts, carefully transfer the baked loaf to a wire cooling rack. Allow to cool for at least 1 hour before slicing.
Notes
- Water: If you're brand new to sourdough baking, you may want to use the smaller amount of water since the dough will be easier to work with. As you become more comfortable with the process, you can increase the amount of water to achieve your desired results.
- Starter: It's super important to have an active and healthy starter for this recipe. You should have fed your starter 4-12 hours previously and it should have at least doubled in volume or reached peak and be nice and bubbly. Use it soon after it reaches peak fermentation. Also, it should be at minimum 2 weeks old if you made it from scratch, preferably 1 month old. If you're unsure what a healthy starter should look like, read the starter section in the post above.
- Salt: I use unrefined sea salt, so if you opt for table salt you may want to decrease the amount a bit.
- Bulk Ferment: Several factors can affect how quickly your dough finishes the bulk fermentation phase. It's best to keep an eye on your dough instead of going by a rigid timeline. Set a timer if needed to remember to check on the dough.
Recommended Products
As an Amazon Associate and member of other affiliate programs, I earn from qualifying purchases.


Nutrition Information:
Yield:
12Serving Size:
1 sliceAmount Per Serving: Calories: 167Total Fat: .5gSaturated Fat: .1gTrans Fat: 0gCarbohydrates: 35gFiber: 1gSugar: 0gProtein: 5g
Joy
Friday 5th of September 2025
Thank you for this thorough step-by-step tutorial! I love your daughter’s comment at the end because I also thought that your loaf looked beautiful! I hope my loaves comes out looking like yours!
Erica Kastner
Saturday 6th of September 2025
She's the sweetest! It's all about dialing in those 4 factors. You've got this!
Mary Kate
Wednesday 26th of March 2025
Do you have a video of this recipe?
Erica Kastner
Friday 28th of March 2025
Yes, at the top of the post! If it's not displaying, you may need to disable an ad blocker.
Jill
Sunday 23rd of March 2025
I've been making your original sourdough recipe for years. I'm excited to try this one!
Erica Kastner
Sunday 23rd of March 2025
Hope you enjoy, Jill! I think the room temperature bulk ferment in this recipe helps to dial in the fermentation a bit more accurately than my original recipe!