Come and tour my transitional, industrial farmhouse style kitchen!
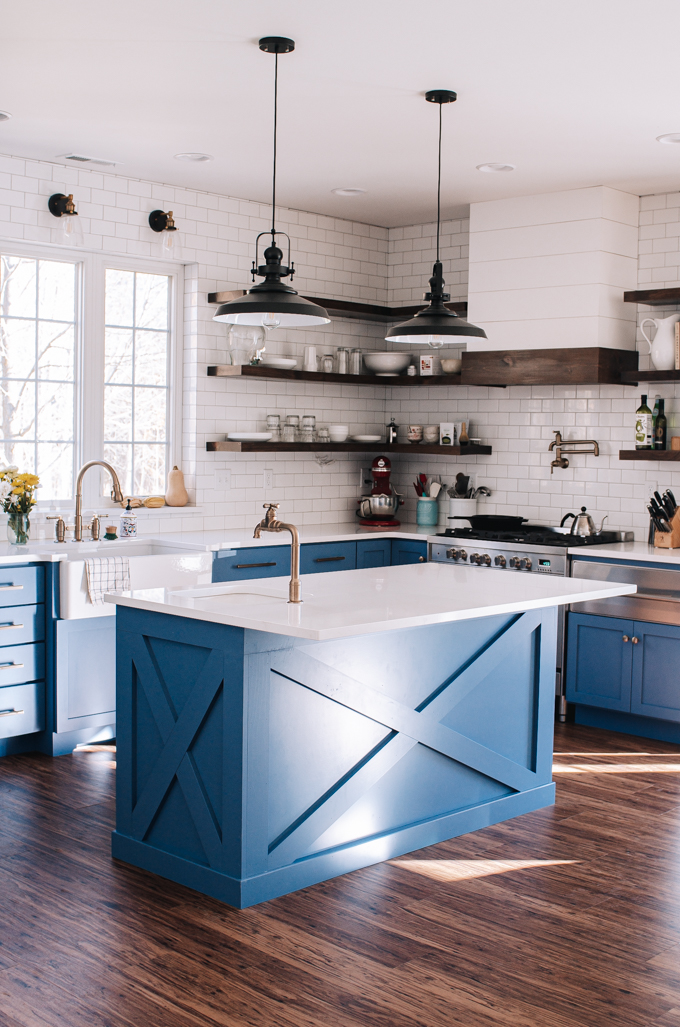
Well, well. I’m finally getting around to sharing a tour of my new (dream) kitchen with y’all!
It’s by no means finished, as you can tell by the wires peaking out of the open shelving.
But it’s gonna be a while before it’s completely done, so I figured I’d show you a kind of finished, kind of work in progress kitchen tour!
My Transitional Industrial Farmhouse Style Kitchen
Before we jump into the tour, let me talk a little bit about the style of my kitchen.
I went for a transitional blend of classic, industrial, and farmhouse in my kitchen.
The faucets, light fixtures, and cabinet hardware have an industrial feel. The cabinets, stove, and counters have a more traditional style. And the sinks, backsplash, island, and range hood cover have that farmhouse vibe.
Okay, let me show you around my kitchen!
The Kitchen Island:
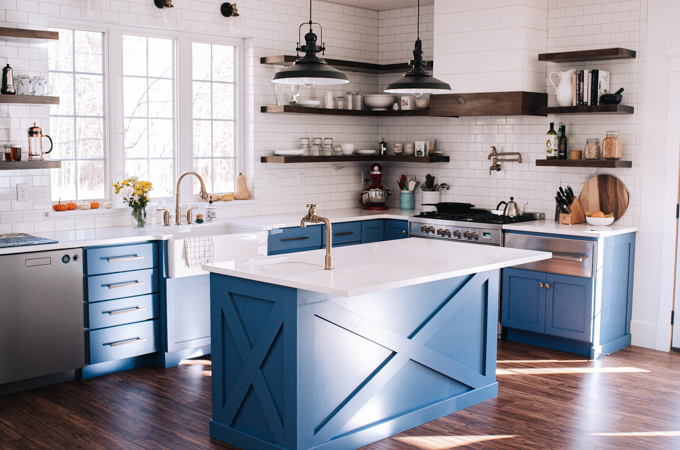
Let’s start with the island.
We have an L shaped kitchen, and I think it blends really well with the kitchen island.
I asked Reuben to put as much space between the main cabinets and the island as possible. I’m so glad I did, because we don’t tend to bump into each other when we’re both working in the kitchen!
For the counters, we went with Silestone Statuario quartz. We’ve had a few issues with these countertops, which I discussed in the video. Basically, they stain and chip. I might do a separate post about that.
Reuben used two of the base cabinets from the Craigslist Kitchen to construct the island. He resurfaced the side and back panels by framing them and putting Xs on them.
We went for a cool, mid-tone blue on the island. The color is Blue Jacket from Ecos paints.
We did semi-gloss for the paint finish on the cabinets. Reuben didn’t prime the cabinets first (it’s a long story), and a few small pieces of paint have come off here and there. I love the more matte finish of the semi-gloss, but gloss might have been a good choice for durability. I don’t regret my choice, but it’s something to consider.
The dimensions of our kitchen island are approximately 1.5 m by 0.5 m (64 inches by 24 inches).
The overhang is 13 inches. We asked the quartz manufacturer to extend the overhang out as much as possible without compromising the integrity of the countertop.
I found the black pendants over the island on Birch Lane, and I’m so happy with how they look. We spaced them 33″ apart, and put them at a 36″ height above the island. We wanted them low enough to add task lighting, but high enough that we could see into the kitchen easily.
The Sink in the Island
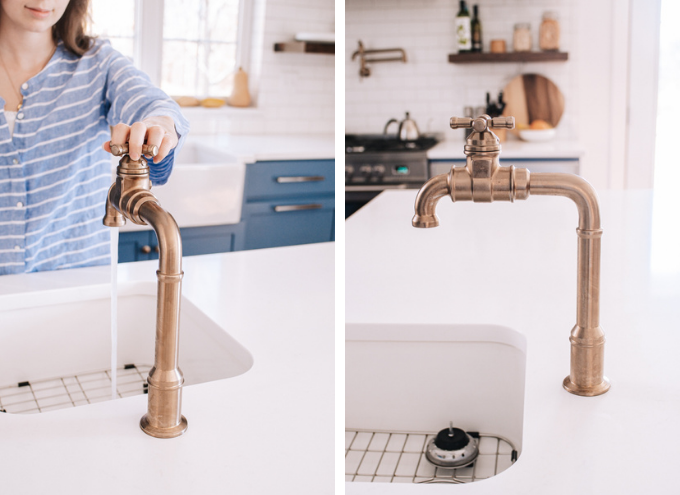
I really wanted a prep sink in the island, and I’m so glad that I went for it. It’s really handy to be able to wash your hands or prep other things while someone is washing the dishes.
We got a Houzer undermount fireclay bar sink.
I fell in love with the Delta Broderick True Bar Faucet in the color champagne bronze. The industrial feel is perfect in my kitchen.
The downside to a bar faucet like this is there’s no spray function. Sometimes I have to wipe the crumbs towards the drain with a rag. It’s not a huge issue for me, though.
Also, this faucet works like a shower: you turn it a little bit, and it’s cold. Turn it more, and it gets hot. This means that you can’t have a small trickle of hot water: it has to be on all the way.
Again, those two issues are small enough that they don’t outweigh the design for me. But it’s something to consider!
The Range
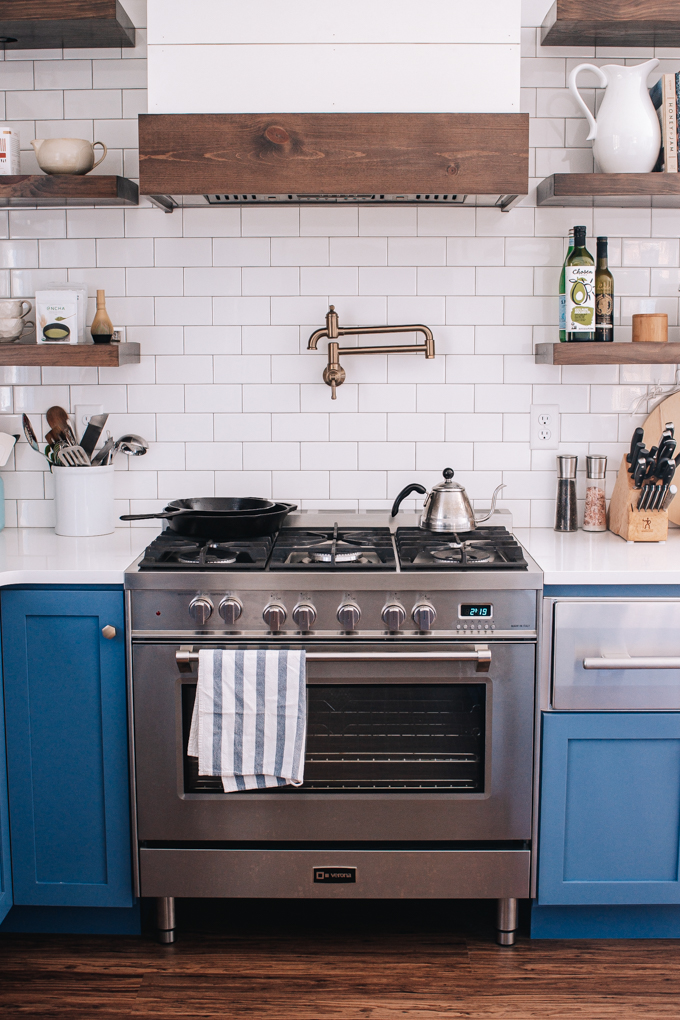
Okay, let’s move on to the range!
We went with the Verona Prestige Dual Fuel 36″ Range.
What really sold me on this range was the fact that Melissa from The Faux Martha reviewed it.
I am in love with it, but it does have a couple of features that I would change…
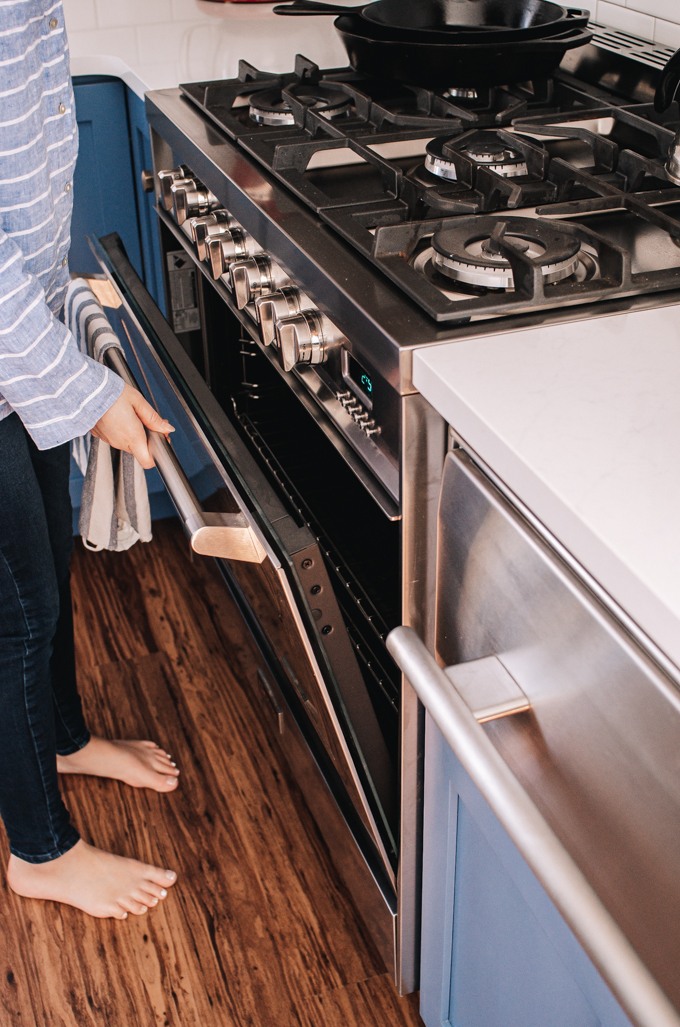
The oven depth is a little shorter than my previous oven. Some of my pans just barely fit in. And a Papa Murphey’s family size pizza hits the back of my oven. Just saying.
Also, the low setting on the gas range is not very low. But you can get around that by turning the knob back beyond the starter until the flame is low enough.
Also, it takes a while to start the stove when it’s cold. Sometimes it takes about 12 clicks of the starter before it will start.
Not a huge issue for me. Doesn’t make me dislike this beautiful range. It’s just something to note.
Also, we went with the matching Delta Broderick pot filler above the stove.
Open Shelving in My Transitional Kitchen…
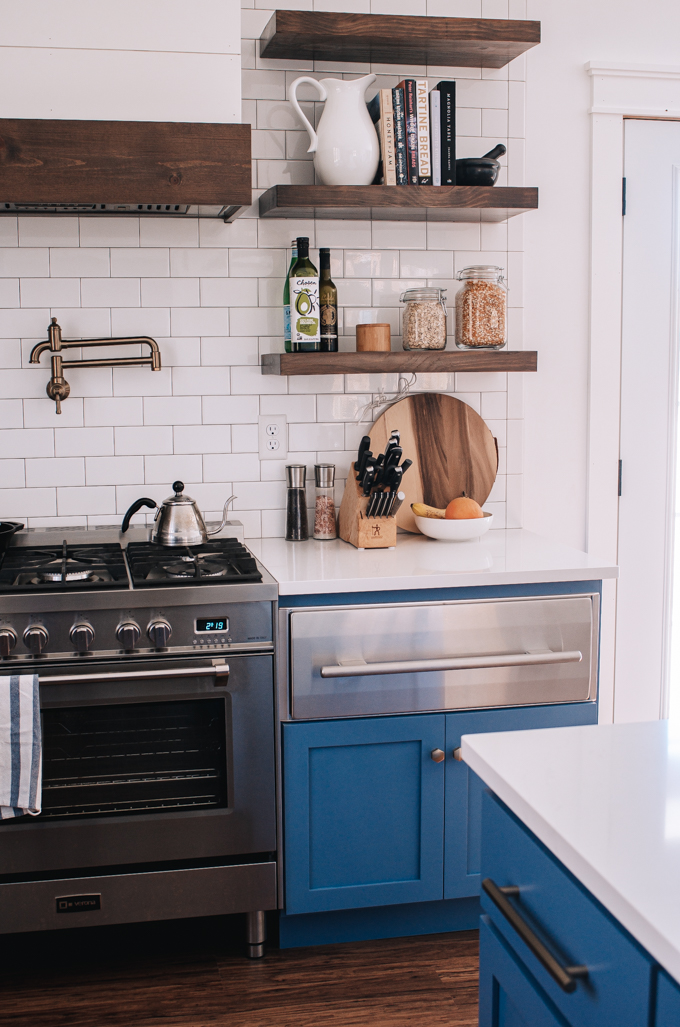
Since we got our cabinets used, it was going to be a bit of a headache to try to make the uppers fit into our new kitchen.
So we decided to just go with open shelving!
I knew that the major downsides to open shelving were dust and having to keep them looking nice and styled. But I decided to go for it anyway!
I try to keep only things that we either use often or would be pretty easy to dust. So far it hasn’t been a big issue!
But I haven’t figured out what I should put on the top shelves. ?
You can read more about the process of building our DIY open shelves for our kitchen in my previous post detailing how we bought the cabinets off of Craigslist.
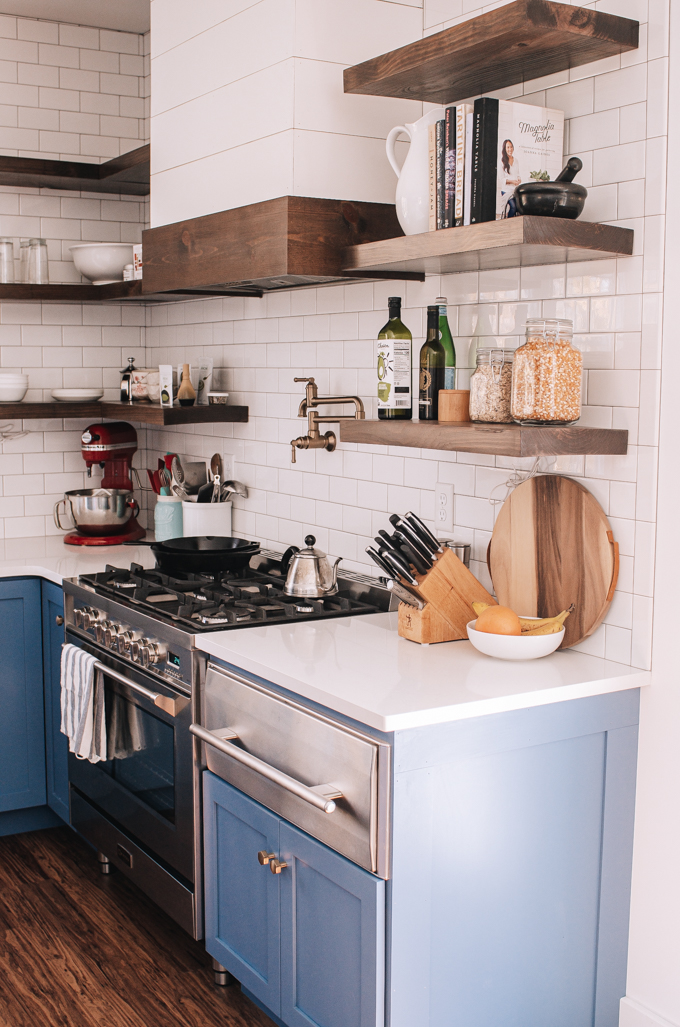
Next to the range we also have a Wolf warming drawer that came with the Craigslist kitchen. I thought it might be superfluous, but it’s actually really handy!
Besides keeping food warm, I’ve used it for proofing bread and softening butter.
Now I would never part with it!
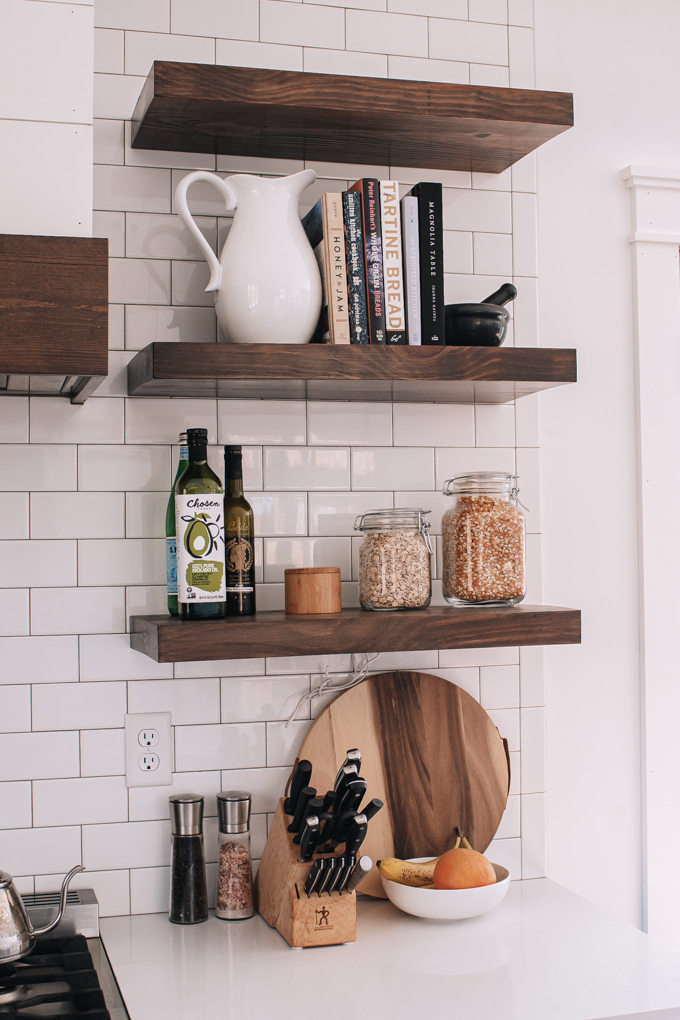
Next to the range and above the warming drawer I store my knives and salt and pepper grinders.
On the shelves above I have some avocado oil, a salt cellar, rolled oats, and popcorn. This is the brand of flip top jars I have.
Over that I have my pretty cookbooks with a pitcher on one side and mortar and pestle on the other to keep them from falling over.
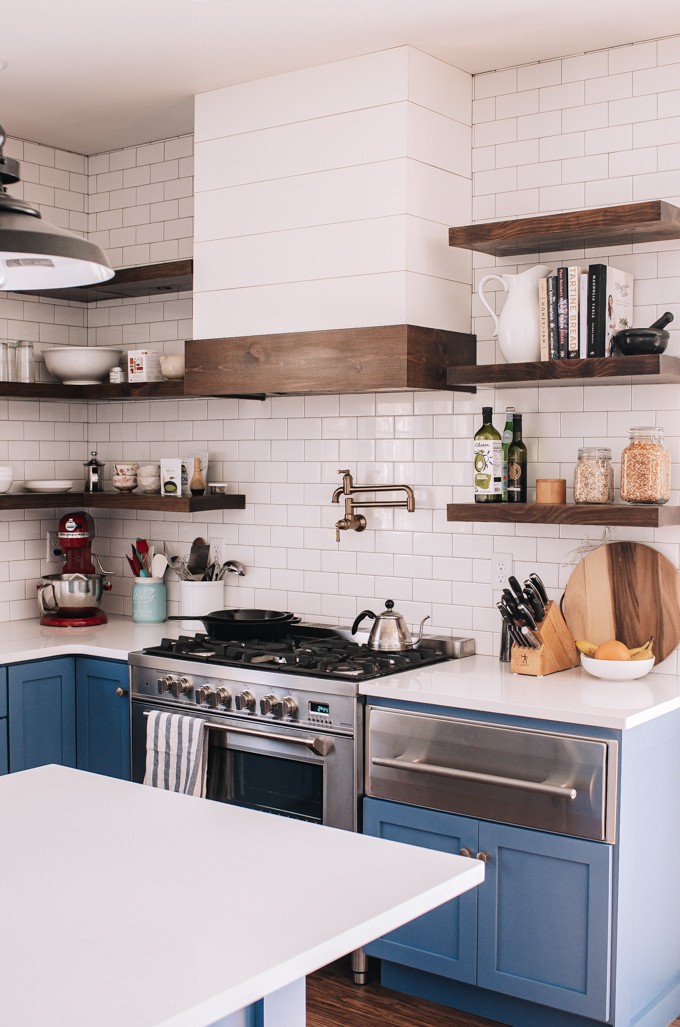
Reuben built the shiplap custom range hood cover himself. I saw something similar on Pinterest, and fell in love.
I think it’s a nice transitional style between farmhouse and industrial kitchen.
You can read more about that in the Craiglist Kitchen post.
We went with the 34″ Fabriano Range Hood by XO Appliance. The reason we chose this insert range hood is it has two lights instead of one, and the maximum sones is 6.5.
It’s not like a quiet little whisper on high, but it’s not outrageously loud either.
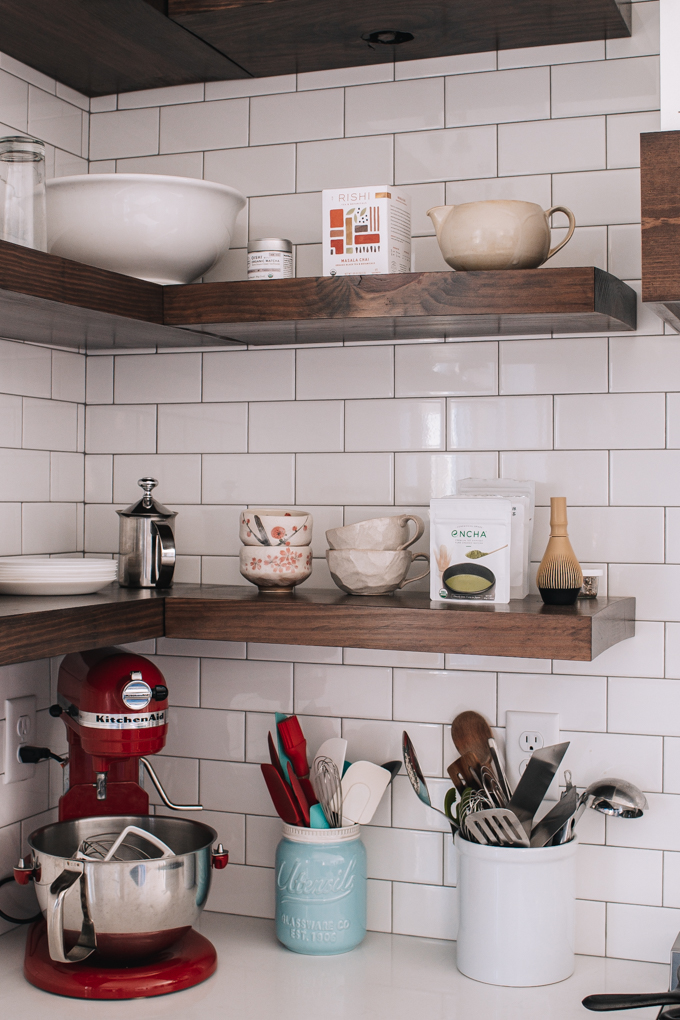
To the left of the stove, I store my KitchenAid stand mixer and my cooking utensils.
Eventually I’m going to store my stand mixer in the pantry once we get that finished…
I tried to pair down my utensils to just my most used ones. It keeps my counter from being too cluttered!
I set up a little matcha/tea station on the shelves above with my milk frother, some mugs, some of my matcha powder collection, and my matcha whisk.
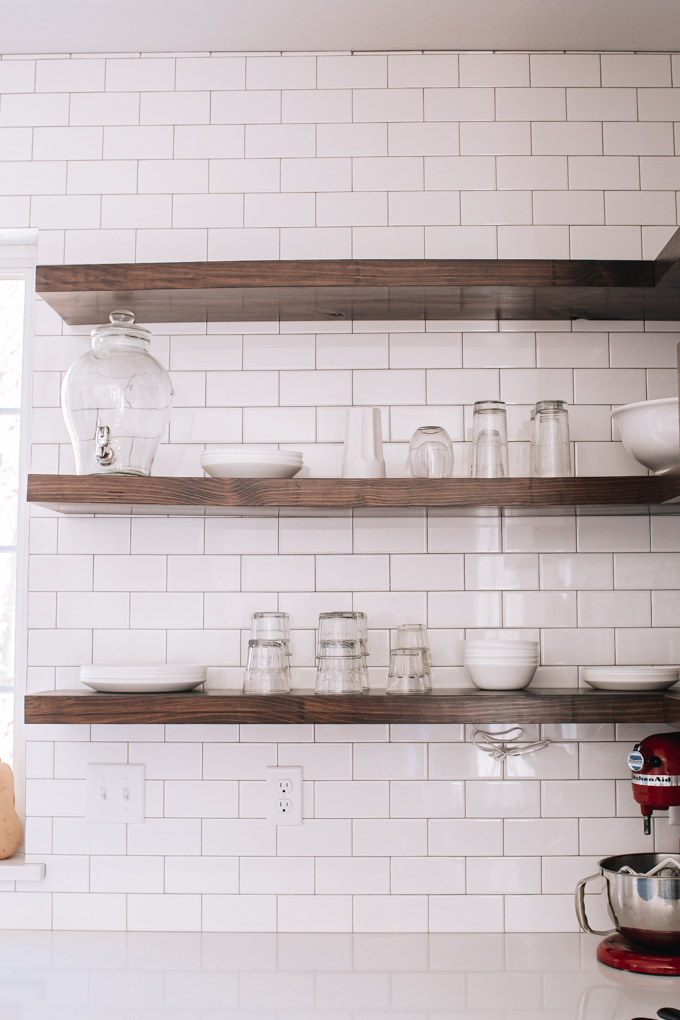
To the left of that I store all of our daily use dishes.
I got our water glasses on World Market (I believe I used a gift card that they sent me), and our plates and bowls are from IKEA.
I think these are some of the same glasses we have?
Above that I have some overflow dishes and a water dispenser.
The Main Kitchen Sink
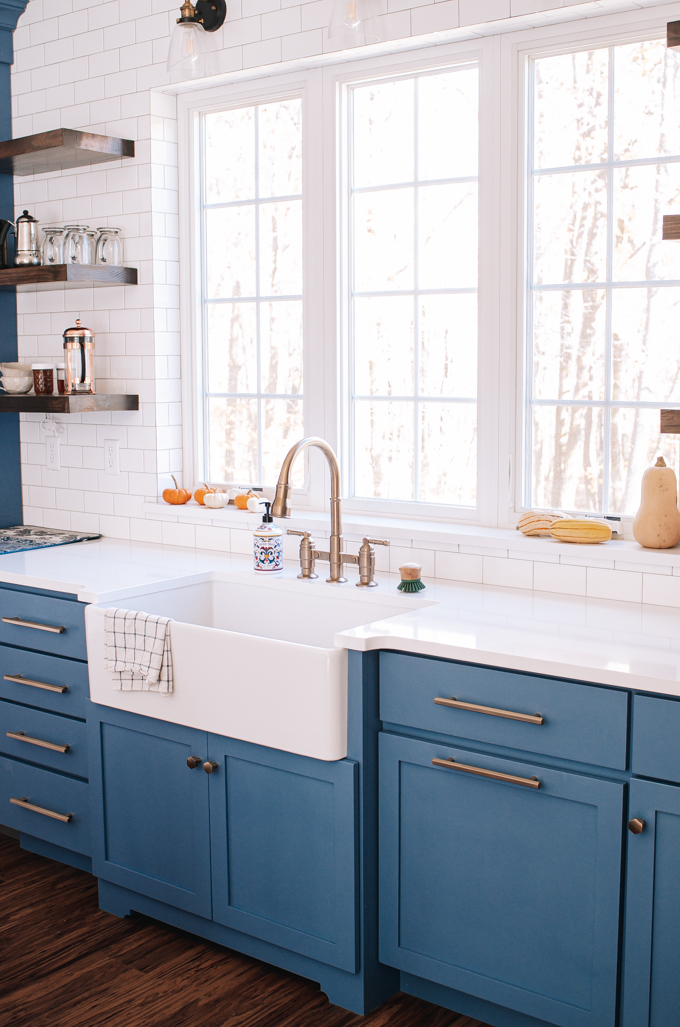
Okay, let’s move over to the main kitchen sink!
We went with a fireclay apron front (AKA farmhouse) sink.
I debated about going for stainless steel instead of fireclay because it’s obviously more durable.
But in the end I decided that a stainless steel sink would probably look better on the inside, but worse on the outside. With kids, stainless steel + fingerprints is a nightmare situation.
We got a Houzer 33″ x 20″ fireclay sink. I went with this one partly because it’s deeper than a lot of other fireclay sinks.
The only downside to this sink that I’ve found so far is that it has a Houzer logo on the inside right side of the sink.
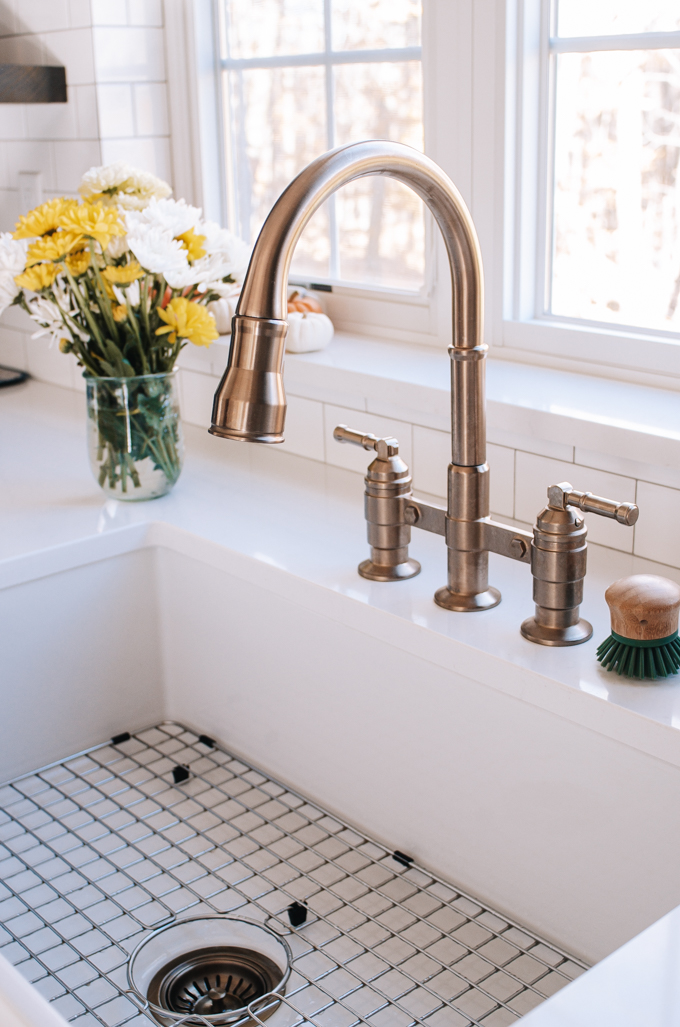
For the main faucet, we went with the Delta Broderick two handle pull-down bridge kitchen faucet.
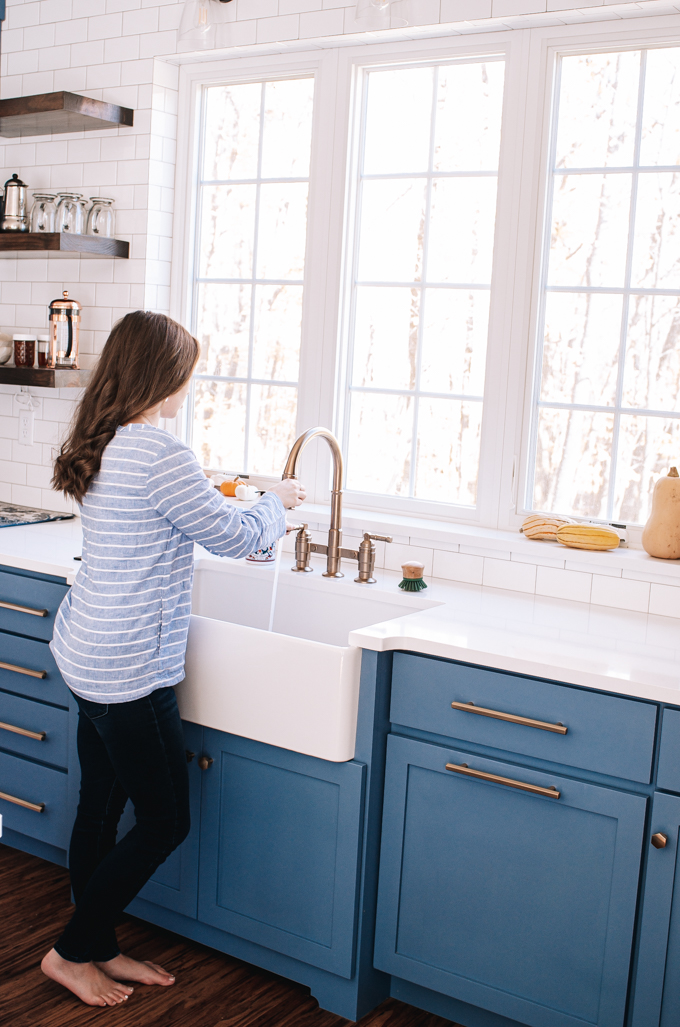
I love love love this faucet.
The spray shield function is SO nice. I use it all the time.
Watch the video for the embarrassing story about how I discovered this function. ?
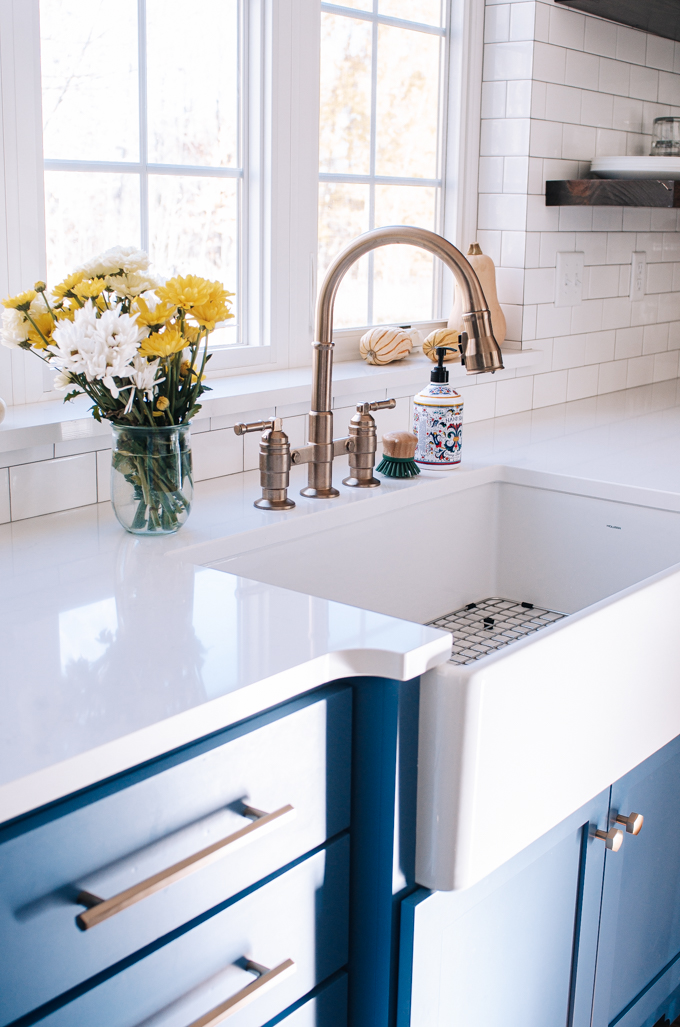
From this angle you can see the label on the inside of the sink.
No bigs, just wanted to note it.
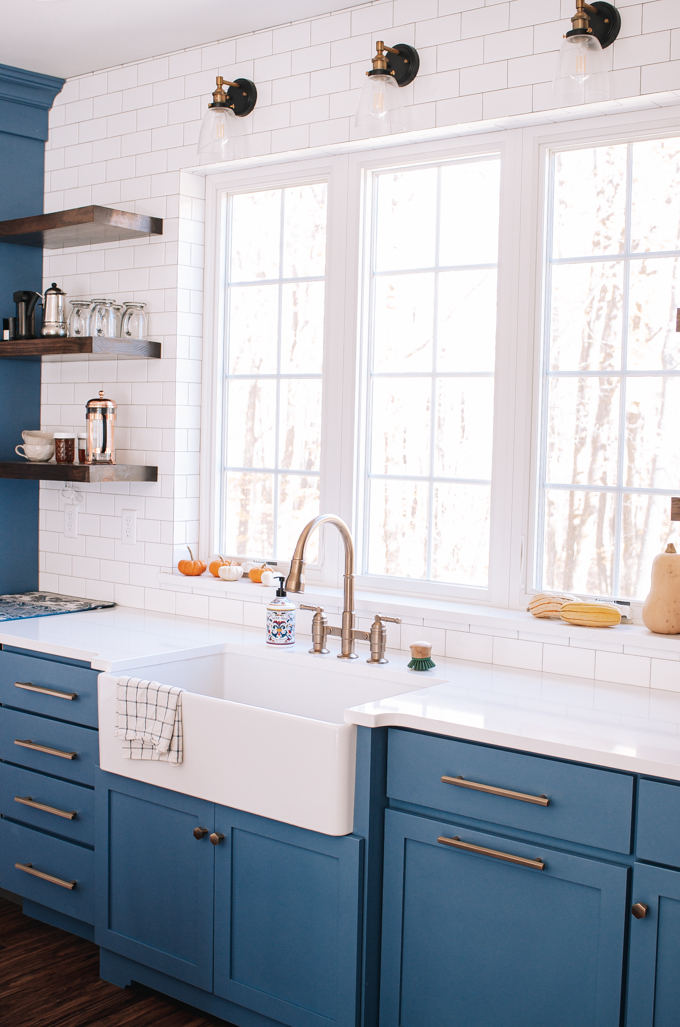
The lights above the kitchen sink are actually one of my kitchen regrets.
They’re definitely not horrible, but I probably wouldn’t choose them again.
The glass around the lights just looks kind of like plastic to me. And the gold is a liiiiitle bit too warm for my tastes.
I won’t be switching them out anytime soon, though!
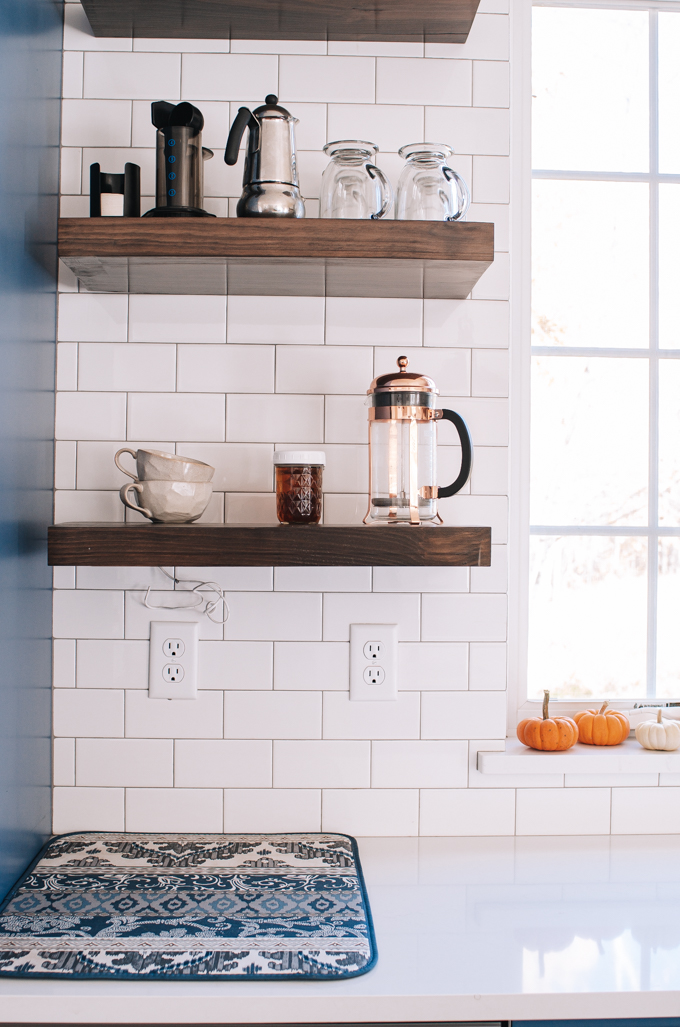
Next to the sink I have my dish drying mat. I may get a drying rack eventually, but for now this totally works!
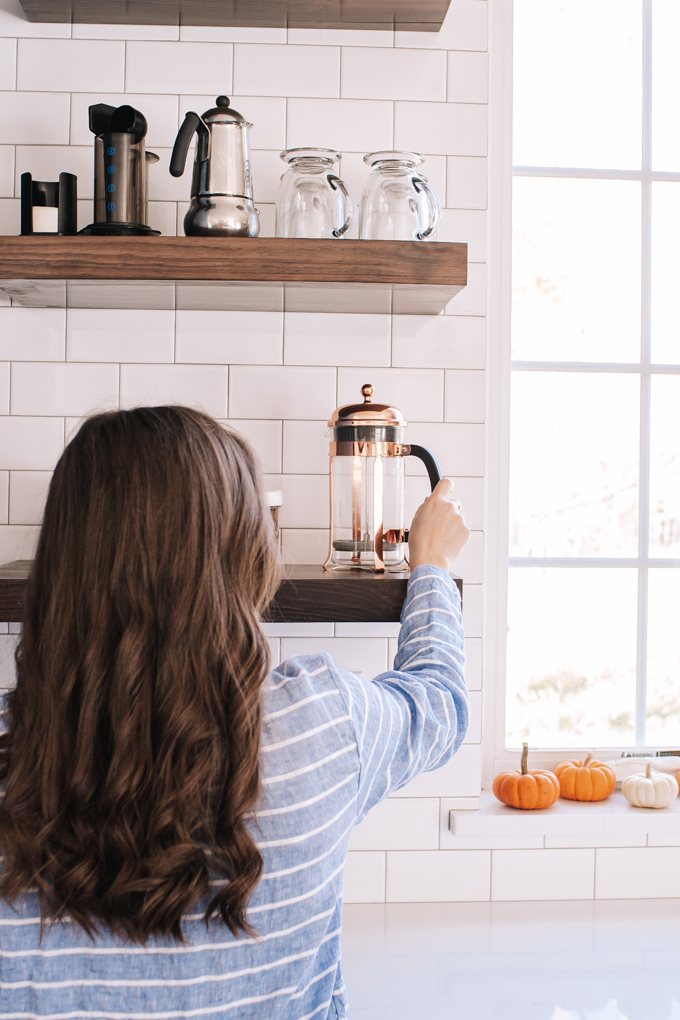
On the open shelving above I have a coffee station with mugs, homemade vanilla syrup, a copper French press, my Aeropress, a Bialetti espresso maker (similar), and some more mugs.
The Pantry
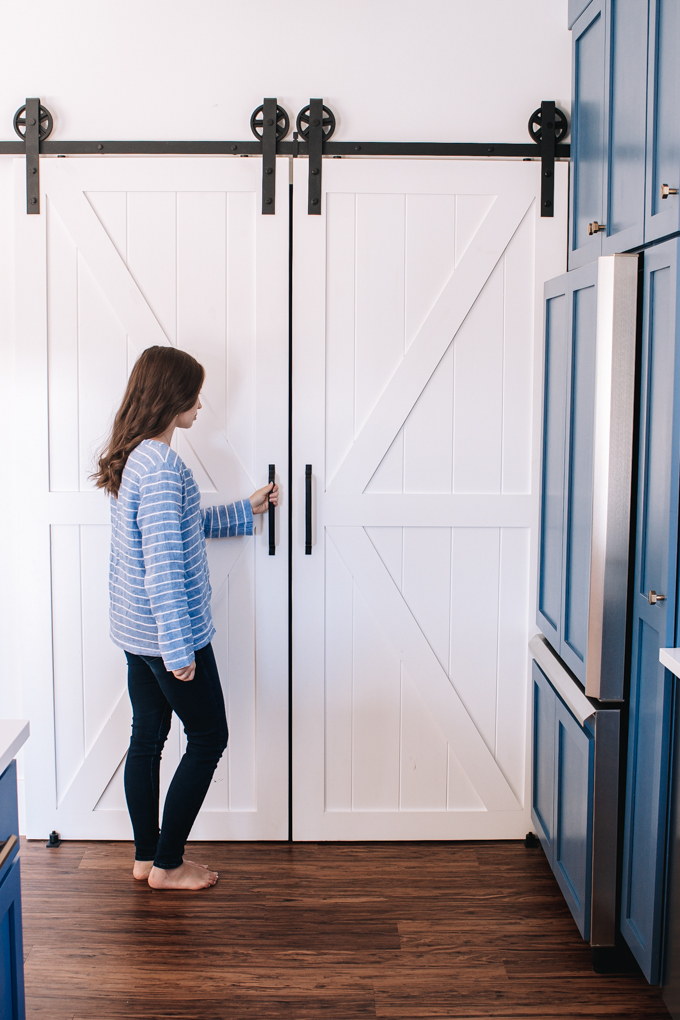
Next to the fridge is our pantry.
We decided to go for sliding barn doors.
I love them, except the fridge door hits the handle on one of the barn doors. We didn’t think about that!
We’ll probably switch out the handles for inset ones eventually to solve this problem.
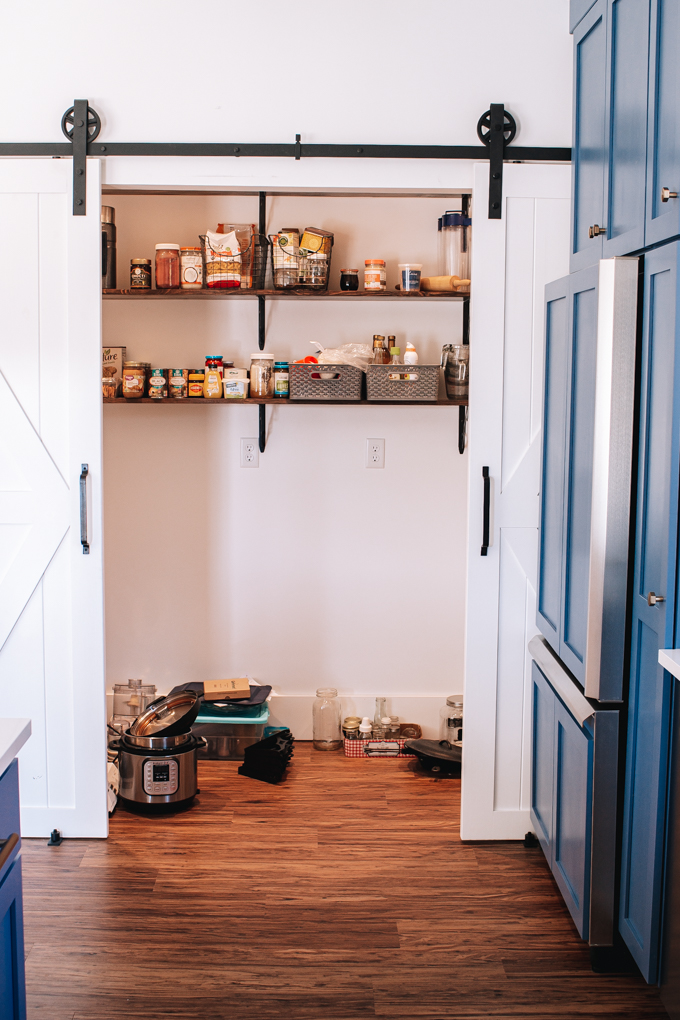
I’m not going to give you a full tour of our pantry just yet because…it definitely isn’t finished. We do have the upper shelves installed, but no cabinets down below.
We’re going to put in countertops on the lowers so I can store most of my small appliances in the pantry.
It will be kind of like a prep station in there.
What’s Inside My Transitional Cabinets
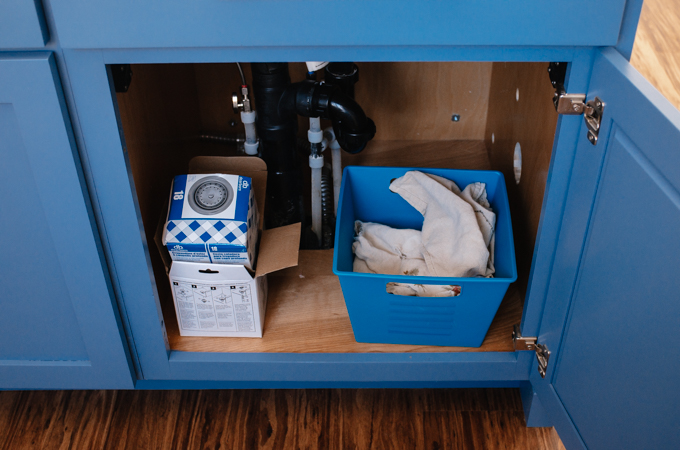
Okay, let me give you a quick tour of what’s inside my cabinets!
For a more in-depth look, make sure to watch the video!
Below the island sink I have some floor rags and the drain that’s supposed to go in the island sink.
By the way, I highly recommend upgrading to a high quality sink drain. We got the Delta flange and strainer in champagne bronze, and I love it.
Above this cabinet is a faux drawer where I keep some extra stainless steel scrubbers and such.
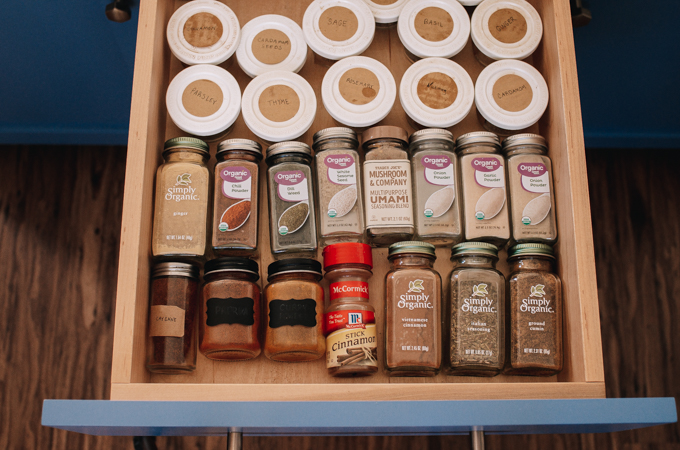
In the drawer next to that I keep my most often used spices.
The little containers at the top are Weck mini mold jars. I got the plastic storage lids for them.
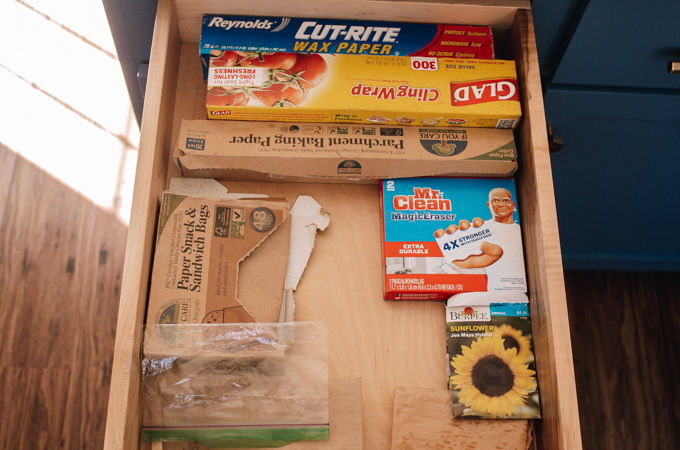
And next to that is kind of a random drawer with wax paper, cling wrap, parchment paper, paper bags, a magic eraser, flower seeds, etc.
I usually have some aluminum foil in there as well, but Reuben had confiscated it for a school project the day I took the photos for this post.
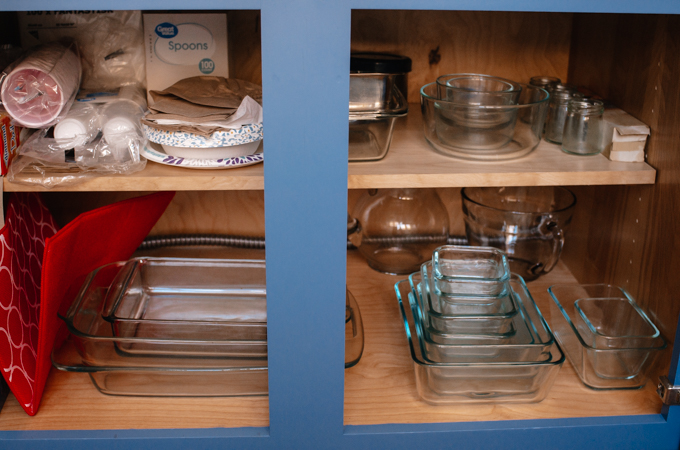
Under those drawers I keep my disposable plates/cups/bowls/utensils, some glass baking pans, glass storage containers, a large measuring cup, and a glass water pitcher.
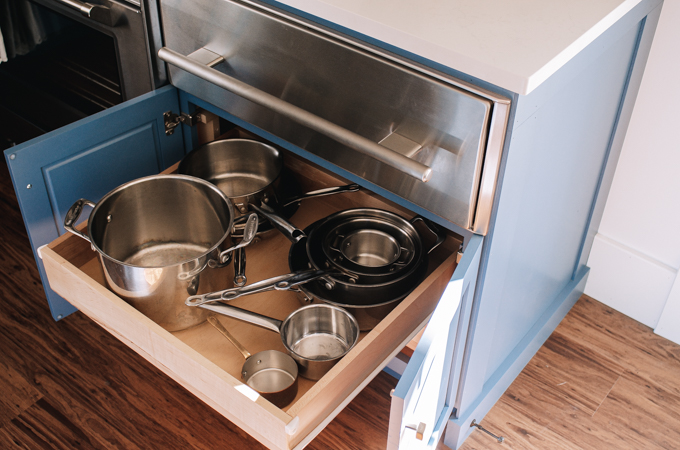
Under the warming drawer I keep my stainless steel pots. I’m so happy that I’m able to fit them all in here!
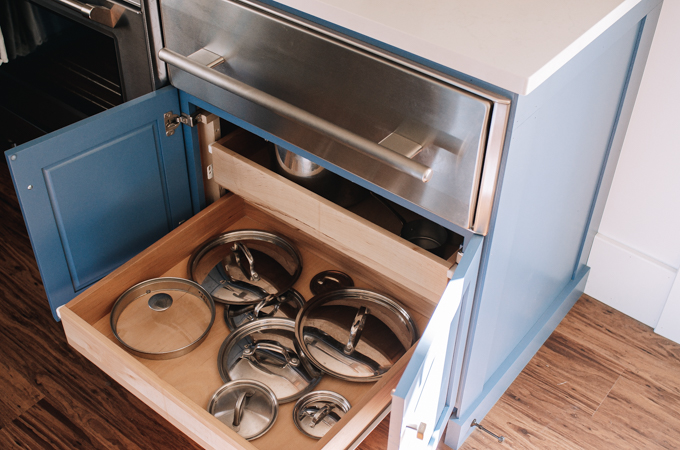
And under that I have the lids to my stainless steel pots.
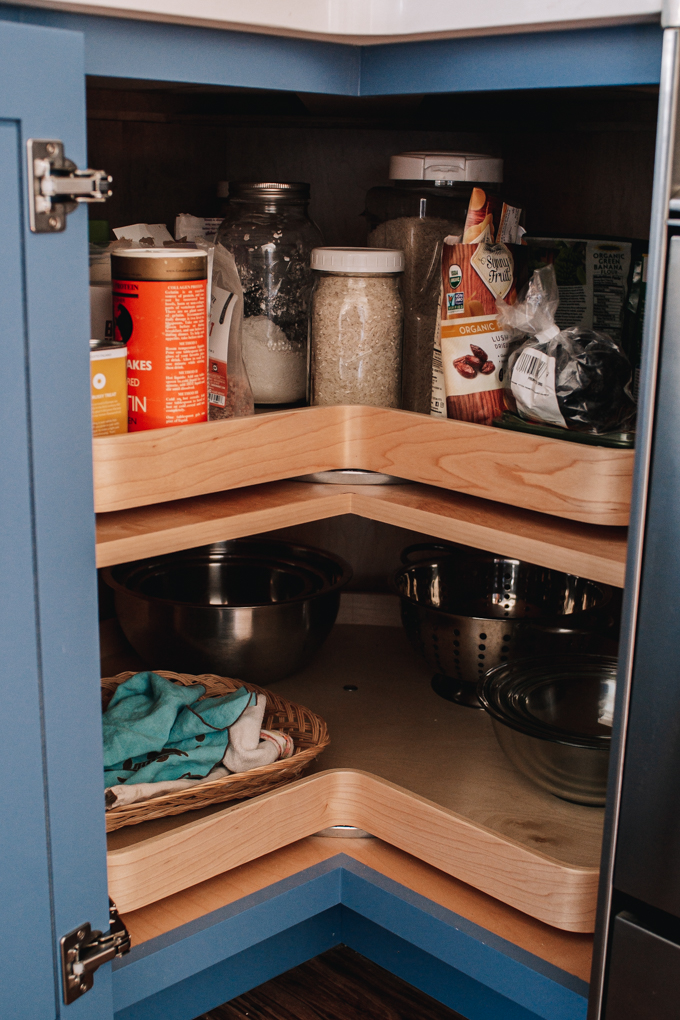
To the left of the stove I have my corner cabinets. We had to purchase this cabinet separate from the ones we got on Craigslist.
I really wanted built in lazy susans for this cabinet, and I’m so glad I went for it.
This space is so much more usable when you can easily access every part of it!
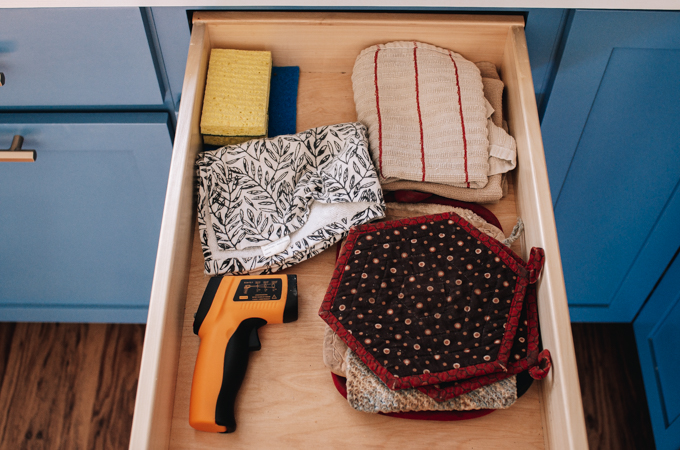
In the drawer to the left of that I keep some dish towels, hot pads, extra sponges/scrubbers, and my infrared thermometer.
I keep the thermometer here because I want it at the ready for making matcha.
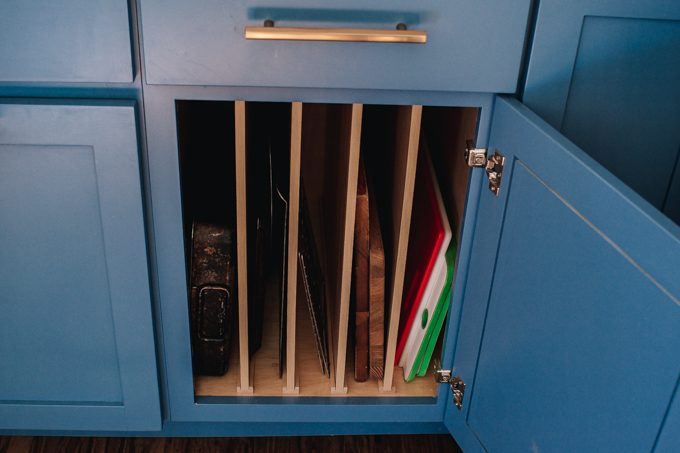
Under that drawer I keep my baking sheets, cooling racks, and cutting boards.
This was another cabinet that we had to add in, and I had them install these dividers.
I LOVE how the dividers keep things organized. I highly recommend having those put into your cabinets!
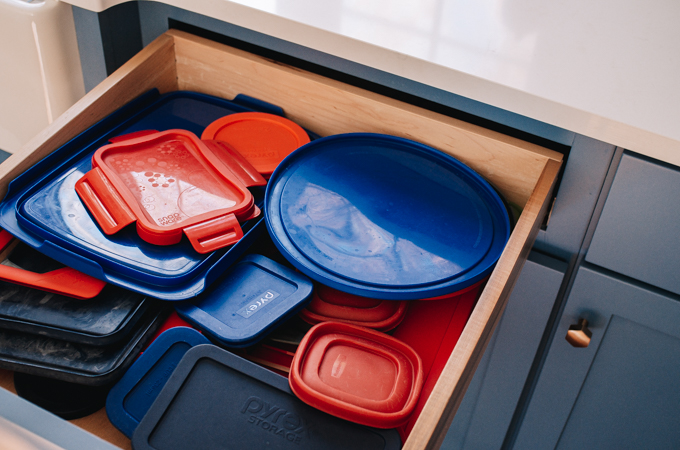
In the drawer next to that I keep the lids to my storage containers.
Yeah, it’s a jumbled mess.
I don’t know how to combat that.
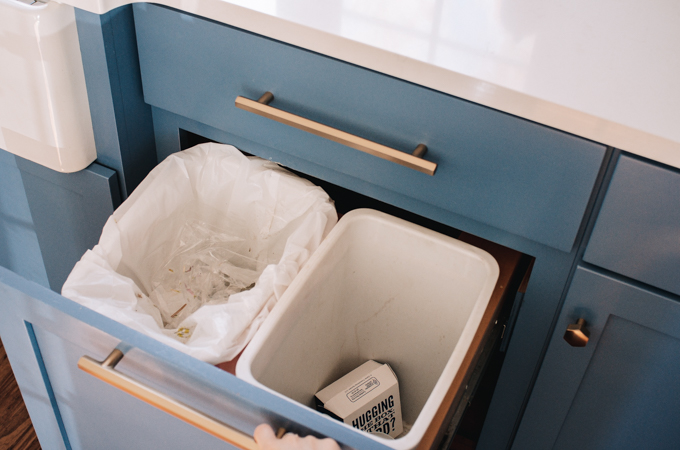
Below that drawer is our pull out trash can and recycle container drawer.
This feature came with the Craigslist kitchen, and I adore it.
Ten out of ten, would recommend.
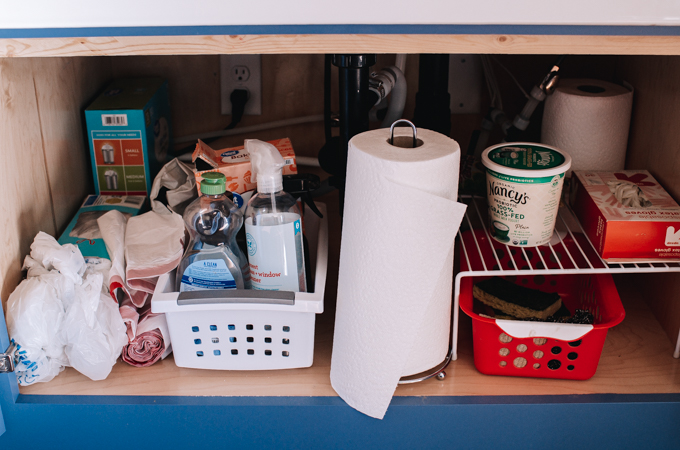
Under the kitchen sink is kind of a mess.
I’ll figure out a way to keep it more organized eventually. But for now I’m not wanting to pull my hair out every time I open it. ?♀️
BTW, that yogurt container is my grease can. I don’t store my yogurt under my sink. ?
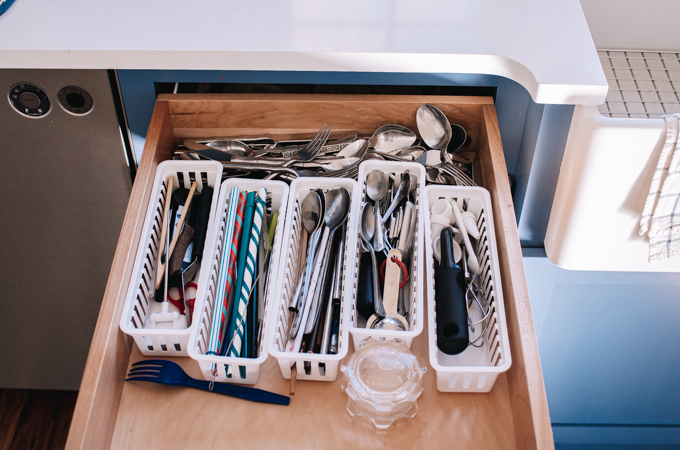
The cabinet to the left of the farmhouse sink is full drawers. ?
In the top drawer I keep my silverware, a few random tools, reusable straws, chopsticks and Korean spoons, baby silverware, and some measuring spoons.
You can also see my garlic twist there.
This drawer is kind of a mess. Eventually Reuben’s going to build me some custom drawer dividers.
But for now, I just throw all the silverware in a jumble. It actually makes unloading the dishwasher easier. ?♀️
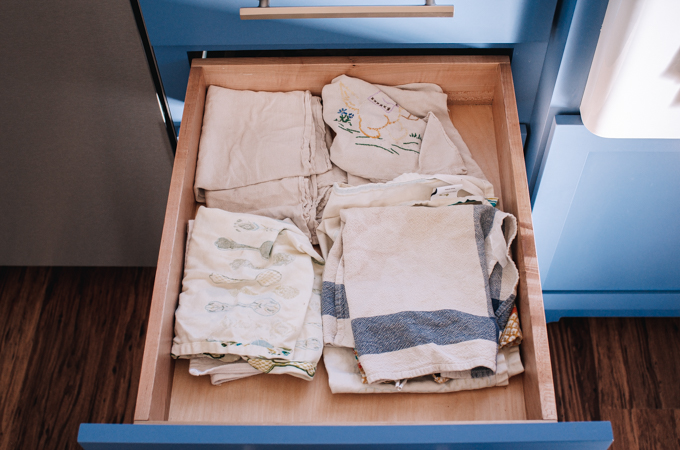
In the second drawer down I keep some extra tea towels.
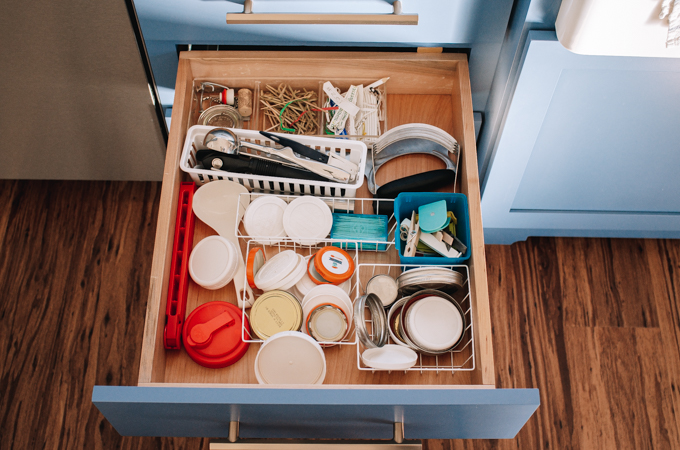
The next drawer down is the junk drawer. ?
I’ve got some jar lids, bag clips, a few random tools, twist ties, etc.
I’d like some built in organization in this drawer eventually as well.
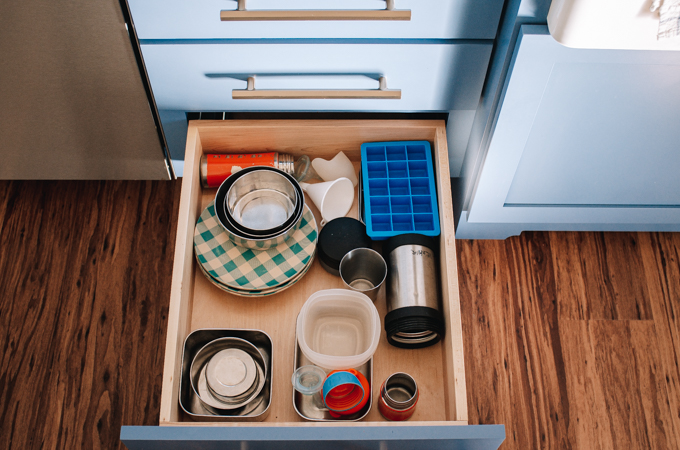
The bottom drawer is Anya’s drawer.
Since I only keep non-breakable items here, it’s safe for her to play with this stuff.
It rarely looks even this organized since she has free range to rummage about in it.
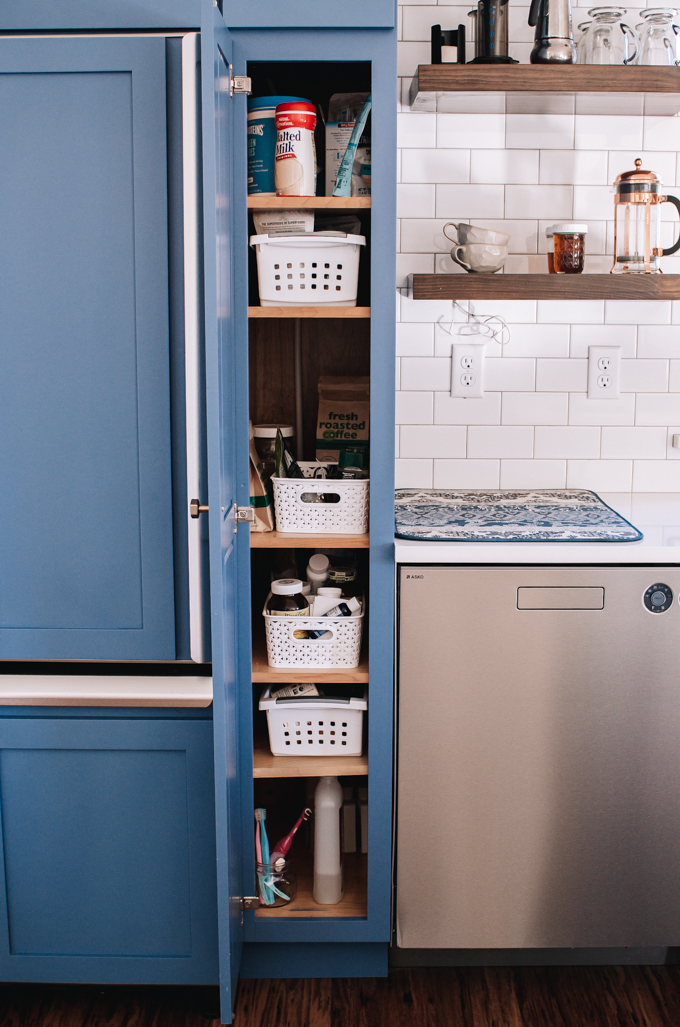
We didn’t think the skinny cabinet next to the fridge would be very useful. But I can actually fit quite a bit of stuff in there!
On the bottom shelf I store the kids’ toothbrushes and some dishwasher detergent and rinse aid.
Above that I keep my chocolate bars and some cocoa powder.
Next up I have my supplements shelf. I have another basket behind the one you see there with extra supplements.
On the shelf above that I have some coffee, tea making supplies, and extra mugs.
Above that I have some superfoods such as mushroom powders.
And on the top shelf I have some dishwasher pods, malted milk powder, and collagen peptides.
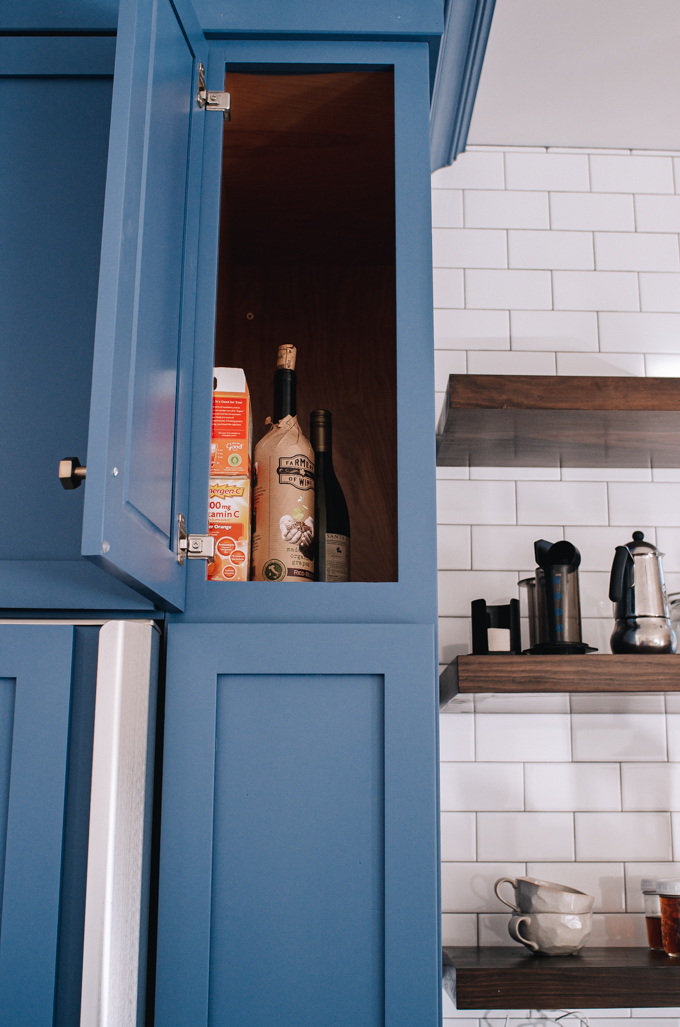
And in the cupboard above that I keep some cooking wine and Reuben’s Emergen-C.
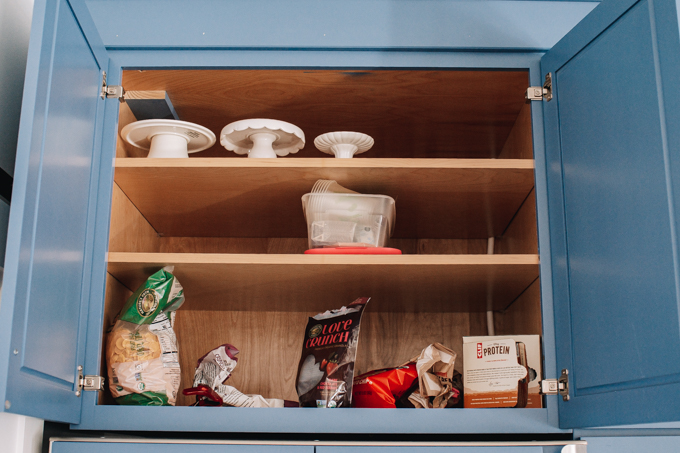
In the cupboard above the fridge I keep our snacks, cereal, some baking supplies, and cake stands.
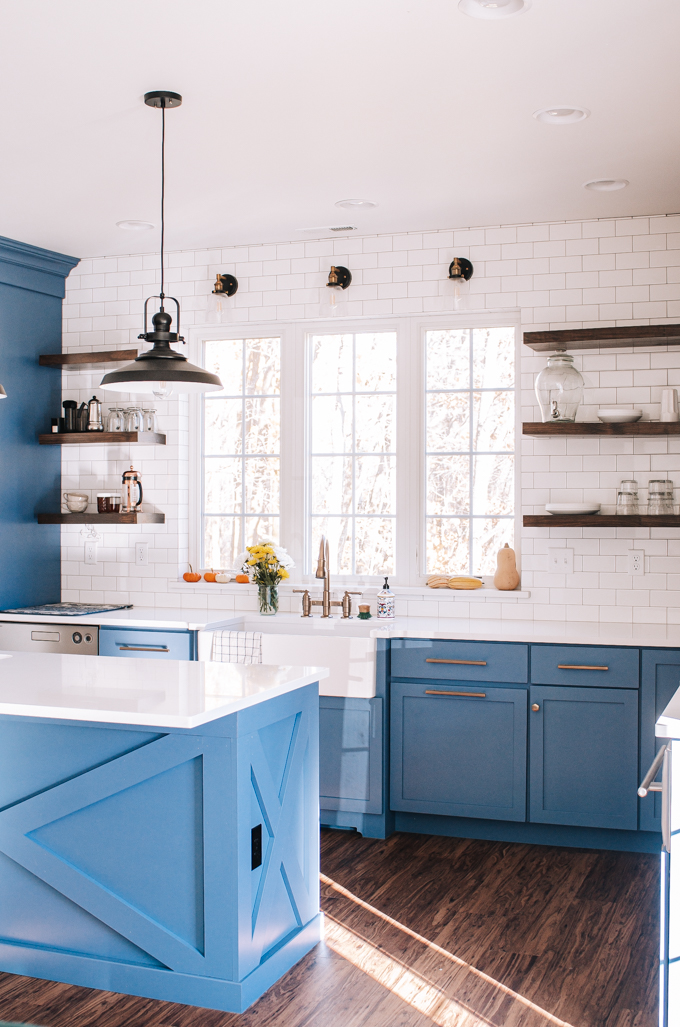
So there you have it: a tour of my transitional industrial farmhouse kitchen!
I hope you enjoyed looking through my kitchen cupboards. ?
xoxo
Erica

Shannon Childs
Friday 30th of April 2021
Hello! I was wondering if you could tell me what size windows you have above your kitchen sink?
Thanks!
Shannon
Erica Kastner
Friday 30th of April 2021
They're approximately 6 feet by 4 1/2 feet total. Were you wondering what the individual window sizes are?
Erica
Sunday 15th of November 2020
Your kitchen looks beautiful! I love the blue. Two questions: 1. What brand is your salt and pepper mills and do you like them? I have been wanting to buy some new ones but whenever I read reviews they are always mixed. 2. Does having your trash uncovered in the cabinet smell more? I have always wondered when I see open trash cans.
Erica Kastner
Monday 16th of November 2020
Thank you! The salt and pepper mills were a gift for a wedding (over 9 years ago!). I believe they were from Target? I do like them - haven't had any issues with them so far! I don't think you can really adjust how fine the grind is, though.
The trash doesn't really smell bad to me! If we put something really stinky in there, it can be worse. But I would definitely do it again. Maybe it's because the trash cans aren't huge, so we have to take the trash out regularly? Haha!
What I Ate Wednesday (10-28-2020) - Buttered Side Up
Wednesday 4th of November 2020
[…] If he leaves before the kids and I eat breakfast, he puts it in the warming drawer. […]
Cait
Monday 19th of October 2020
Wow! It was fun to get such a detailed look. I'm a bit jealous of all the space (but I know you waited a long time for this kitchen)! And I'm impressed how uncluttered the shelves are. Sometimes when I add storage that I felt like I desperately needed it's actually tricky to figure out how to use it most efficiently, especially when I also want it to look nice. Sometimes with the less-used things on open shelving, I try to stick them in the dishwasher whenever there's spare room. It doesn't happen too often, but if it's a day I didn't cook much or something, it helps me keep things from getting ridiculously dusty and also not feel crazy for running a half-full dishwasher - because mornings don't go well if I didn't run it anyway! The kitchen is gorgeous and I'm so happy for you.
Erica Kastner
Tuesday 20th of October 2020
Thank you! Yes, it's kinda tricky to figure out where everything should go. That's one good thing about living in a space a little while before adding the finishing touches - you can get a feel for where things should go before you make permanent decisions!
That's an awesome idea to run items that collect dust in the dishwasher! I'll have to try to implement that!